
Welcome to Part 2 of our blog series on building a comprehensive card management dashboard using Stripe’s Issuing API and Retool.
In Part 1, we laid the foundation for our dashboard by setting up the necessary API credentials, connecting Stripe's Issuing API to Retool, and implementing functionalities for retrieving card data.
Now, in Part 2 (right here!), we’ll continue our journey by focusing on two new user stories that involve POST requests. These user stories will empower administrators to perform crucial actions on cards.
- Admin can block/unblock/cancel a card: Provide admin the ability to block, unblock, and cancel cards as needed.
- Admin can issue new cards: Create and issue new cards to meet the needs of the business.
Here’s the JSON export for the final application—feel free to import it to your own Retool instance to try it out. However, you’ll still need to set up your own Stripe API Resource as described below.
Let’s get started.
User story 1: Block/Unblock/Cancel a card
It’s an unfortunate reality that cards can sometimes be lost or stolen. When that (all but inevitably) happens, you’ll need to block the card immediately to prevent misuse. Conversely, if a previously lost card is found, you'll want to unblock it. This feature makes it possible to perform these actions swiftly and securely.
Enable/Disable/Cancel card
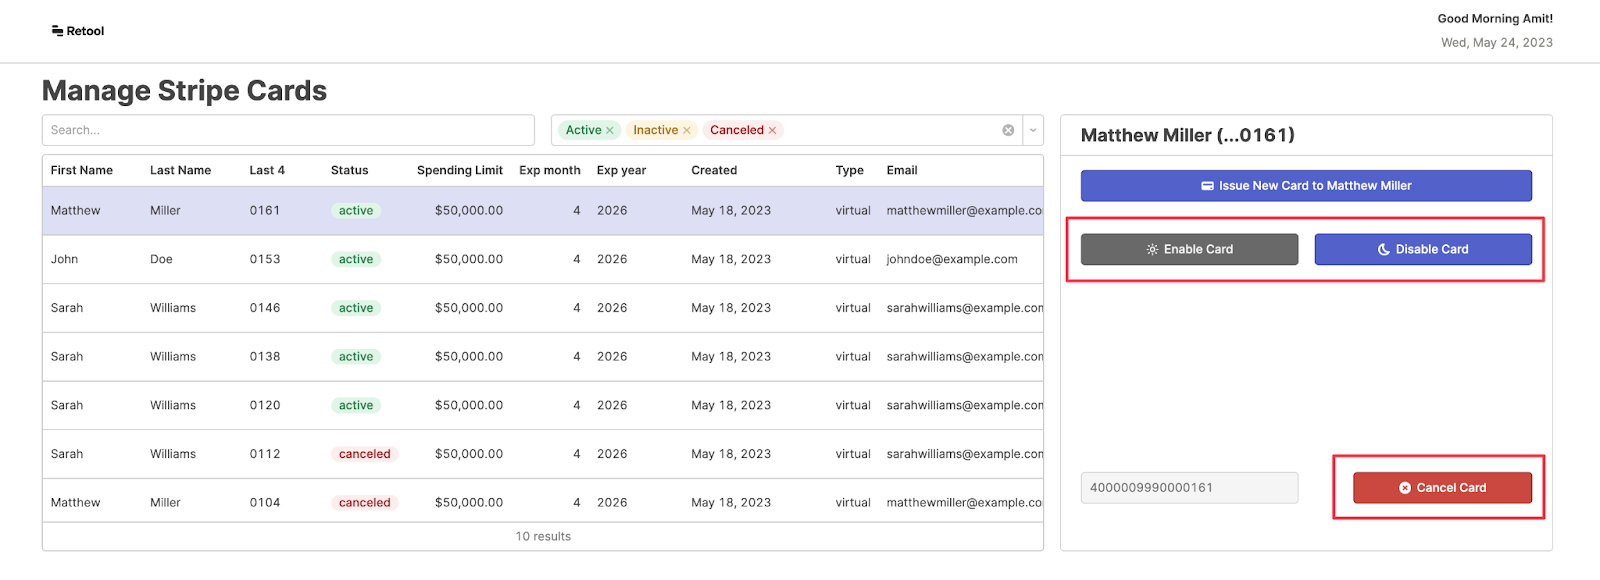
To enable the admin to perform enable/disable/cancel actions on the cards, we’ll add dedicated buttons next to the table. By clicking on a card in the table and using the buttons on the right, the admin can execute these functions for the selected card.
Let’s start by creating the queries needed for these functionalities:
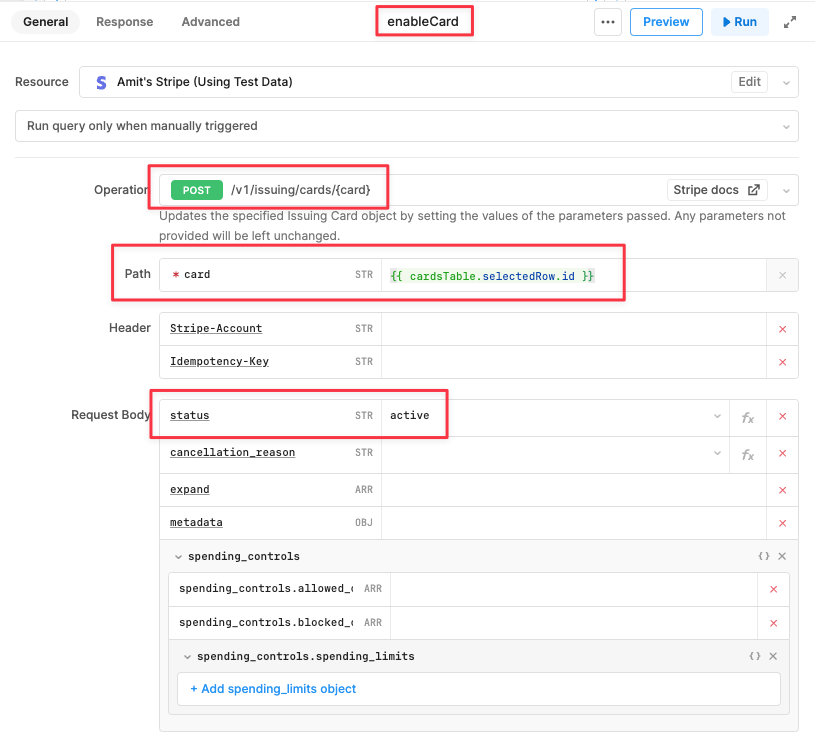
enableCard:
- Create a new resource query and select the /v1/issuing/cards/{card} endpoint.
- Update the card parameter in the URL path to {{ cardsTable.selectedRow.id }}
- In the request body, set the "status" field to "active".
- Add getAllCards to success to refresh the table automatically.
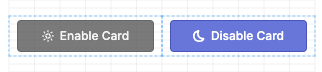
- Drag a Button component to the canvas, and update the text to “Enable Card”. We’ll also add a prefix icon to enhance the user experience.
- Create a new event handler, and set it to enableCard query we just created. This event handler will serve as the trigger for enableCard query.
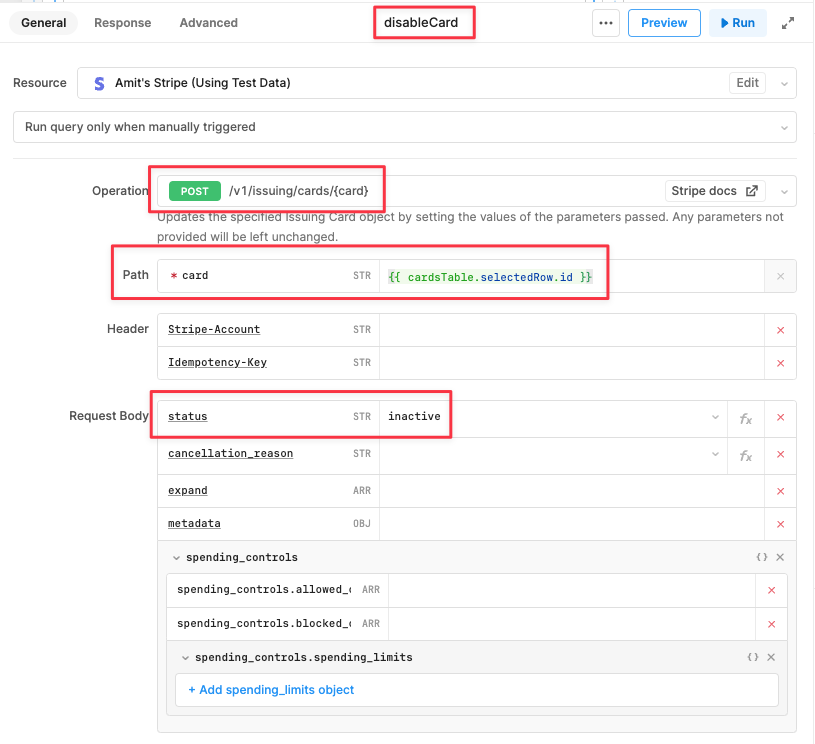
disableCard:
- Duplicate the enableCard query and make a new copy.
- Update the duplicated query’s name to "disableCard" and the "status" field in the request body to "inactive".
- Drag a Button component to the canvas, and update the text to “Disable Card”. We’ll also add a prefix icon to enhance the user experience.
- Create a new event handler, and set it to disableCard query we just created. This event handler will serve as the trigger for disableCard query.
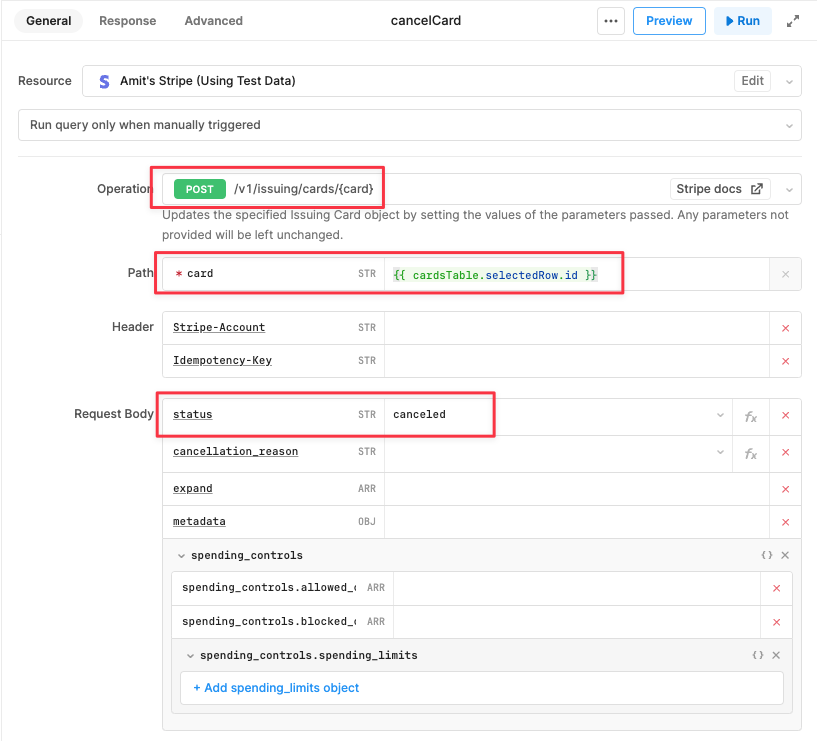
cancelCard:
- Duplicate the enableCard query once again and create a new copy.
- Update the duplicated query’s name to "cancelCard" and the "status" field in the request body to "canceled".
- Drag a Button component to the canvas, and update the text to “Cancel Card”. We’ll also add a prefix icon to enhance the user experience.
- Create a new event handler, and set it to cancelCard query we just created. This event handler will serve as the trigger for cancelCard query.
Disabling "Enable Card" and "Disable Card" buttons based on card status
To enhance the user experience, we can disable the "Enable Card" and "Disable Card" buttons based on the status of the card. If the card’s status is active, the "Enable Card" button should be grayed out. We can achieve this by utilizing the Disabled property of the button and setting it to the expression {{ cardsTable.selectedRow.status === "active" ? true : false }}
By evaluating the expression, the Disabled property will be set to true when the card’s status is "active," disabling the button. When the card’s status is not "active," the Disabled property will be set to false, enabling the button.
User story 2: Admin can issue new cards
Imagine a situation where you need to issue an additional card to an existing employee. With this feature, you can effortlessly create and issue new cards to the selected employee right from your dashboard.

Create a resource query to issue a new card
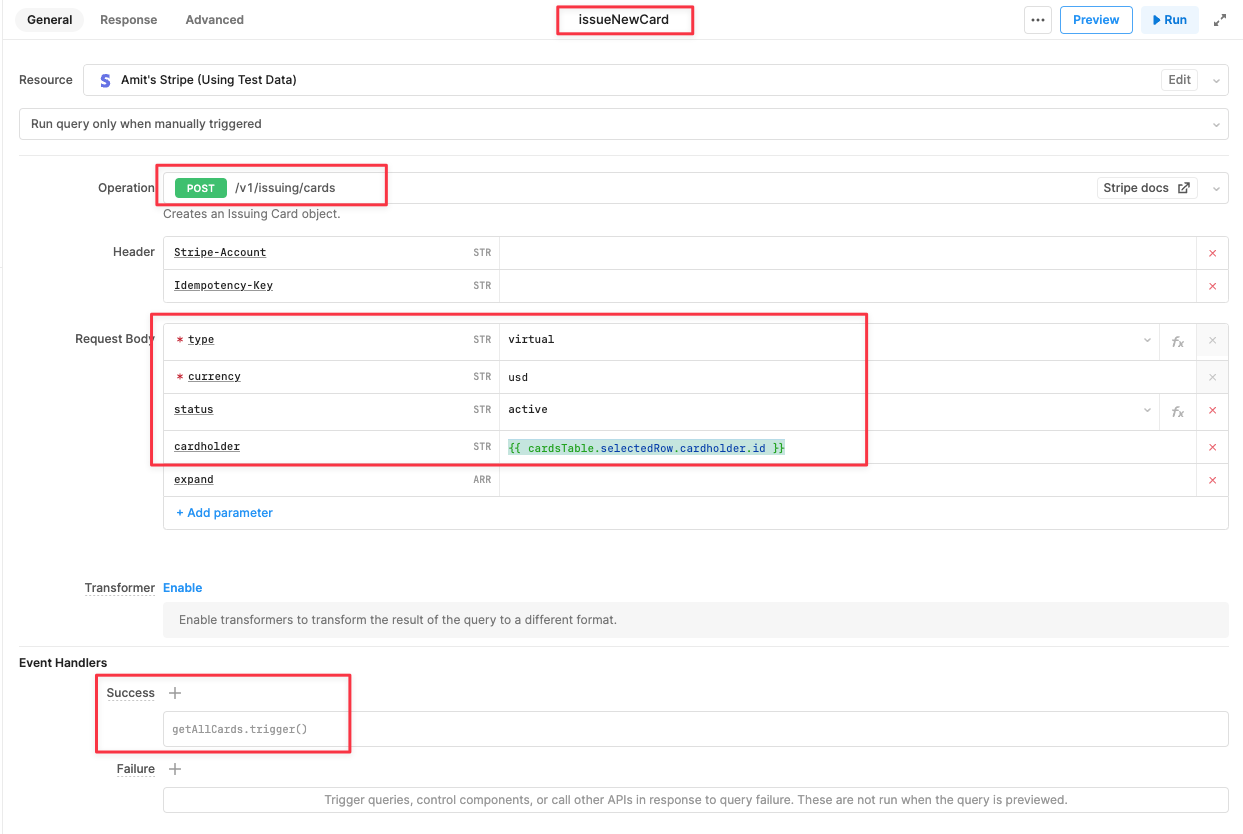
Create a new resource query named "createNewCardFromCardsView" to handle the card creation process. Choose POST /v1/issuing/cards from the Operation dropdown.
Set the following parameters to create the card:
- "type" parameter to "virtual"
- "currency" parameter to "USD"
- "status" parameter to "active"
- For the "cardholder" parameter, use the expression {{ cardsTable.selectedRow.cardholder.id }} to pass the ID of the selected cardholder to the query.
Finally, in the success section of the "createNewCardFromCardsView" query, add the "getAllCards" query. This will automatically refresh the table, ensuring the new card is included in the card inventory view.
Add the Button and the event handler
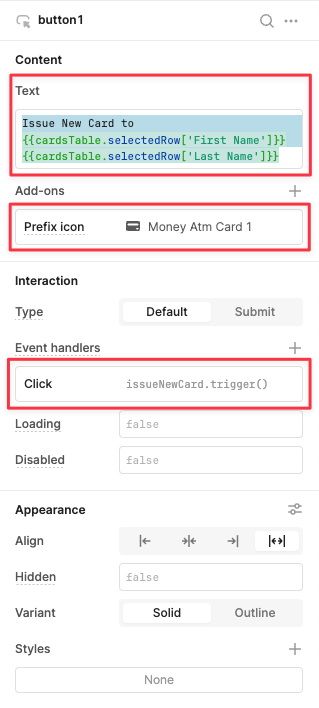
Drag a button component onto your dashboard. Update the button text to the expression "Issue New Card to {{cardsTable.selectedRow['First Name']}} {{cardsTable.selectedRow['Last Name']}}. This ensures that the button text clearly indicates who the card is being issued to. We’ll also add a prefix icon to enhance the user experience.
Finally, we’ll add an event handler for the button and connect it to the issueNewCard query we created earlier. This event handler will serve as the trigger for initiating the card creation process.
issueNewCard Resource QueryWrapping up
And that concludes our journey through the world of Stripe and card management! We hope you’ve enjoyed exploring the powerful capabilities of Stripe’s Issuing API and Retool’s app builder.
In Part 1, we focused on creating a solid foundation, setting up the Stripe API resource in Retool, and building the core functionalities to view, search, and filter cardholder data.
Here in Part 2, we went deeper into the realm of card management, enabling actions such as blocking/unblocking/canceling cards and issuing new cards, empowering administrators to handle card operations with ease.
This is just a taste of what you can achieve with Retool. You can leverage integrations with the likes of Stripe, Twilio, HubSpot, and various databases, so you’ve got the power to tailor your admin panels and dashboards to your business needs. Whether it’s adding advanced reporting features, integrating with other systems, or scaling your operations, the possibilities are virtually limitless.
I hope this walkthrough has been helpful in sparking your creativity and providing some insight into the capabilities of Stripe's API and Retool. If you have any questions or want to share your ideas, you can reach out to me on Twitter (I’m @amit), or say hello in our Discord community.
And hey, while you’re here—take a peek at some other Stripe-related tools and dashboards like the Stripe Revenue Dashboard, and templates like Stripe Refund Tool and Stripe Credits App.