
If you’ve gotten this far, you’re probably interested in working with DigitalOcean’s Spaces API. Fear not – our guide will walk through how to build a useful internal UI for working with your Spaces data – listing files, previewing images, and uploading new files too.
To get started, we’ll want to create a new resource in Retool that connects to our Spaces setup. The way we do that is through Retool’s S3 connector, but we’ll check the “Use Custom S3 Endpoint” box to let Retool know that we want to use a non-S3 service.
Head over to your Retool subdomain’s resources page, and click “create new” – then select the Amazon S3 resource from below the fold. We’ll fill in a couple of fields:
→ Name: we’ll call it “DigitalOcean Spaces” (creative, I know)
→ Base URL: this is going to be <your_data_center>.digitaloceanspaces.com. Our Spaces is in DigitalOcean’s nyc3 data center, so the URL is nyc3.digitaloceanspaces.com. If you’re not sure which data center your Space is in, you can find this URL in your Space’s settings.

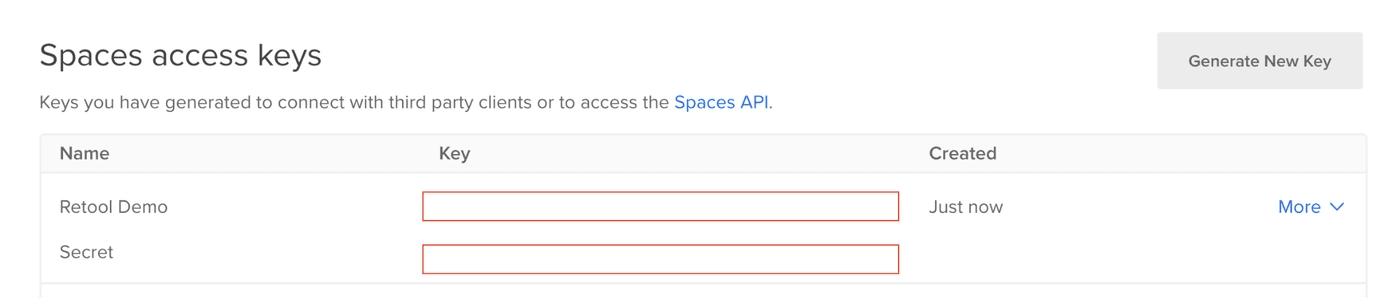
→ Access keys: follow the tutorial here to generate an API key for Spaces. For the Access key ID, put in the first value. For the Secret access Key ID, put in the secret key.
After all of this not-so-tedious credential wrangling, this is what your resource form in Retool should look like (give or take the red boxes):
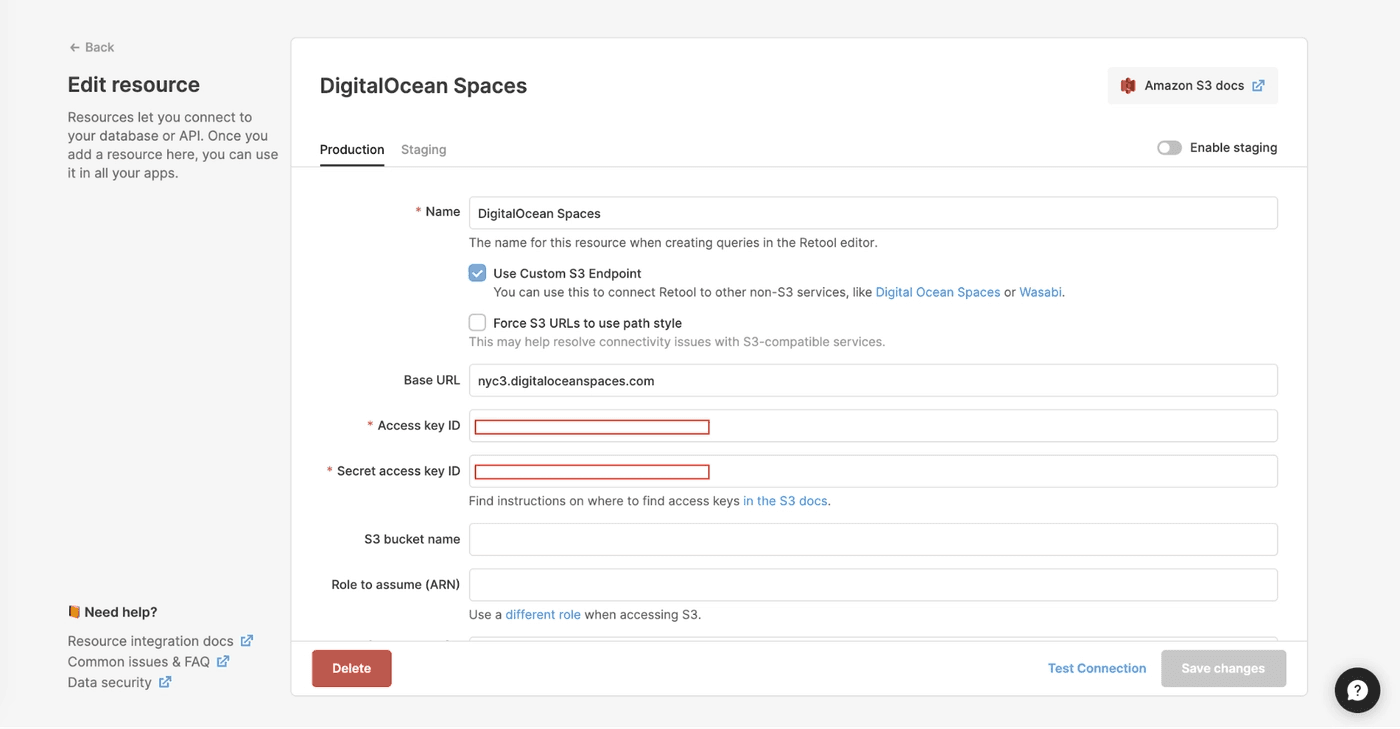
Just click “create resource” at the bottom right, and you should be ready to go.
A great place to get started is visibility into your storage: we’ll create a basic UI that lets you select a Space and list all of the files in that bucket, along with relevant metadata.
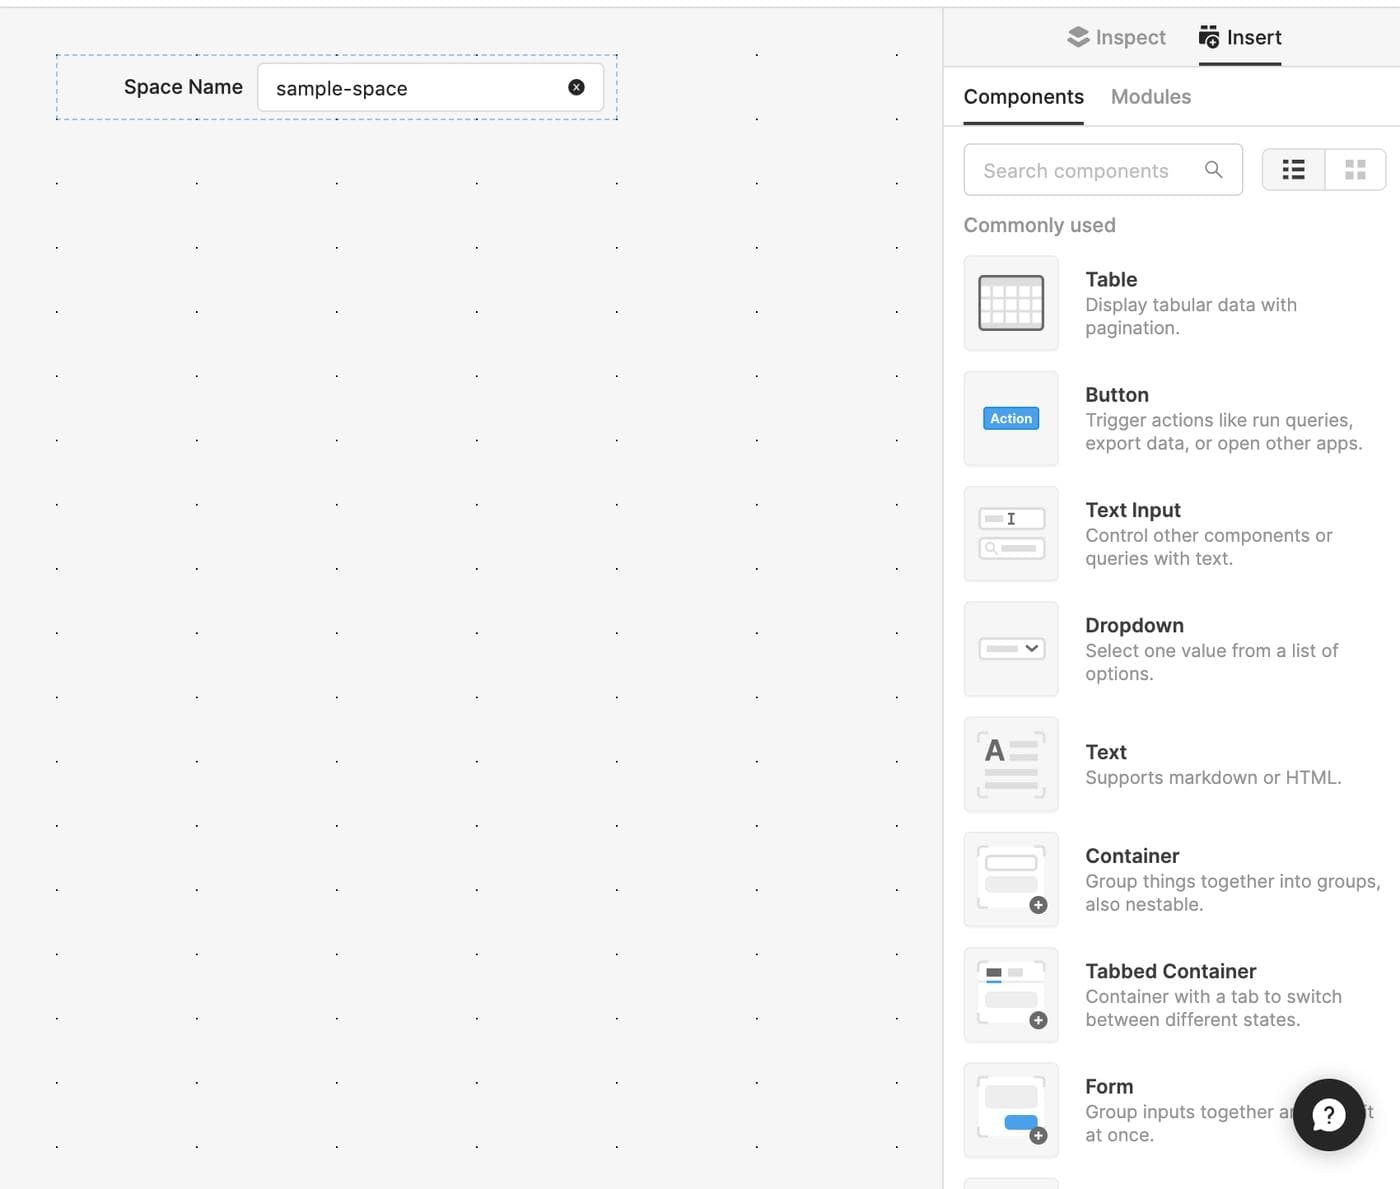
- Create a text input to enter a Space name
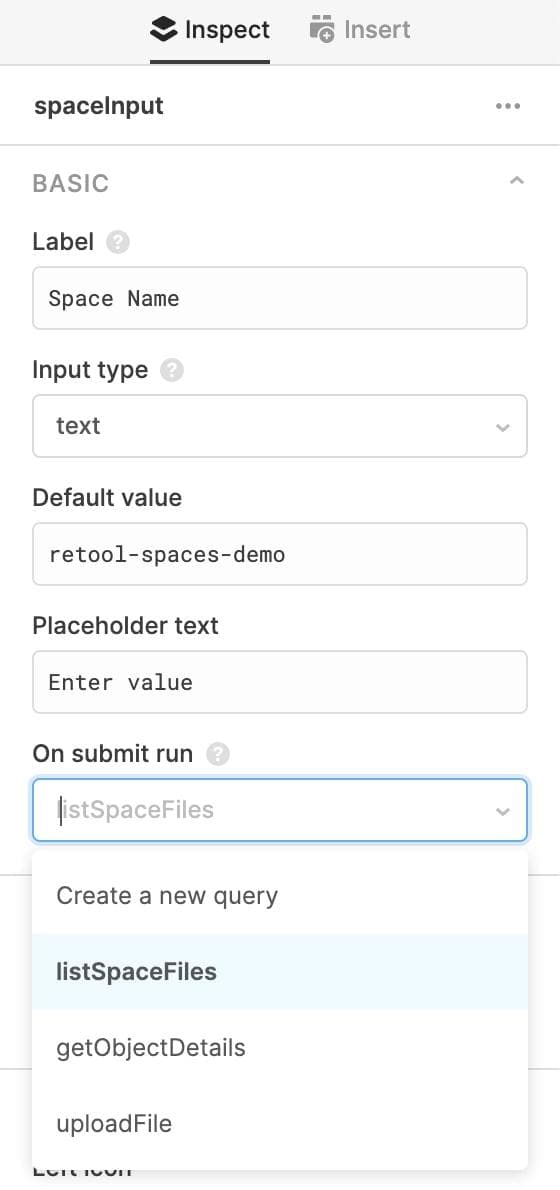
Drag a text input component onto the canvas, and for the label, put in “Space Name” for posterity. We can also rename the text input to spaceInput to make it easier to work with its properties. We’re going to reference that value of this input with spaceInput.value in just a minute.
If you only have a few buckets and want to use a dropdown instead, we can do that too by using a dropdown component:
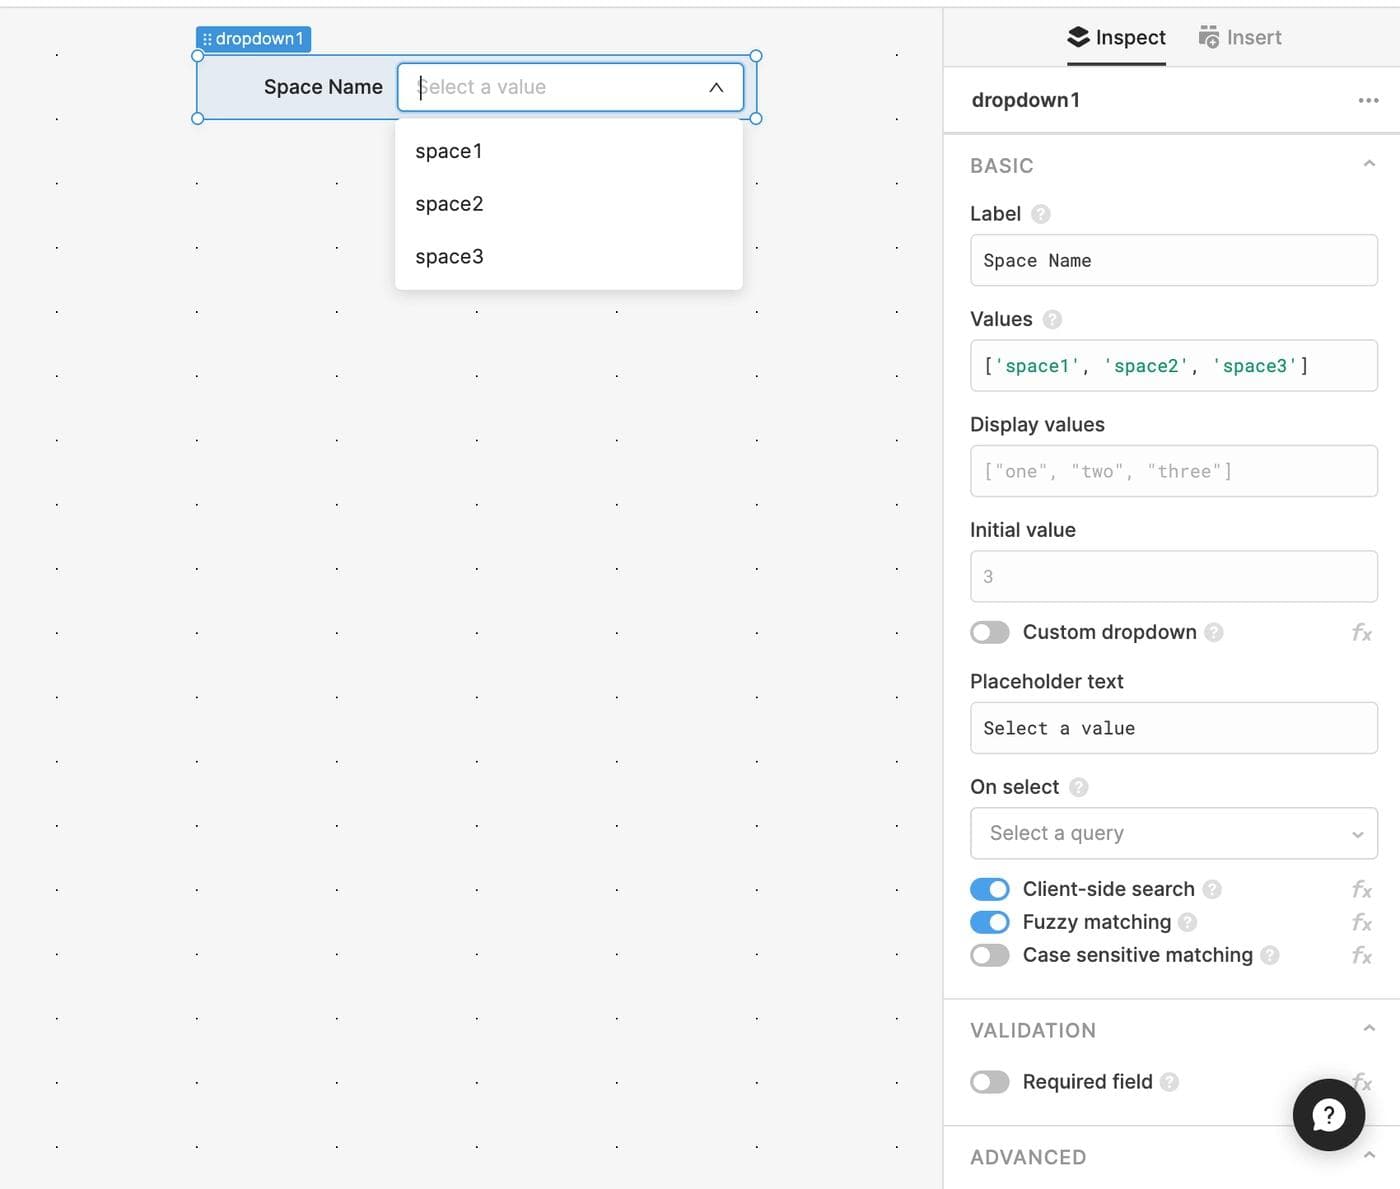
We’ll go ahead with the text input for simplicity’s sake (this is a DigitalOcean reference, thank you).
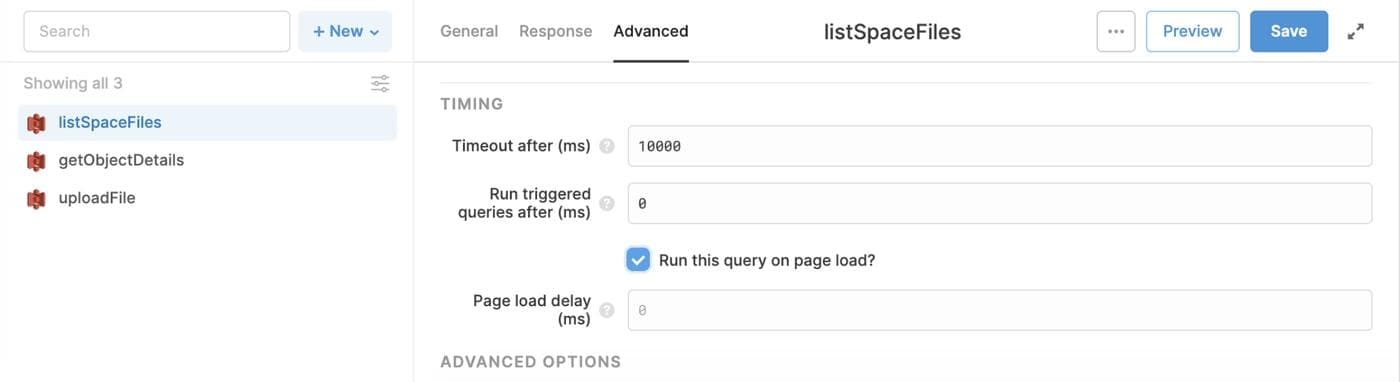
Finally, to make sure our query gets triggered at the right times, we’ll do two things:
→ Set it to run on page load
This is easy enough – just navigate to the “advanced” tab and check the box.
→ Set it to run on submit of our text input
This way, when our users hit “enter” the query will re-run and list the files in their provided Space.
Nice.
- Write a query to list files in a bucket
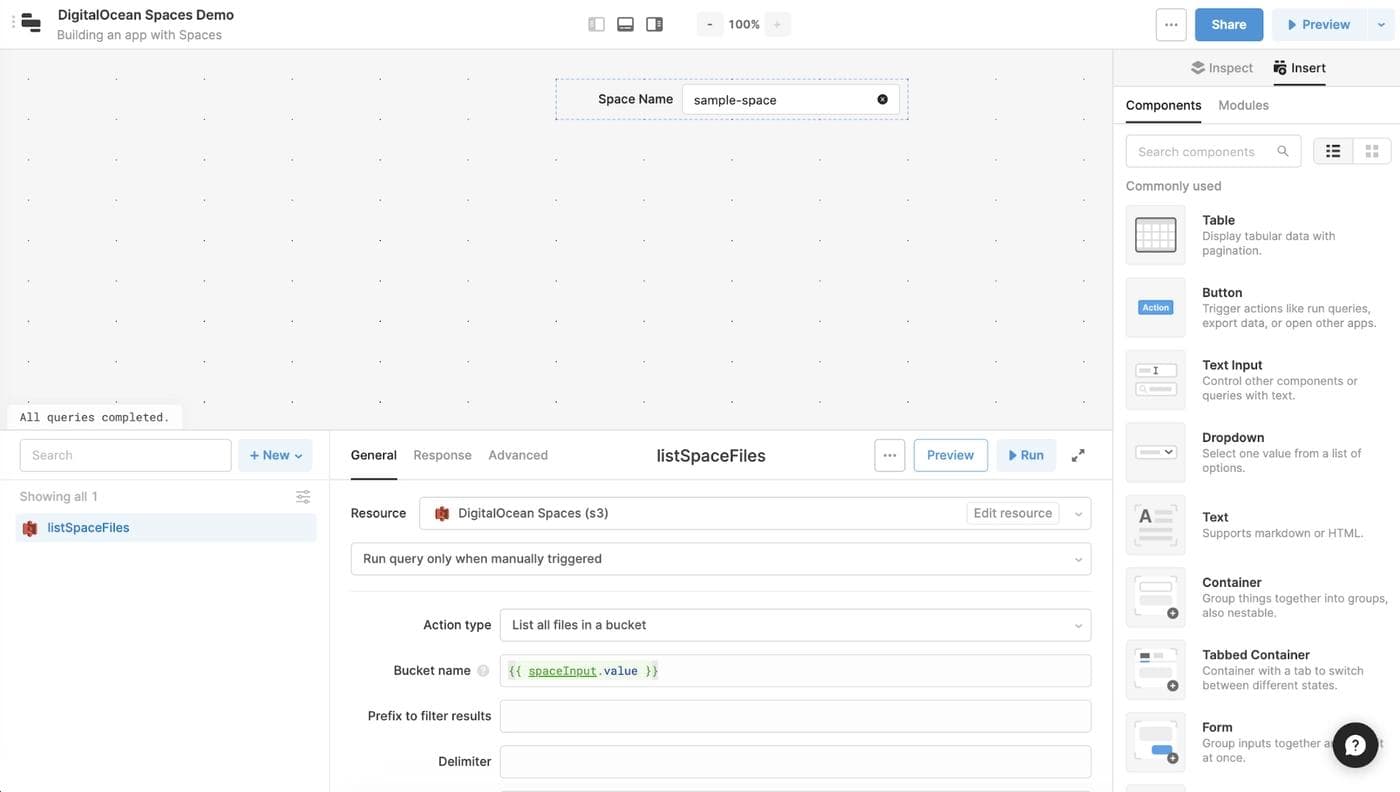
Now that we’ve got a way for our user to specify a bucket name, let’s build a query to list the files in that bucket. Start by creating a new query “+ New” and then choose our sparkly new resource from the dropdown list. We’re going to choose “List all files in a bucket” from the “Action type” dropdown, and then fill in the value of our text input for the “Bucket name” field.
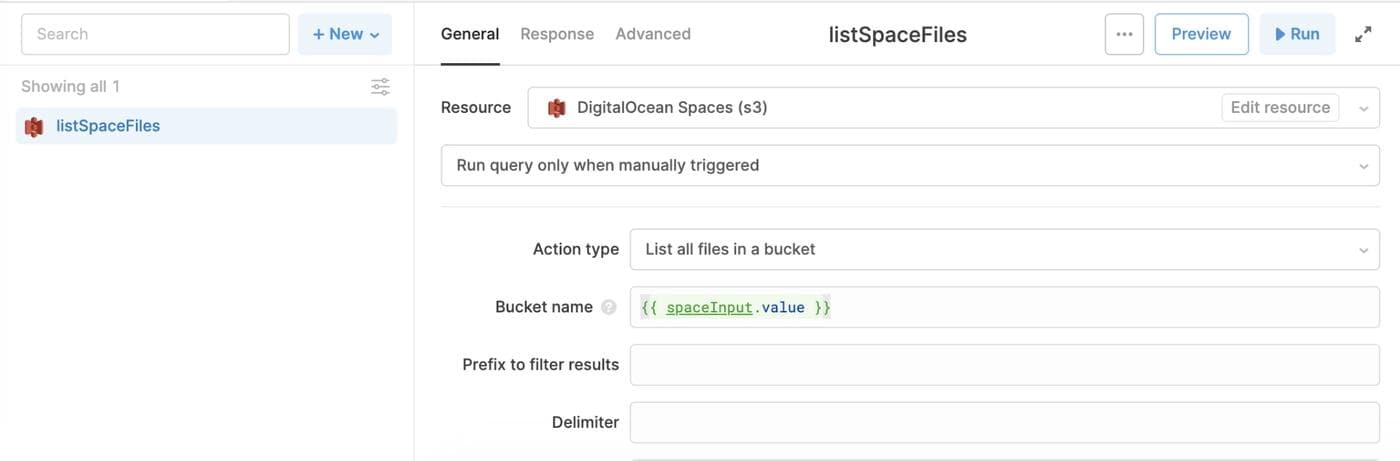
The last thing we’ll want to do here is change our query to make sure it only runs manually instead of when inputs change – that way, we won’t re-run it every time someone changes a character in the text input we’ve added. Here’s what your app should look like so far:
To make sure our query runs correctly, type in the name of an existing space in the text input, and then click “Run” in your query editor. You should see a response that looks something like this:
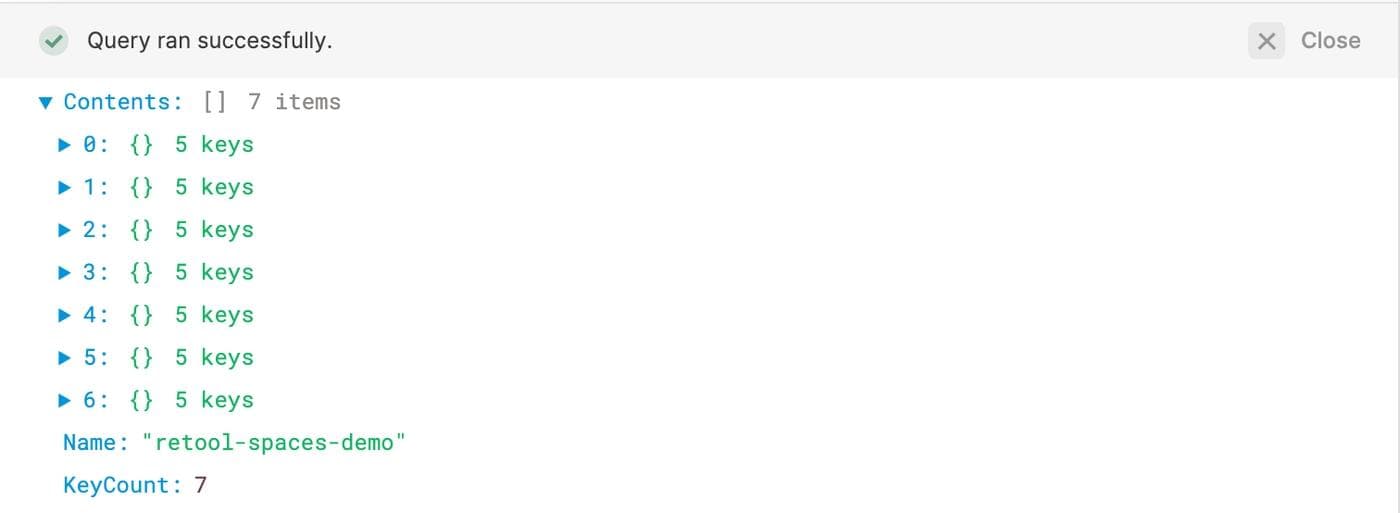
Sweet. Now let’s display this data in a useful way.
- Display Space files in a table
Drag a fresh new table component onto the canvas (you can always get to your component insert screen by clicking on an empty section of the gray canvas), and in the “Data” property for that table, we’ll reference the results of our list query. The file listing is nested within the “Contents” property, so the Javascript is {{ listSpaceFiles.data.Contents }}.
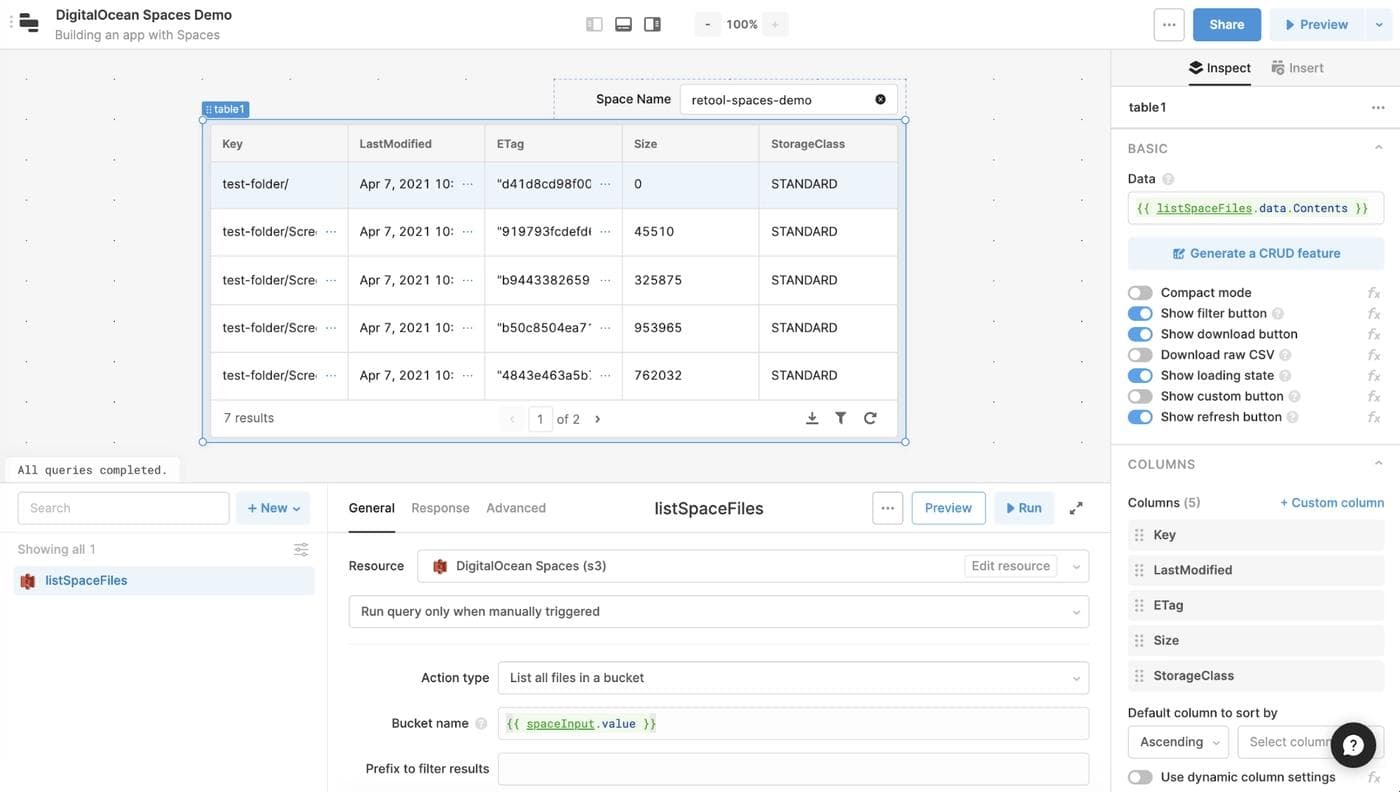
You can also rename the table to “objectsTable” for easier referencing in the next step.
This is a cool table, but it’s not super useful quite yet. Let’s add some details for each object.
- Add a details pane for each Space object
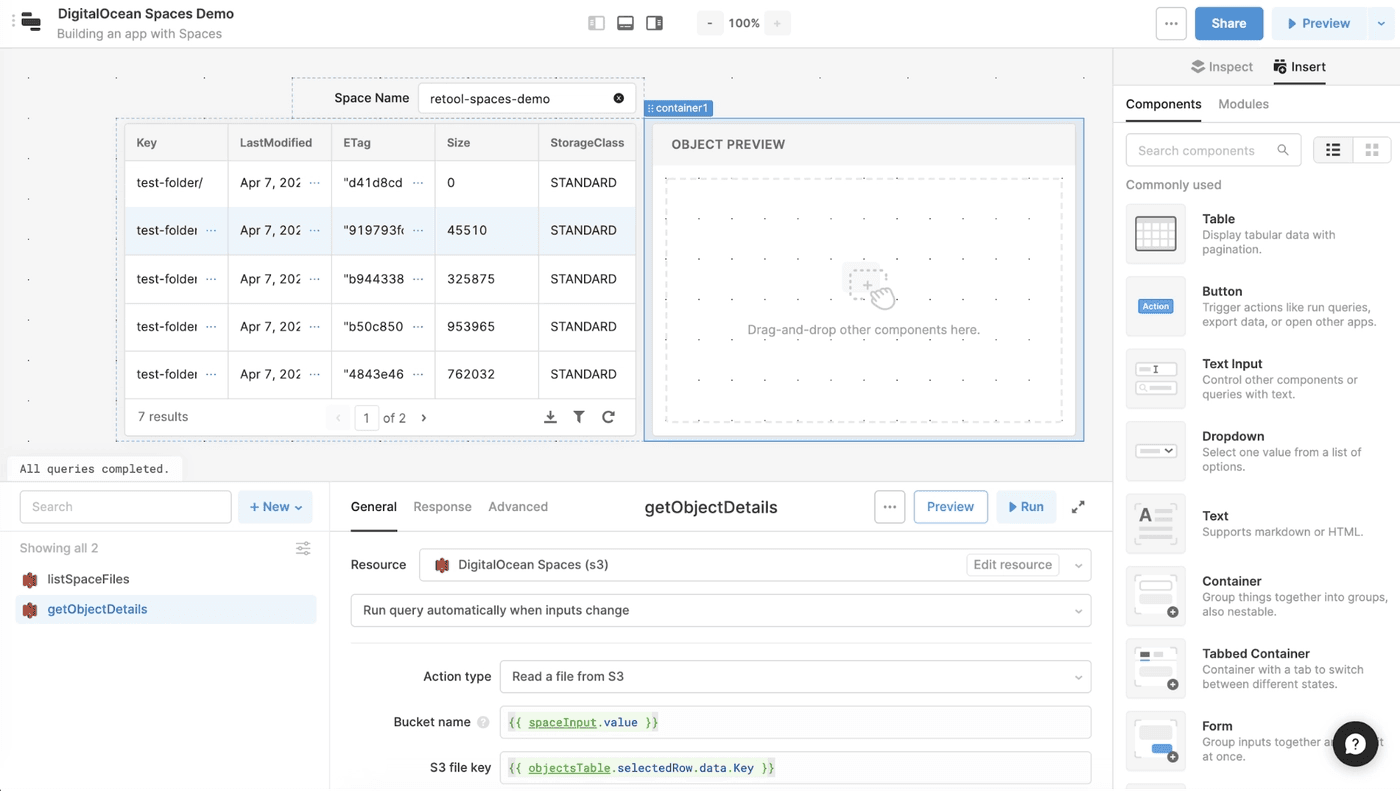
To get details of a particular object, we’ll need to create a second query. Create a new query in your editor, select the DigitalOcean Spaces resource, and then choose the “Read a file from S3” option from the “Action type” dropdown. In the “Bucket name” field, we’ll fill in the same value from our last query - a reference to the text input in our app.
For the “S3 file key” input, we’re going to reference the currently selected table row with {{ objectsTable.selectedRow.data.Key }}. This is going to update dynamically as you select different rows in the table. For the query’s run settings, we’re keeping it as “Run query automatically when inputs change” so that our query will automatically fetch the object that’s currently chosen in our table.
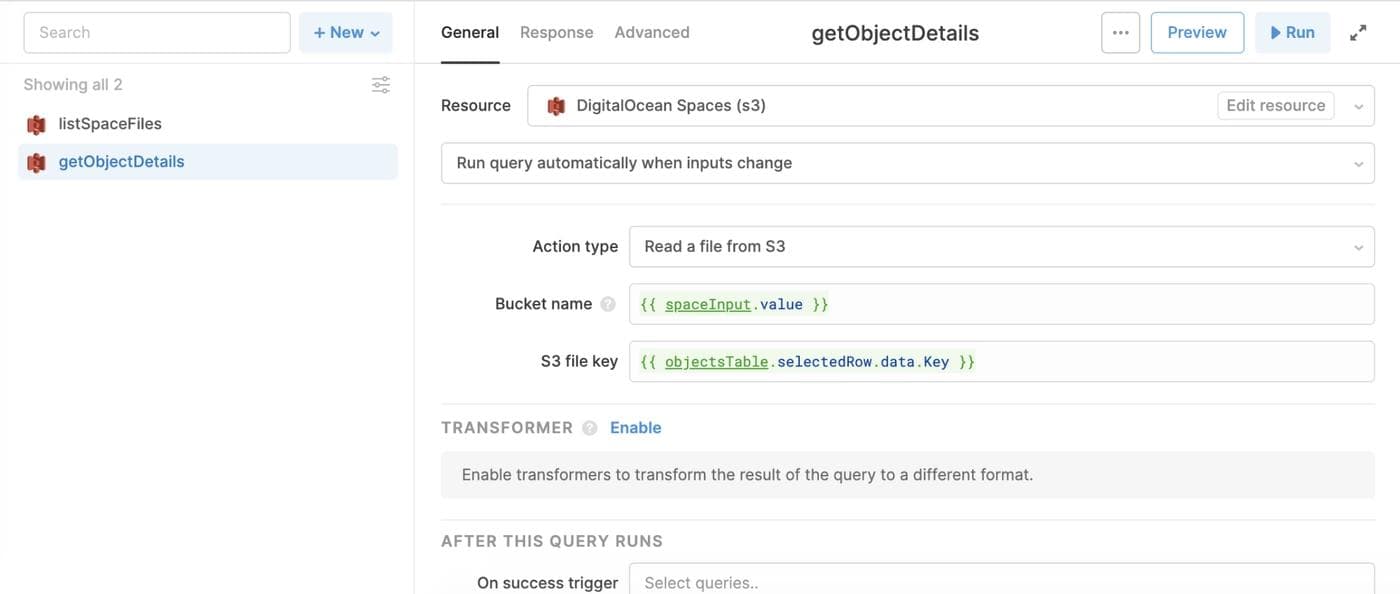
Click “Run”, and you should see a response that looks something like this:

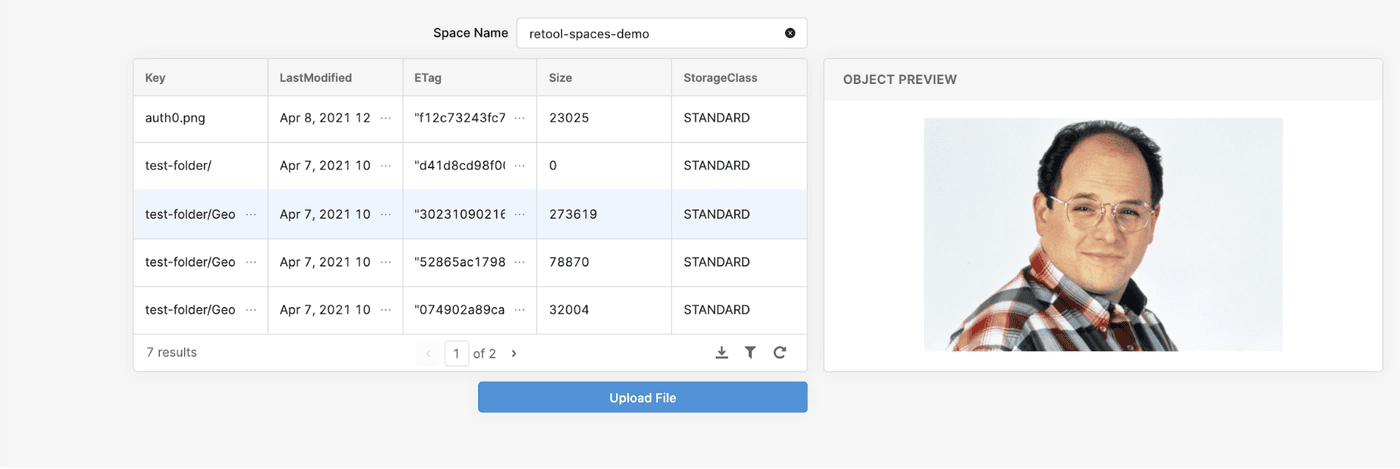
Now let’s take that response data and display it in our app. First, drag a container component onto the canvas and shrink the table a little bit. This is how I organized my app, but take your creative liberties 🙂. I also gave the container an “Object Preview” title.
In our case, all of the files we want to preview are images, so we’re going to drag an image component into this container to display the object. Note that your Space may contain different types of files with other metadata you want to display – you might want to use a series of text components, a statistic component, etc.
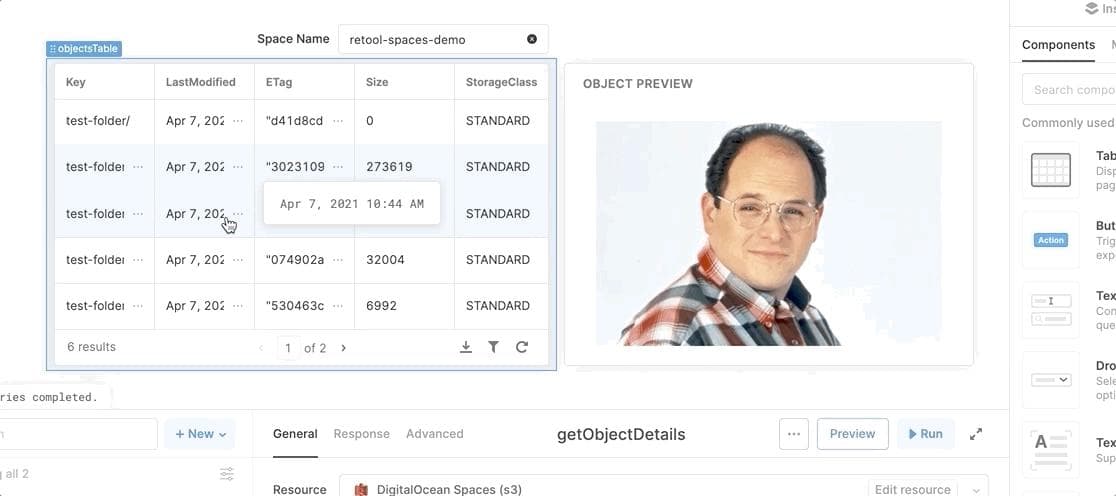
Since Spaces returns images in a Base64 representation, the way that we’ll display them in Retool’s image component requires a bit of interpolation: we’re going to combine a Base64 prefix with a reference to the results of our getObjectDetails query. The code that worked for me was {{ “data:image/jpeg;base64,” + getObjectDetails.data.Body }}.

And voila! You have an image preview for your objects in Spaces. Note that since Spaces includes top level folders in object listings, some of the rows in the table (i.e. folders) won’t work with this image preview, since they are in fact not images.
The Spaces UI has really slick functionality for uploading (especially bulk uploading) files to a Space or folder. But if you want to build something more custom, Retool is a great way to do it.
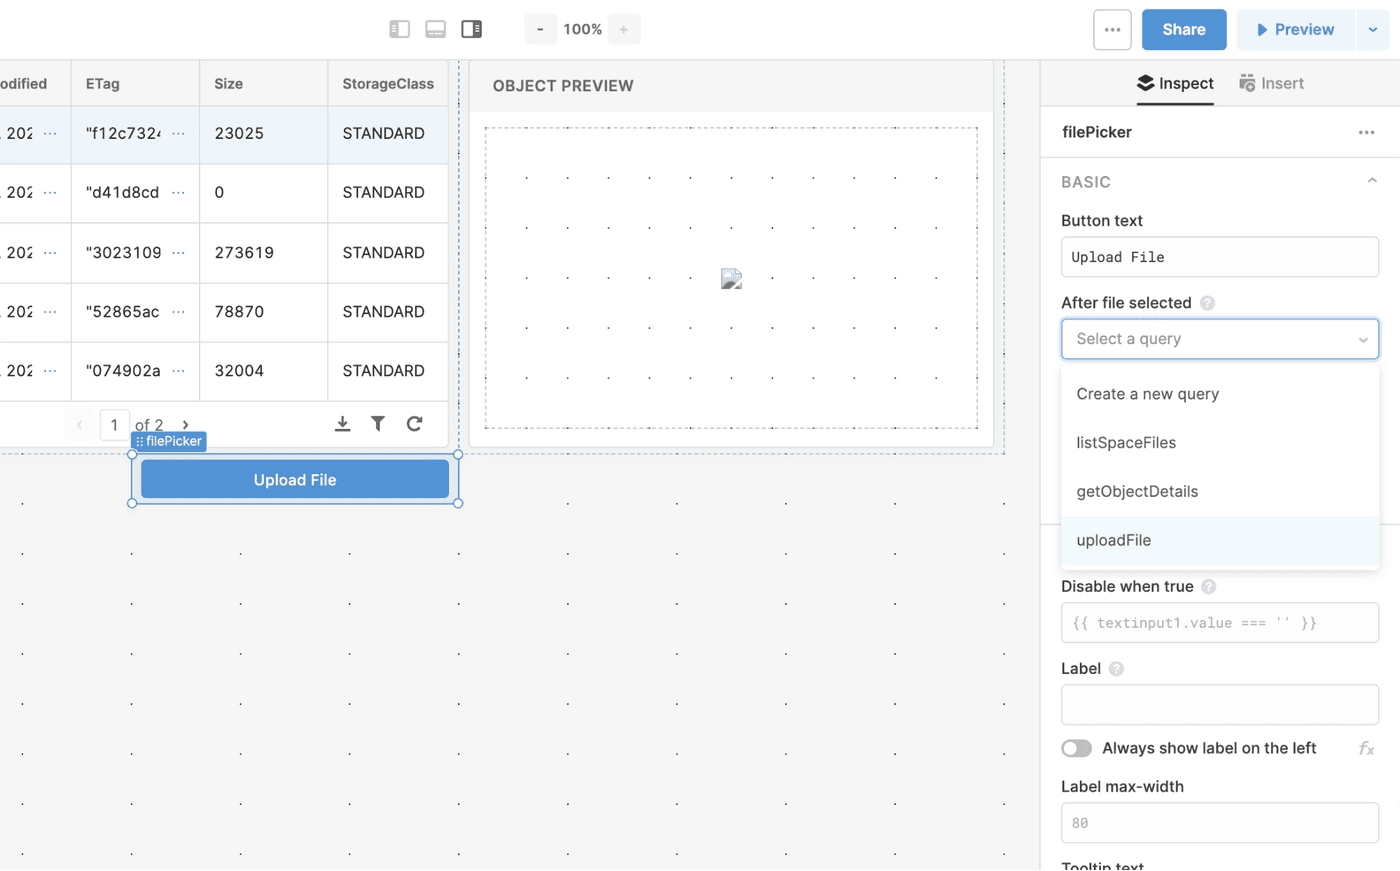
Retool has an out-of-the-box component for uploading files to S3 compatible storage, but we’ll work with Retool’s generic file picker component and then trigger a query (for more customizability). Start by dragging a file picker component onto the canvas. Let’s rename it filePicker.

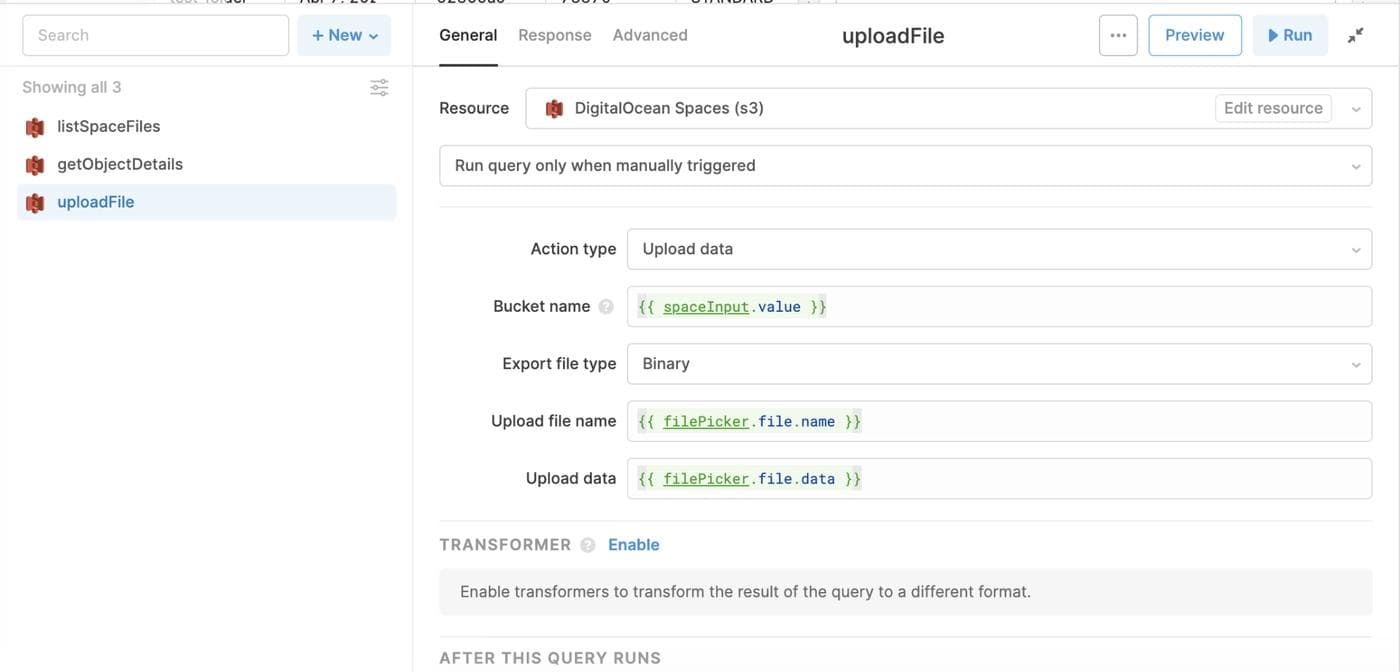
Now we’ll build a query that uploads whatever file you’ve selected with the picker into our Space. Create a new query, choose our DigitalOcean Spaces resource, and then the “Upload data” option from the “Action type” dropdown. As usual, we’ll populate the “bucket name” field with a reference to our text input’s value.
For the file – we’ll choose “Binary” as the file type, and then references to the chosen file’s name with {{ filePicker.file.name }} and the actual content with {{ filePicker.file.data }}.
Finally, click on the file picker again and set it to run this new uploadFile query on upload:
And that’s it! But before you’re good to go, a note on CORS…
If you get errors on upload, it’s likely related to a CORS (Cross Origin Resource Sharing) issue. Your Space is going to reject write requests (i.e. PUT and POST) by default, which is what we’re trying to do here with our file uploader. To get around that, you’ll need to create a new CORS configuration in your Space settings:
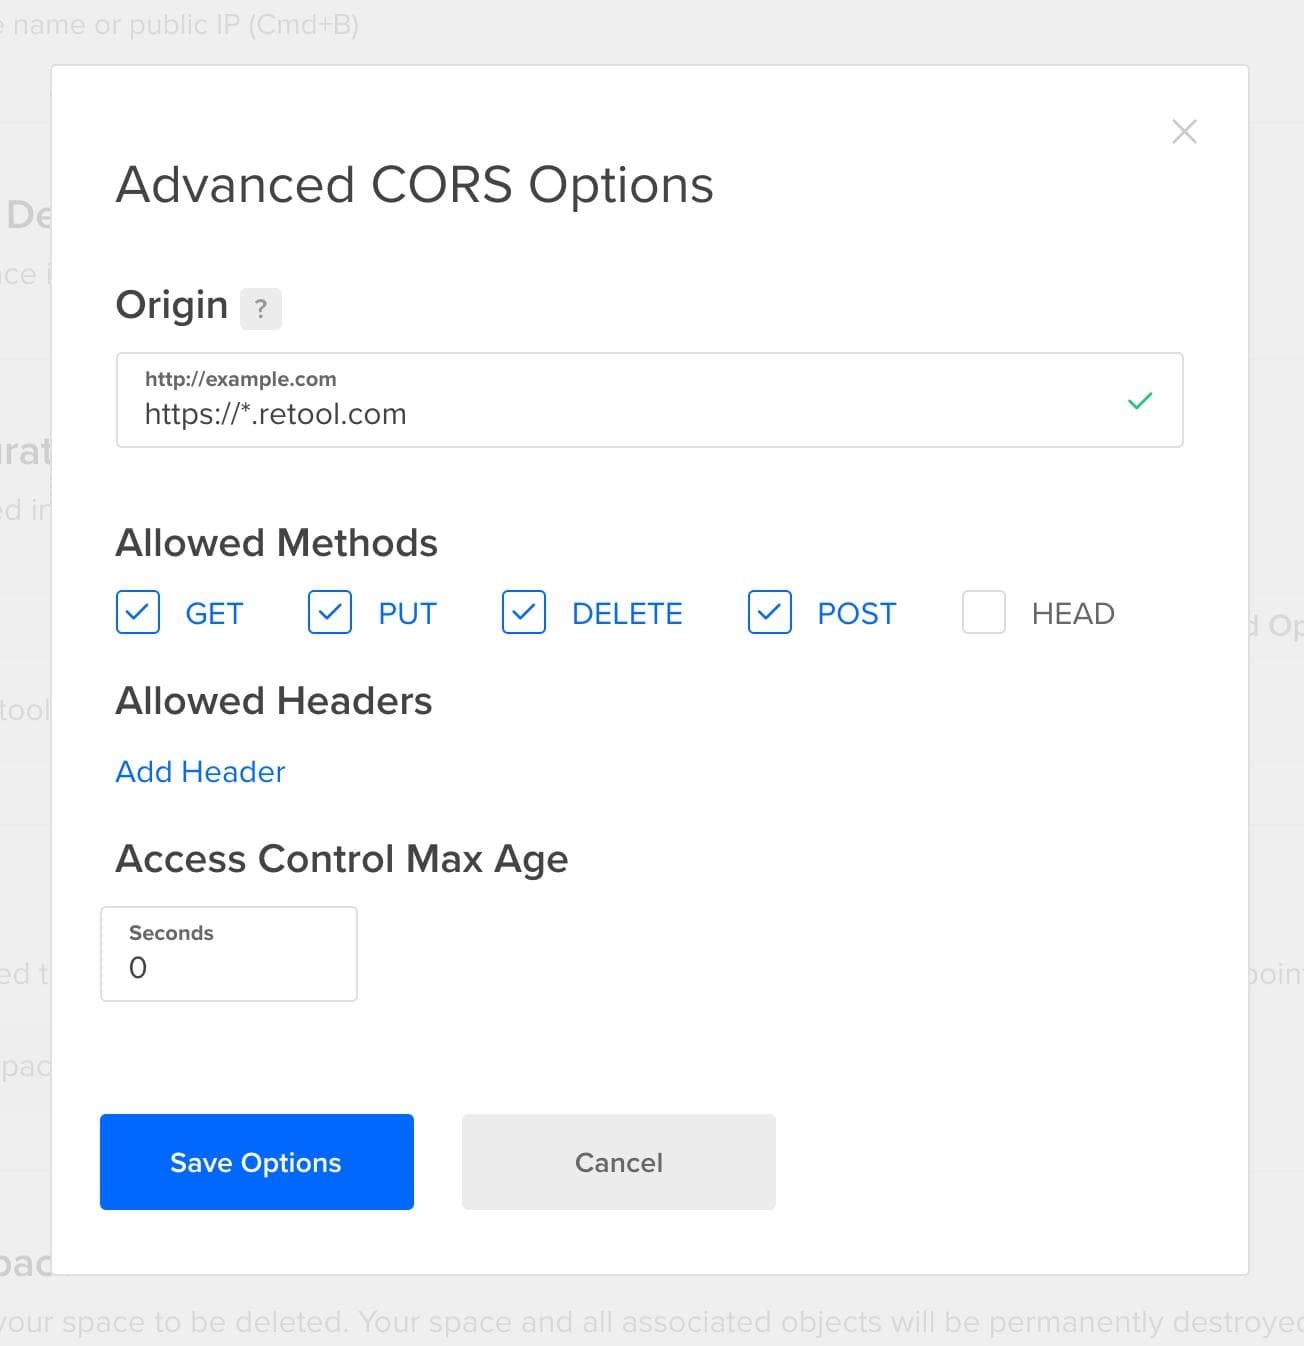
In the “Origin” field, we’ve put in a wildcard to let in traffic from any Retool subdomain. You can limit traffic to your specific subdomain if you’d like, too (probably a good idea). In “Allowed Methods” we’ve chosen the big 4, but you can customize based on what you want to do.
And voila! You’ve got a basic UI for working with your Spaces data in Retool in checks notes about 20 minutes.
Reader