
PlanetScale is an advanced MySQL-compatible database service powered by Vitess, offering almost unlimited scale for your application's database. Retool connects to almost any data source you can imagine, including MySQL databases. In this tutorial, we'll show you how to connect PlanetScale and Retool together, enabling you to quickly build internal tools and dashboards on your data in PlanetScale. Let's get started!
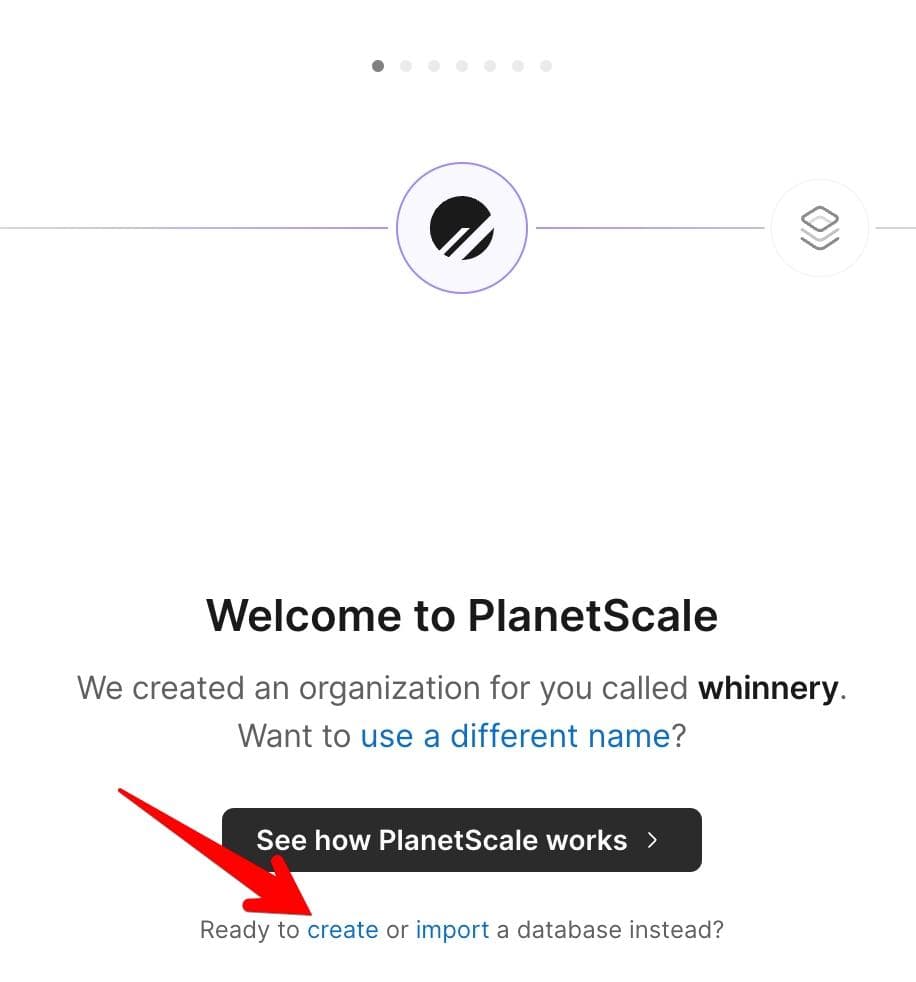
Your first step will be signing up for a free PlanetScale account. Once you sign up, you will be prompted to create your first database. You can skip the onboarding wizard for now!
After electing to create a new database, you can name it whatever you would like. In this example, we're going to create a database for baseball teams and players, so we'll call our database baseball_data.
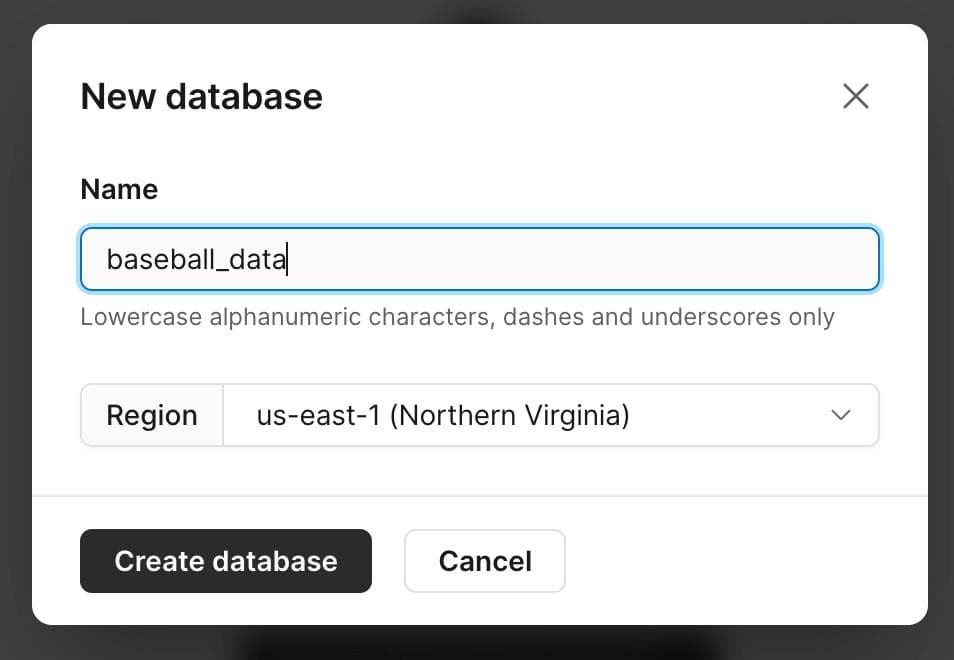
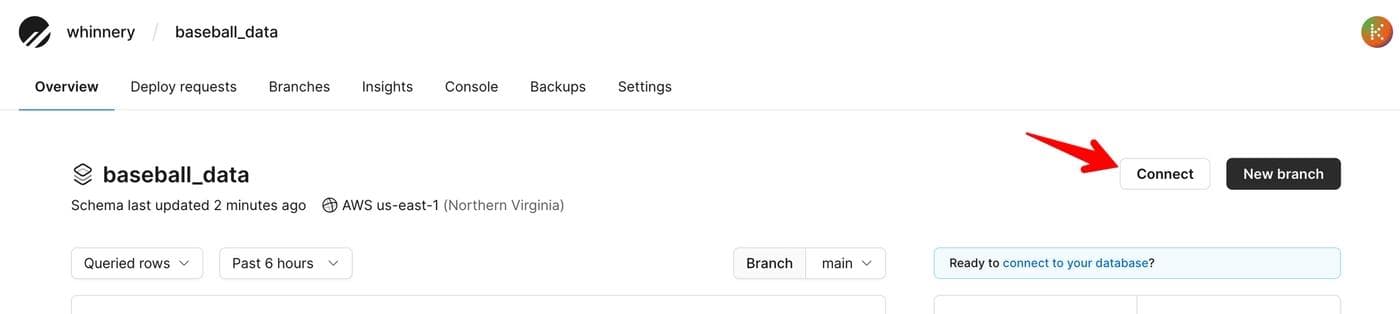
Click "Create database", and in a few moments, you will be the proud owner of a shiny new MySQL-compatible database hosted by PlanetScale. Once your database has been created, click the "Connect" button.
If this is your first time connecting to the database, you will be prompted to create a password for the database. Be sure to note these values in a text document or other secure location on your computer, because you will not be able to see them again after they've been initially created.

Once you have made a note of these values, you're ready to connect to your new database from Retool! There's a lot more useful stuff you can do in the PlanetScale console, but we'll be using the Retool interface to complete the rest of this tutorial.
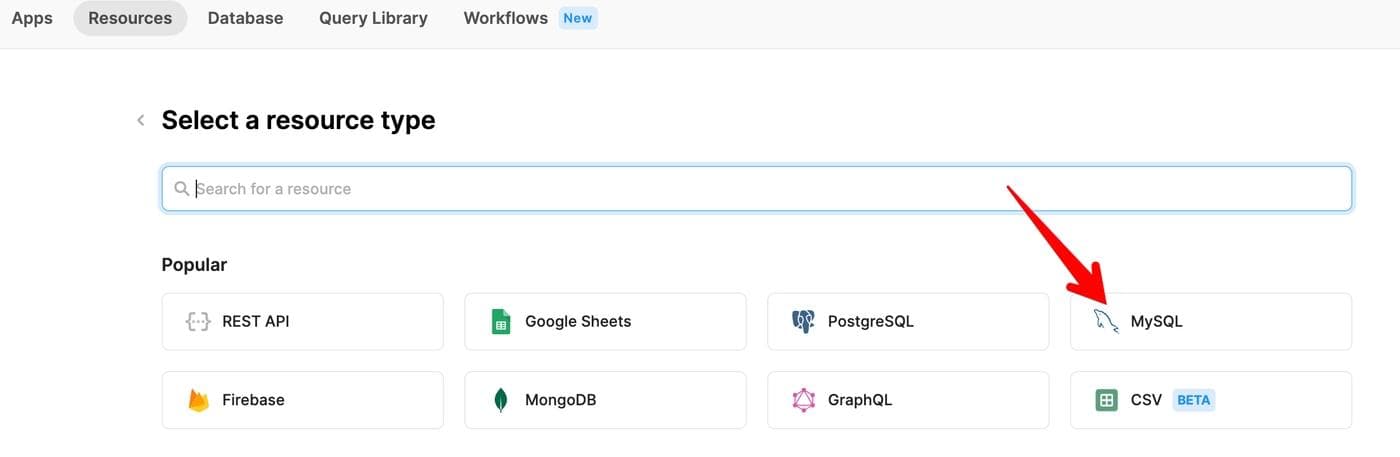
If you haven't already, sign up for a free Retool account. Once you do, head over to the Resources tab in the Retool console, and create a new MySQL resource (this will be our PlanetScale database).
You can start by naming your resource (it can be anything you like), and then filling in the host and database name from the database you created in PlanetScale.
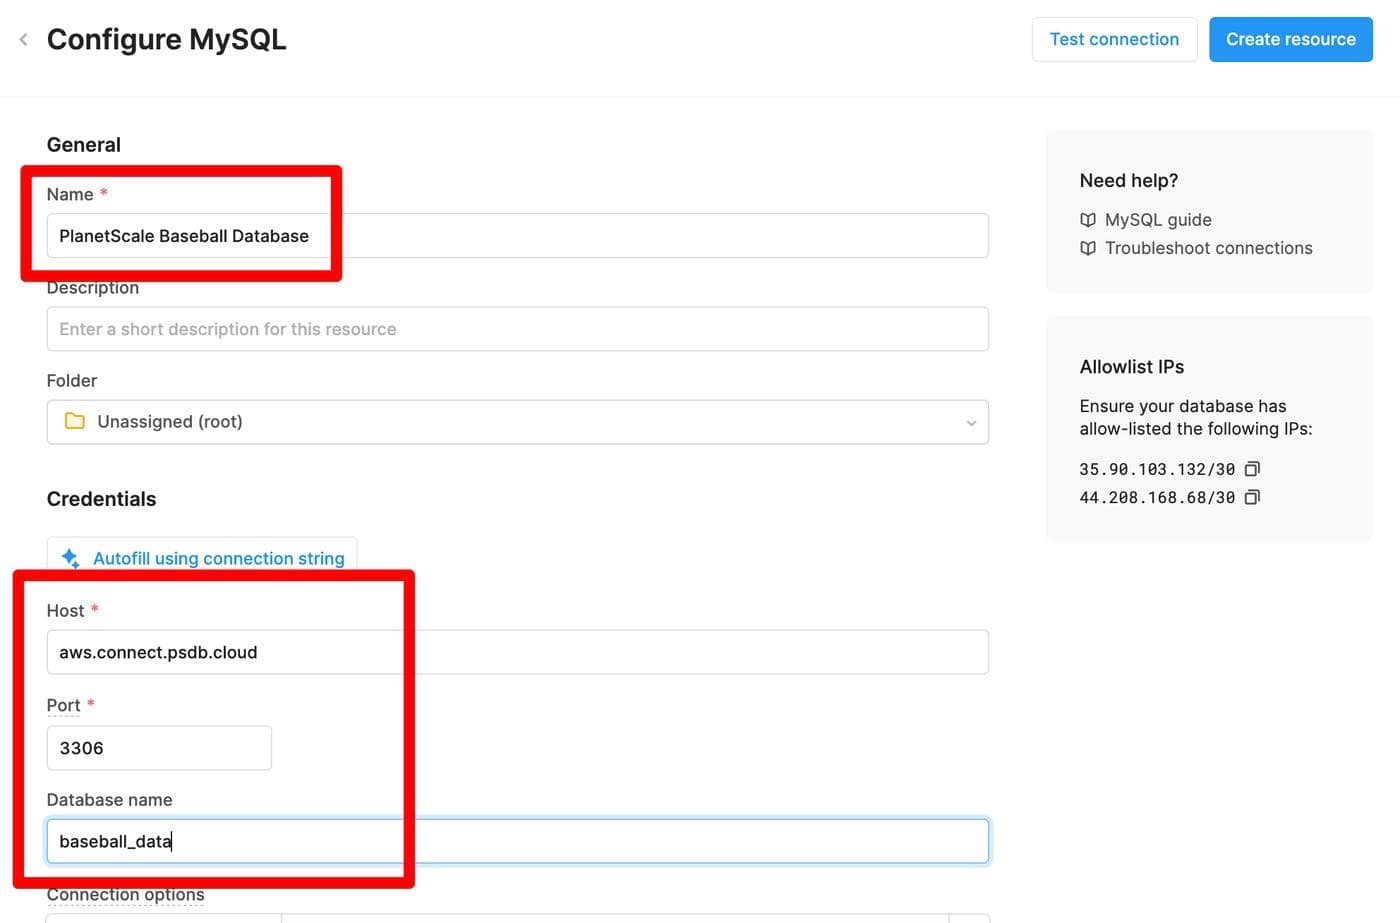
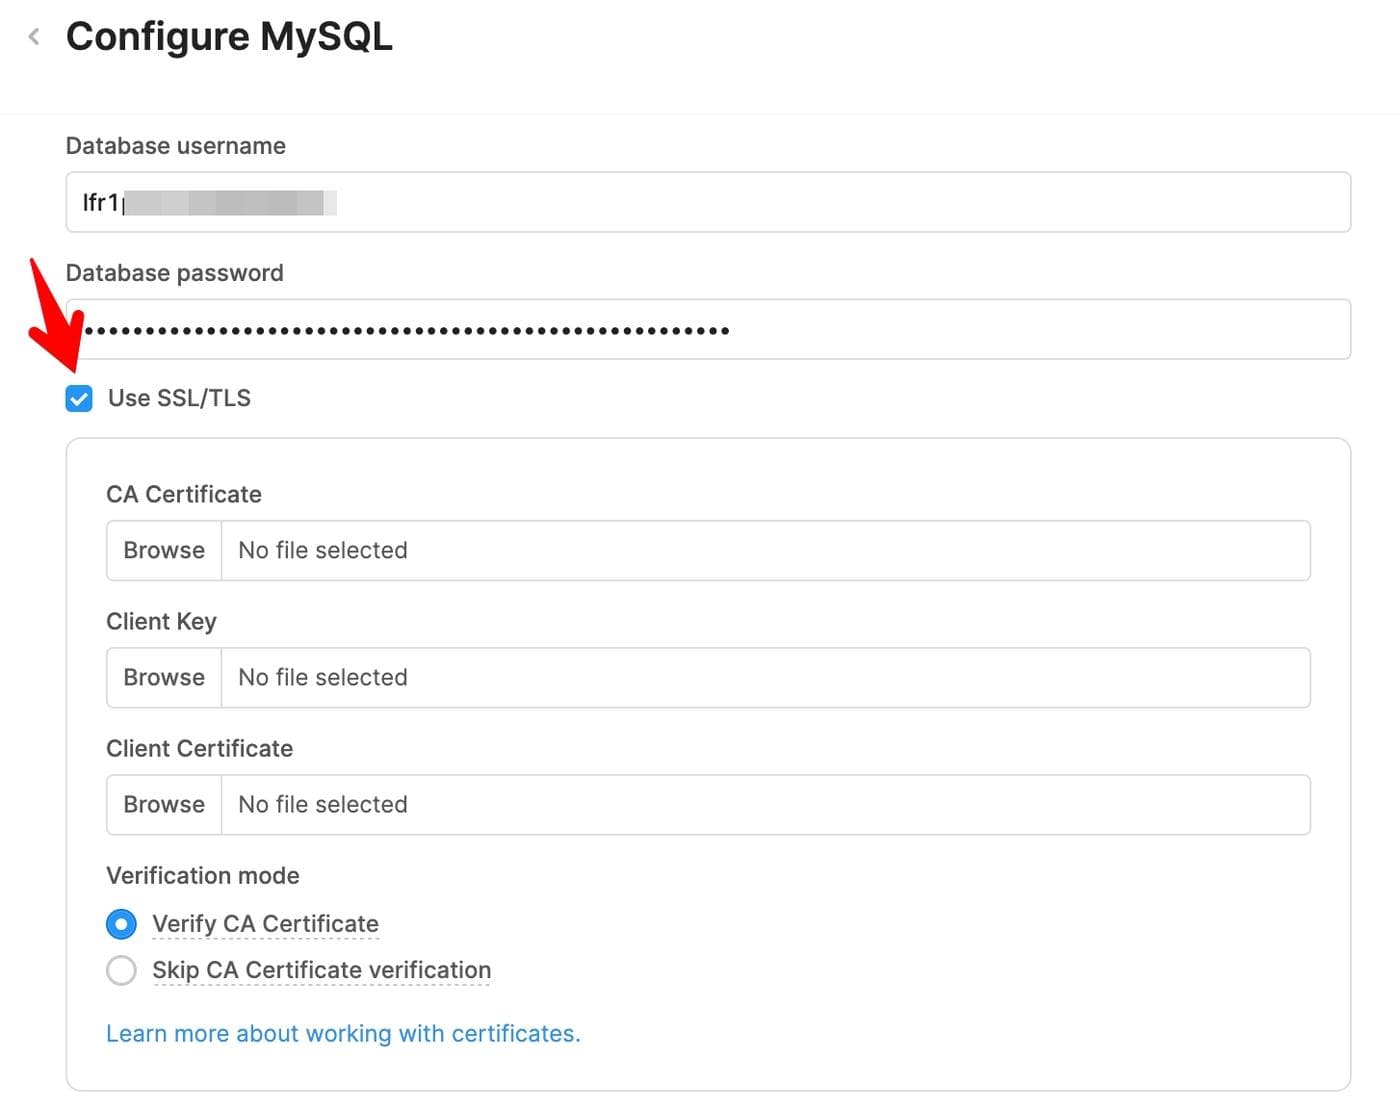
Further down the page, you will need to configure your database username and password.
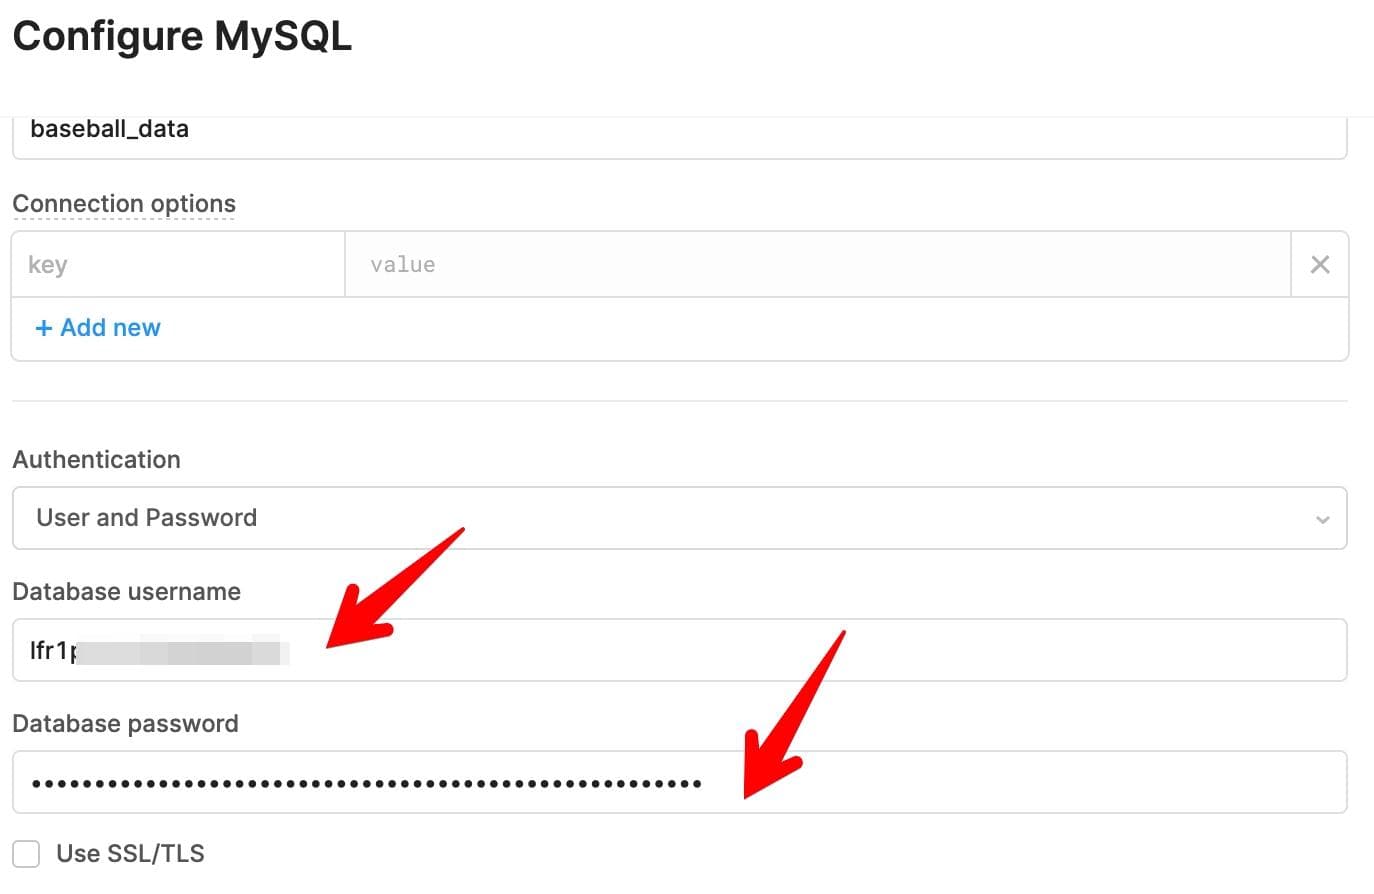
Now comes a slightly tricky part. Connecting securely to a database on PlanetScale requires a secure connection, which means you need to check the box below the password field to "Use SSL/TLS".
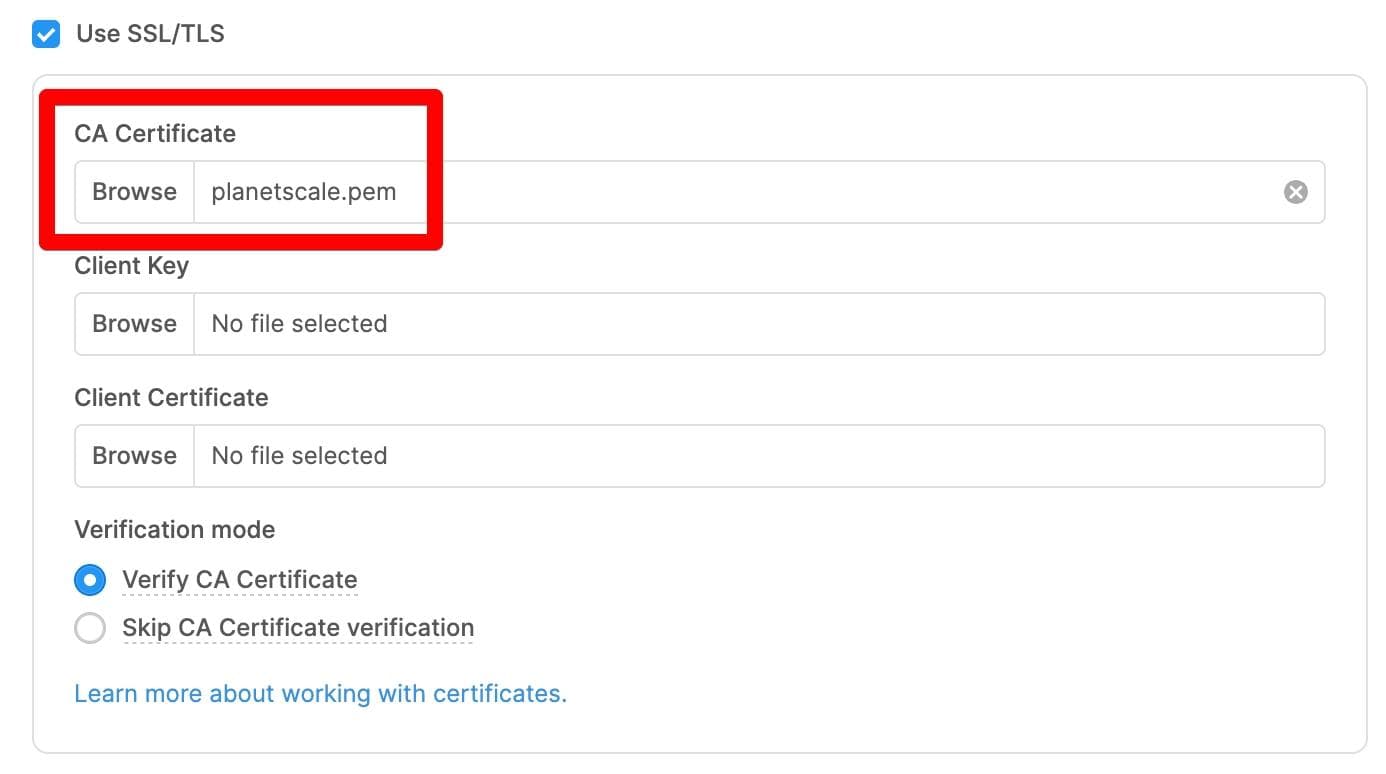
If you're interested in learning more about secure connections to your database in PlanetScale, you can read this tutorial from PlanetScale support. But as a practical matter, you will need to upload the CA Certificate used by PlanetScale (provided by Let's Encrypt) to Retool, so the two systems can securely communicate with one another. Save the following text to a file called planetscale.pem on your computer (include the entire text below, including the "BEGIN" and "END" bits).
1 2 3 4 5 6 7 8 9 10 11 12 13 14 15 16 17 18 19 20 21 22 23 24 25 26 27 28 29 30 31-----BEGIN CERTIFICATE----- MIIFazCCA1OgAwIBAgIRAIIQz7DSQONZRGPgu2OCiwAwDQYJKoZIhvcNAQELBQAw TzELMAkGA1UEBhMCVVMxKTAnBgNVBAoTIEludGVybmV0IFNlY3VyaXR5IFJlc2Vh cmNoIEdyb3VwMRUwEwYDVQQDEwxJU1JHIFJvb3QgWDEwHhcNMTUwNjA0MTEwNDM4 WhcNMzUwNjA0MTEwNDM4WjBPMQswCQYDVQQGEwJVUzEpMCcGA1UEChMgSW50ZXJu ZXQgU2VjdXJpdHkgUmVzZWFyY2ggR3JvdXAxFTATBgNVBAMTDElTUkcgUm9vdCBY MTCCAiIwDQYJKoZIhvcNAQEBBQADggIPADCCAgoCggIBAK3oJHP0FDfzm54rVygc h77ct984kIxuPOZXoHj3dcKi/vVqbvYATyjb3miGbESTtrFj/RQSa78f0uoxmyF+ 0TM8ukj13Xnfs7j/EvEhmkvBioZxaUpmZmyPfjxwv60pIgbz5MDmgK7iS4+3mX6U A5/TR5d8mUgjU+g4rk8Kb4Mu0UlXjIB0ttov0DiNewNwIRt18jA8+o+u3dpjq+sW T8KOEUt+zwvo/7V3LvSye0rgTBIlDHCNAymg4VMk7BPZ7hm/ELNKjD+Jo2FR3qyH B5T0Y3HsLuJvW5iB4YlcNHlsdu87kGJ55tukmi8mxdAQ4Q7e2RCOFvu396j3x+UC B5iPNgiV5+I3lg02dZ77DnKxHZu8A/lJBdiB3QW0KtZB6awBdpUKD9jf1b0SHzUv KBds0pjBqAlkd25HN7rOrFleaJ1/ctaJxQZBKT5ZPt0m9STJEadao0xAH0ahmbWn OlFuhjuefXKnEgV4We0+UXgVCwOPjdAvBbI+e0ocS3MFEvzG6uBQE3xDk3SzynTn jh8BCNAw1FtxNrQHusEwMFxIt4I7mKZ9YIqioymCzLq9gwQbooMDQaHWBfEbwrbw qHyGO0aoSCqI3Haadr8faqU9GY/rOPNk3sgrDQoo//fb4hVC1CLQJ13hef4Y53CI rU7m2Ys6xt0nUW7/vGT1M0NPAgMBAAGjQjBAMA4GA1UdDwEB/wQEAwIBBjAPBgNV HRMBAf8EBTADAQH/MB0GA1UdDgQWBBR5tFnme7bl5AFzgAiIyBpY9umbbjANBgkq hkiG9w0BAQsFAAOCAgEAVR9YqbyyqFDQDLHYGmkgJykIrGF1XIpu+ILlaS/V9lZL ubhzEFnTIZd+50xx+7LSYK05qAvqFyFWhfFQDlnrzuBZ6brJFe+GnY+EgPbk6ZGQ 3BebYhtF8GaV0nxvwuo77x/Py9auJ/GpsMiu/X1+mvoiBOv/2X/qkSsisRcOj/KK NFtY2PwByVS5uCbMiogziUwthDyC3+6WVwW6LLv3xLfHTjuCvjHIInNzktHCgKQ5 ORAzI4JMPJ+GslWYHb4phowim57iaztXOoJwTdwJx4nLCgdNbOhdjsnvzqvHu7Ur TkXWStAmzOVyyghqpZXjFaH3pO3JLF+l+/+sKAIuvtd7u+Nxe5AW0wdeRlN8NwdC jNPElpzVmbUq4JUagEiuTDkHzsxHpFKVK7q4+63SM1N95R1NbdWhscdCb+ZAJzVc oyi3B43njTOQ5yOf+1CceWxG1bQVs5ZufpsMljq4Ui0/1lvh+wjChP4kqKOJ2qxq 4RgqsahDYVvTH9w7jXbyLeiNdd8XM2w9U/t7y0Ff/9yi0GE44Za4rF2LN9d11TPA mRGunUHBcnWEvgJBQl9nJEiU0Zsnvgc/ubhPgXRR4Xq37Z0j4r7g1SgEEzwxA57d emyPxgcYxn/eR44/KJ4EBs+lVDR3veyJm+kXQ99b21/+jh5Xos1AnX5iItreGCc= -----END CERTIFICATE-----
After doing this, upload the file to Retool in the configuration UI where it says "CA Certificate". You can leave the "Client Key" and "Client Certificate" fields blank.
After uploading the file, click the "Test connection" button at the top of the configuration screen. If all goes according to plan, you'll have a successful connection to your PlanetScale database!

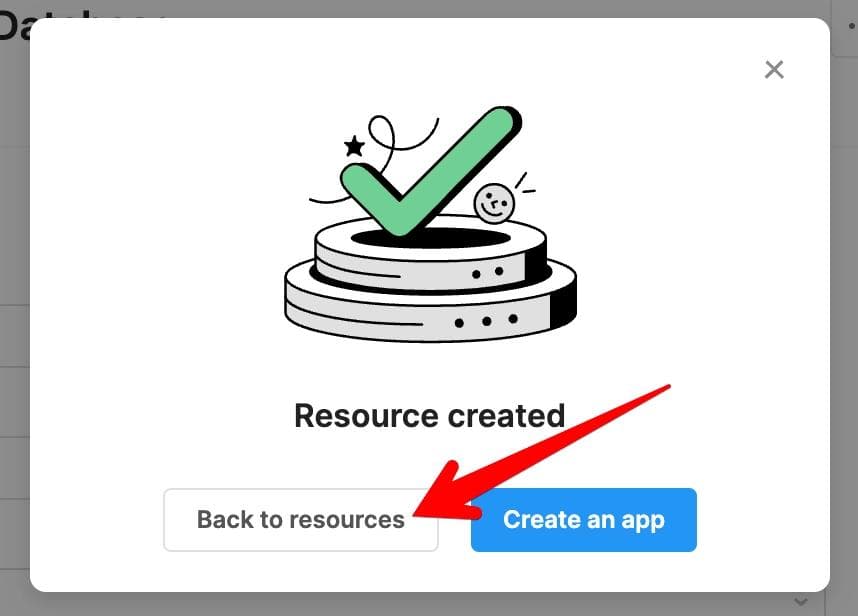
After establishing a successful connection, click the "Create resource" button to save your configuration. This will enable you to use this database across all your Retool apps and workflows. After creating your resource, it may be tempting to immediately create an app - but for now, head back to the Resources screen, and then navigate to the Query Library. We have a bit of work to do there first.
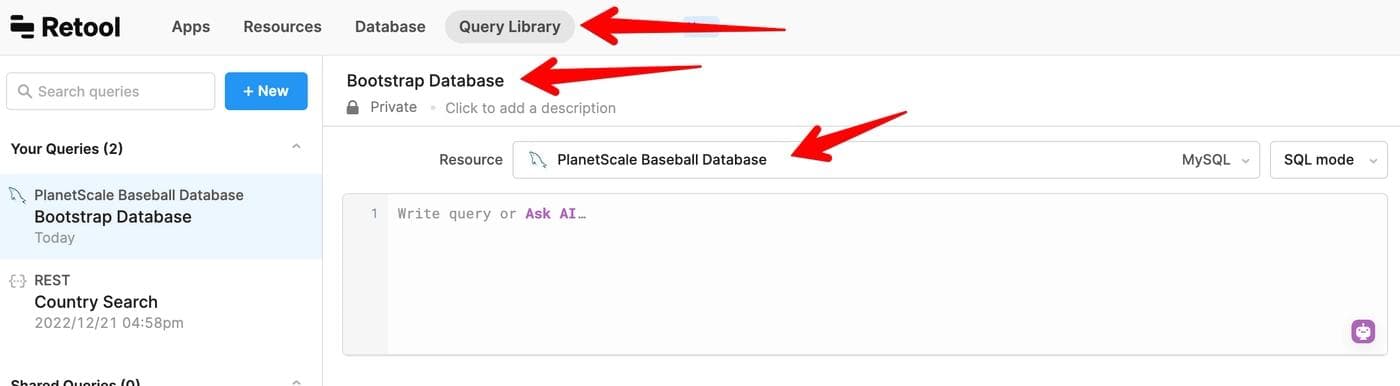
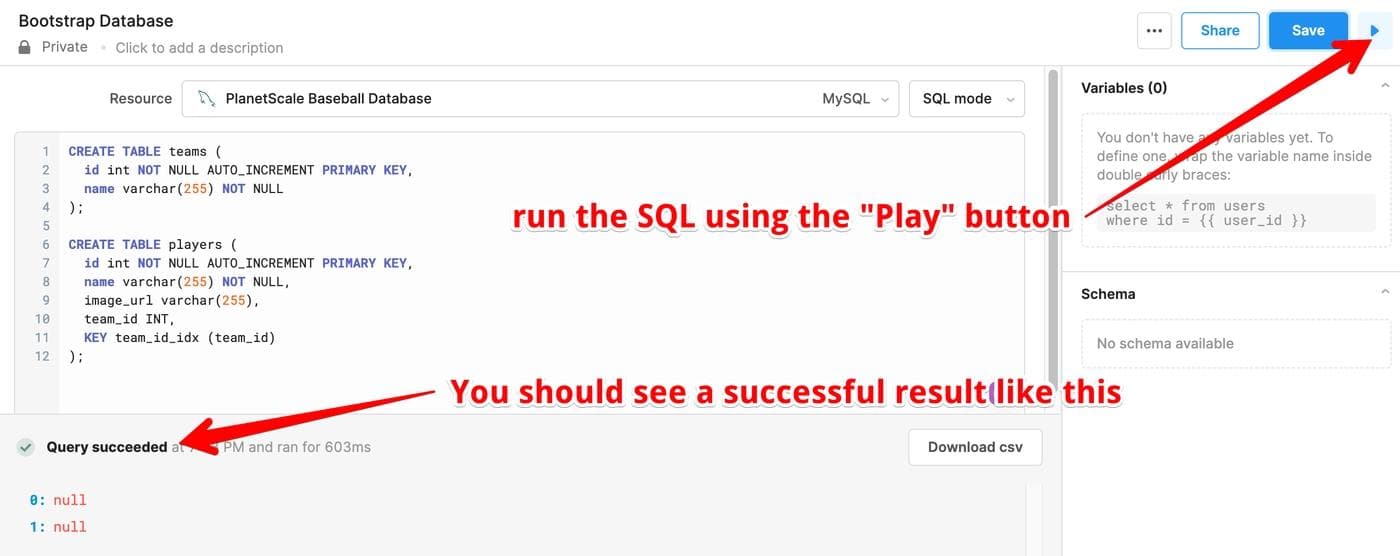
Retool's Query Library lets you set up shared queries that you can use across all your applications. But it's also a great way to execute arbitrary SQL queries against your database if you need a quick-and-dirty console for doing so. It just so happens we are in the market for such a console – our PlanetScale database doesn't have any tables or records in it yet, so we need to add a couple first. Create a new query, and then select the database we just created as the Resource in the dropdown menu.
In the text field below, paste in the following SQL query. It will create two tables, called teams and players. This will set up a basic schema for our database with some relational data (a one-to-many relationship between teams and players).
1 2 3 4 5 6 7 8 9 10 11 12CREATE TABLE teams ( id int NOT NULL AUTO_INCREMENT PRIMARY KEY, name varchar(255) NOT NULL ); CREATE TABLE players ( id int NOT NULL AUTO_INCREMENT PRIMARY KEY, name varchar(255) NOT NULL, image_url varchar(255), team_id INT, KEY team_id_idx (team_id) );
You might notice that this simple schema does not have foreign key constraints, as they are not supported in PlanetScale. Run the SQL statement now, using the "Play" button in the top right corner of the UI.
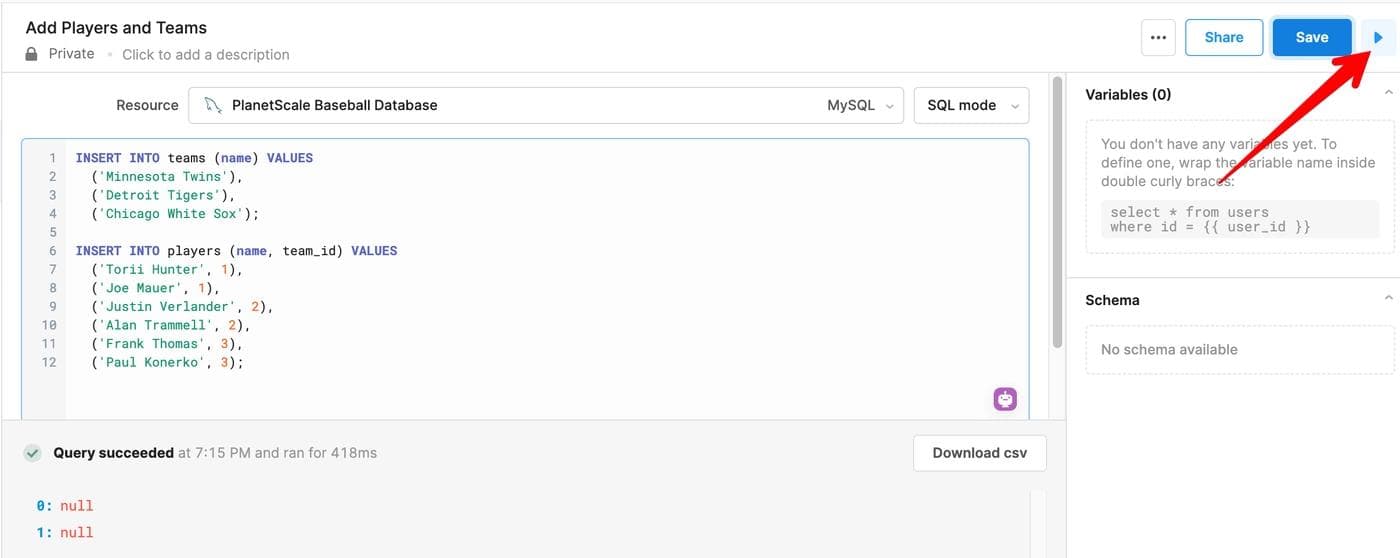
Staying in the Query Library, let's create a new query against our database. This time, we'll insert some sample data we can use in a Retool app.
1 2 3 4 5 6 7 8 9 10 11 12INSERT INTO teams (name) VALUES ('Minnesota Twins'), ('Detroit Tigers'), ('Chicago White Sox'); INSERT INTO players (name, team_id) VALUES ('Torii Hunter', 1), ('Joe Mauer', 1), ('Justin Verlander', 2), ('Alan Trammell', 2), ('Frank Thomas', 3), ('Paul Konerko', 3);
Run the query as before using the Play button.
Now, we have a database schema set up and some sample data we can use in a Retool application. Let's create one now!
With our database connected and configured, we can finally create a new Retool application that uses the data! Create a new app from the console UI, naming it anything you would like. After creating the app, you should be greeted with a relatively blank canvas like this one. If your PlanetScale database was the last resource you created, it will probably even helpfully include a query you can customize, as we will want to do next.
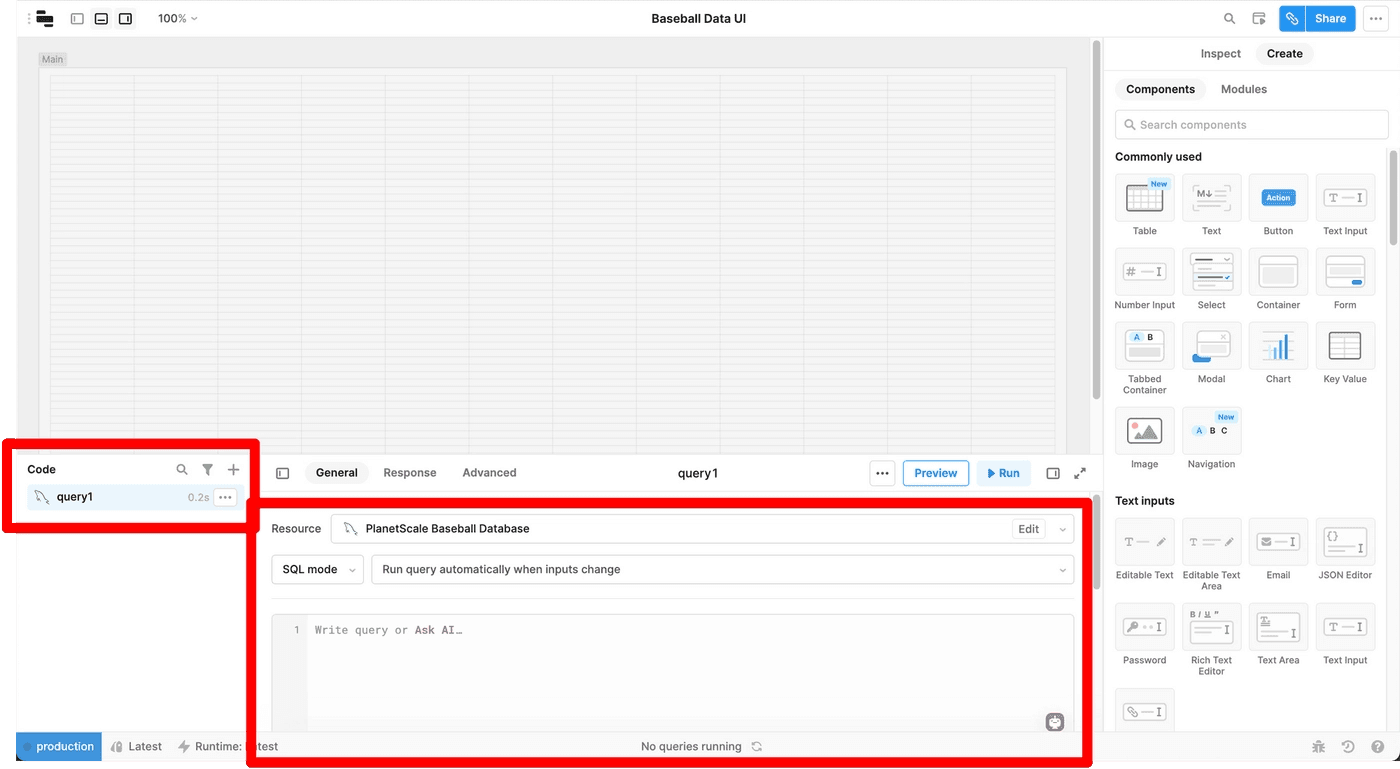
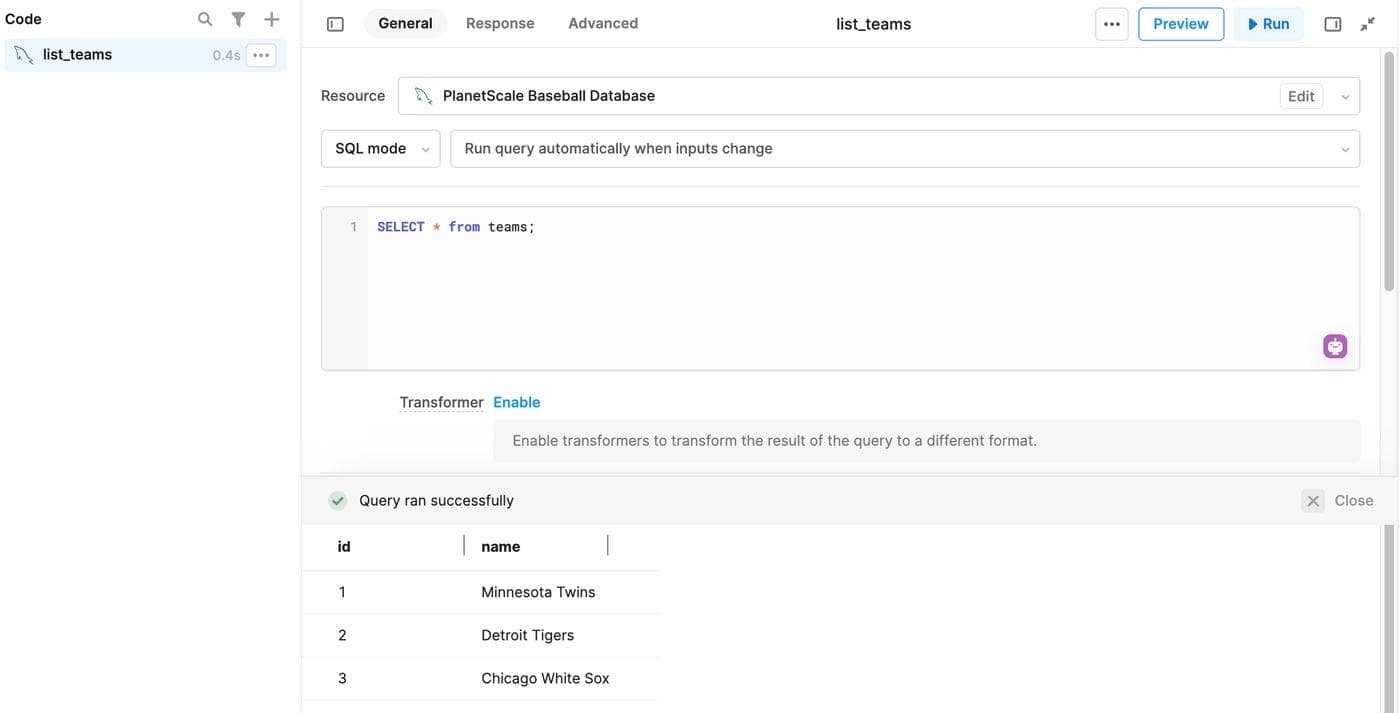
In Retool, queries contain logic that connects to your data or takes action in your UI. Let's start with a basic one - a SQL query that will get a list of all the teams in our database. Rename query1 to list_teams and paste in the following SQL.
1SELECT * from teams;
Click the "Save & Run" button, and you should see that data coming back from your database. You should even be able to see the data coming back in a preview below your query.
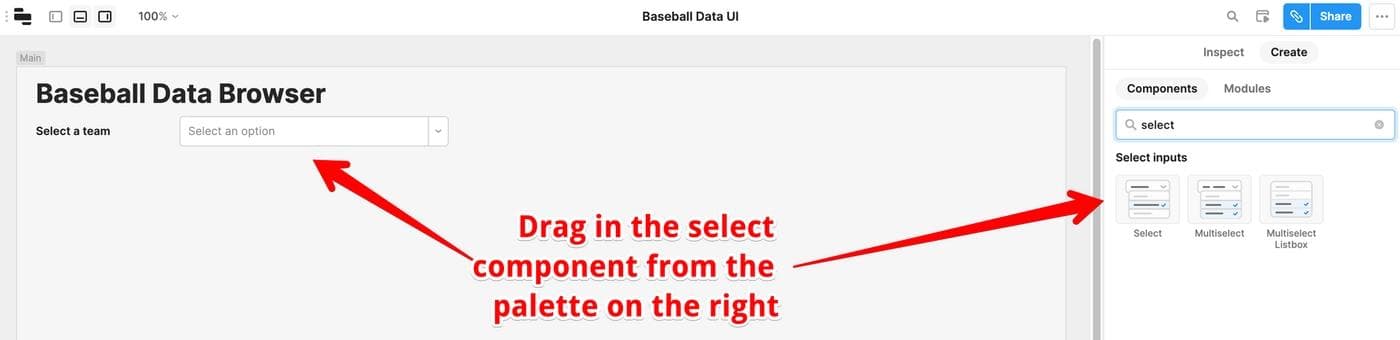
Now let's create some UI by dragging in a couple components from the righthand side of the page - a text component and a select component.
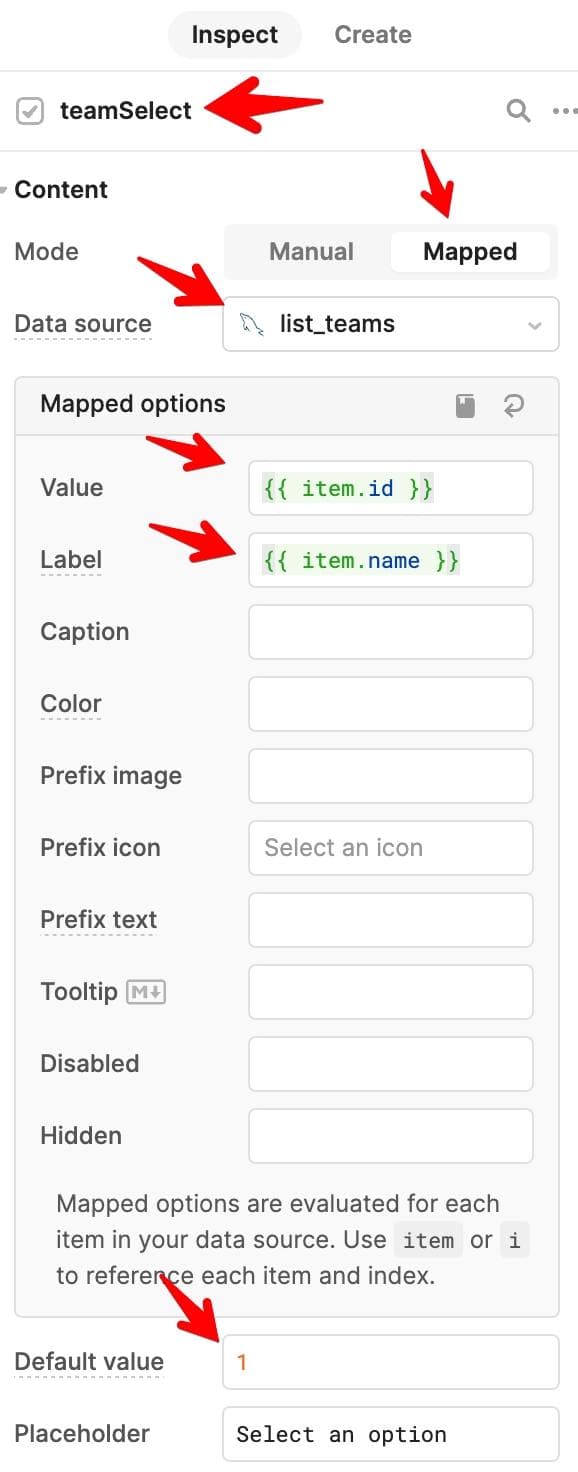
You can click on the label of the selected component to customize it. Next, we need to make the select component not show default hard-coded data, but rather data from our database. In the inspector UI for the select component, switch it from "Manual" to "Mapped" mode, and select our list_teams query as the data source. While you're at it, rename the select component to teamSelect and make the default value 1 . In the configuration below, the name column from the teams table in our database is being used as the label, and the value is the team's primary key ID.
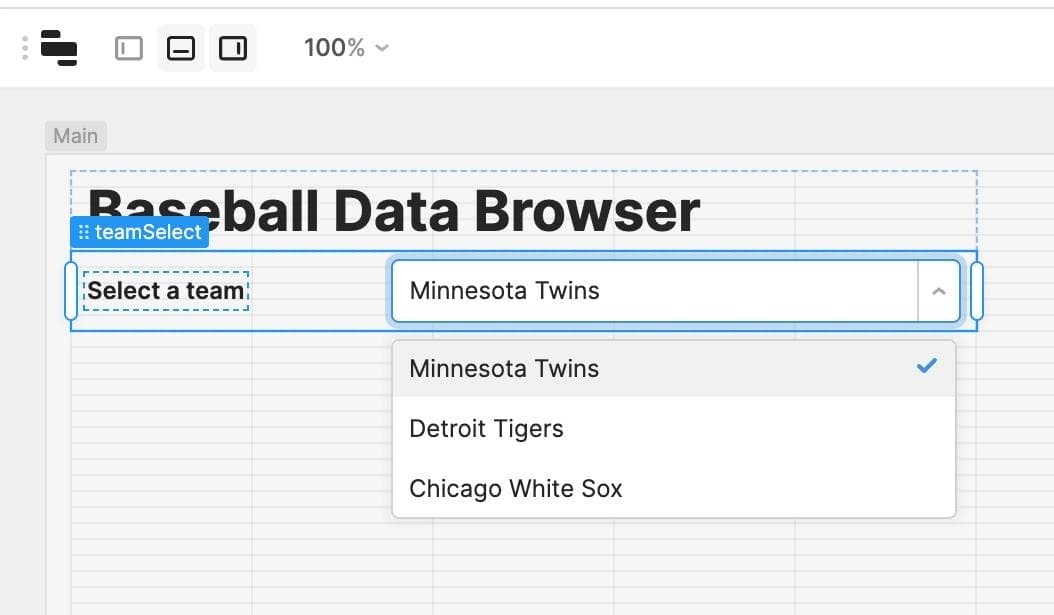
After doing this, your UI should look something like the below.
Next, let's create a second query that fetches a list of players for the currently selected team. This query will need to make use of Retool's double curly brace syntax to dynamically insert the database ID of the currently selected team, as shown below. Be sure to rename the query to list_players or something similarly useful.
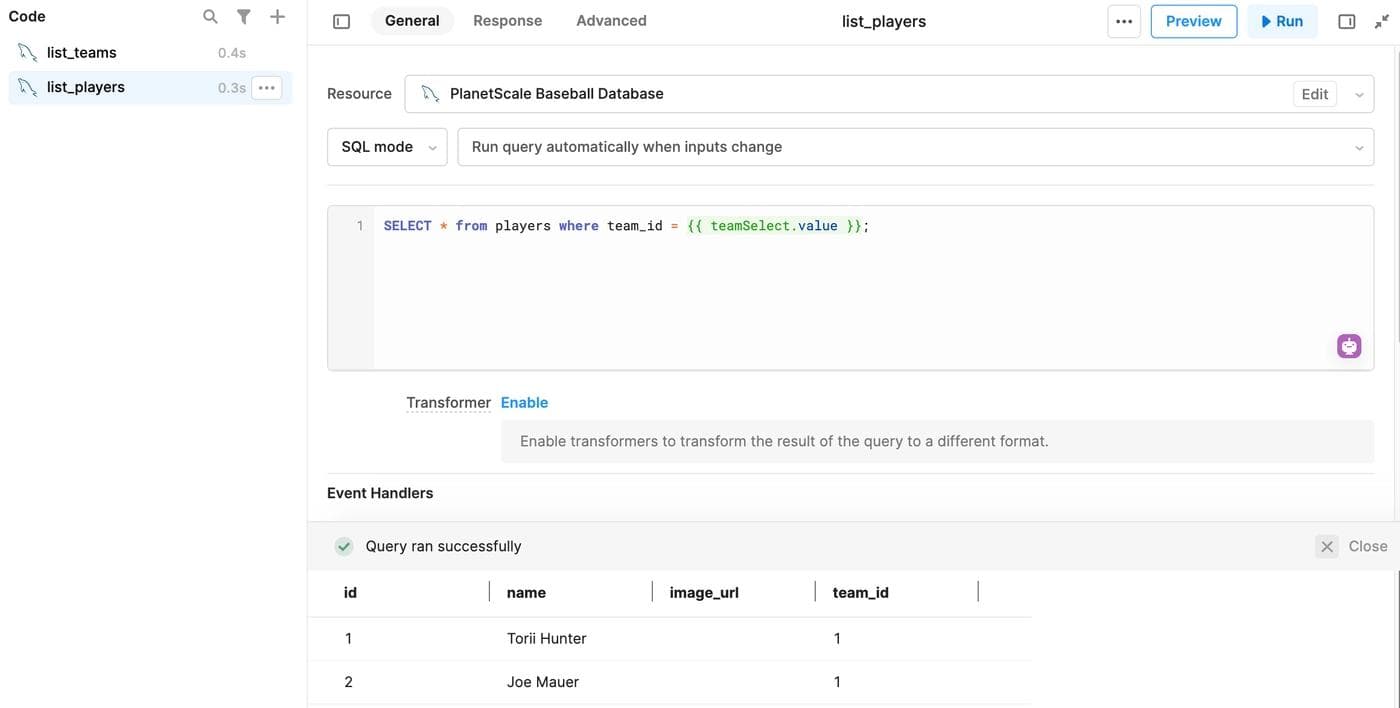
The SQL for this query is below, for your copy/pasting pleasure. It assumes that you renamed your select component to teamSelect.
1SELECT * from players where team_id = {{ teamSelect.value }};
Next, let's drag in a table to display the players for the current team. The query you just created should be helpfully pre-selected as the data source behind the table. You can resize and configure columns as you prefer!
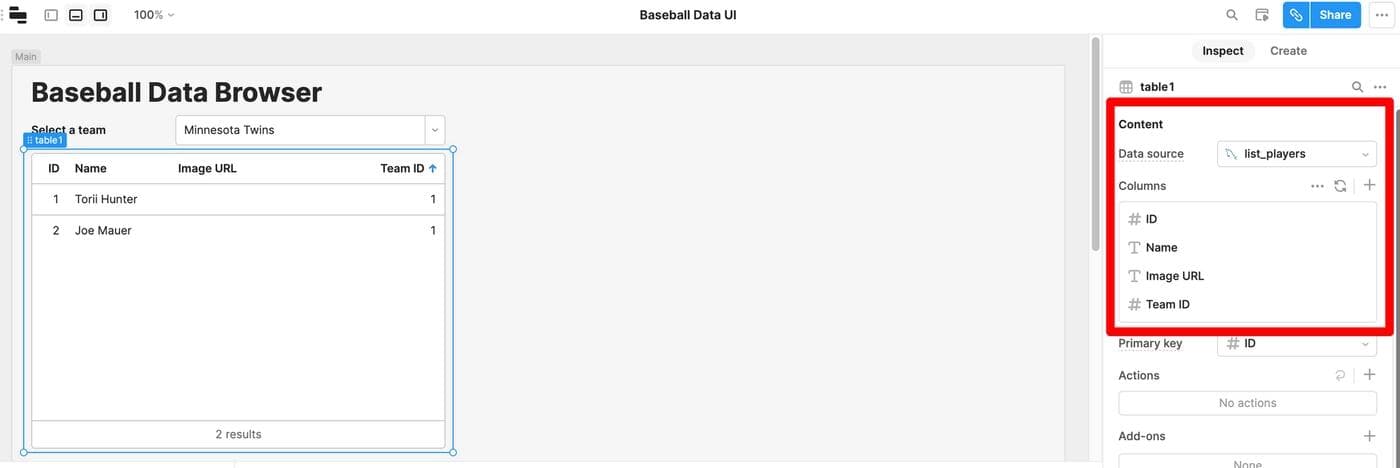
Go ahead and play around with your select component - this list of players should update dynamically!
In this tutorial, we barely scratched the surface of what's possible when you use Retool and PlanetScale together. But now that you know how to connect these two systems, you're well on your way to building powerful internal tools. If you have any questions, or would just like to say hi, please be sure to visit our community forums and Discord server. We'd love to hear about what you're building!
Reader