

This tutorial is going to walk through how to build a Retool app that uses the SendGrid API to send emails to your customers – in just under an hour (yes, one hour). If you’re using another ESP like Mailgun, the same principles apply (some assembly required).
Here’s what our finished app is going to look like:
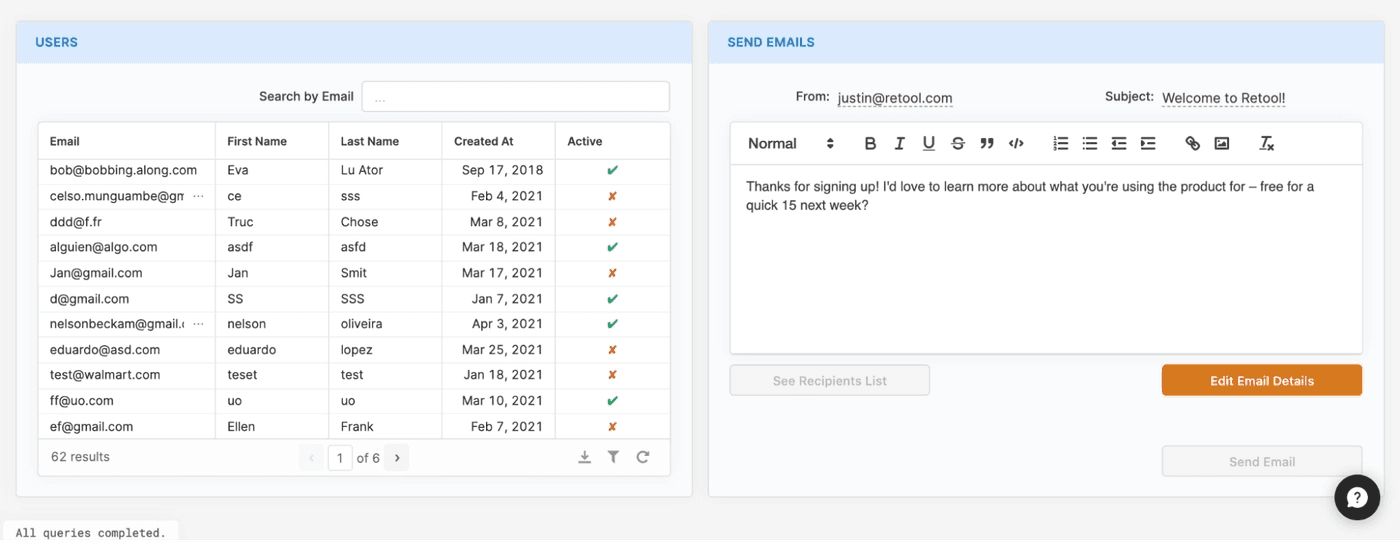
On the left, we’re pulling a list of users from a Postgres DB. On the right, we’ve got a rich text editor for writing your emails, a modal to edit email details, another modal for viewing selected recipients, and a big ol’ button to send emails out to the users selected in the table.
(You can clone this app as a template and use it right away here, if you're so inclined.)
Before we get anywhere, we’ll need to get SendGrid hooked up to your Retool account. The bulk of the work here is actually in SendGrid – you’ll need to create a new API Key, set the appropriate permissions, and then paste that key into Retool.
To get started, head to your SendGrid account and click on Settings → API Keys (or you can go straight to this link). Click on the “Create API Key” button, and choose the level of access you want to give your key. Here we’ve chosen “Restricted Access” (which lets us set domain specific permissions), and given the key full write access to mail send APIs (which is the whole point of our app).

Give your key a nice descriptive name up top, and then click “Create & View” – don’t worry too much about permissions, you can always edit them after the fact. But once SendGrid shows you your key value, make sure to keep that in a safe place – they won’t show it to you again.
Once you’ve got your API key from SendGrid, head over to your Retool account and click on the “Resources” top nav. Click the “Create new” button and find the SendGrid option. You’ll be prompted for a name and your key.
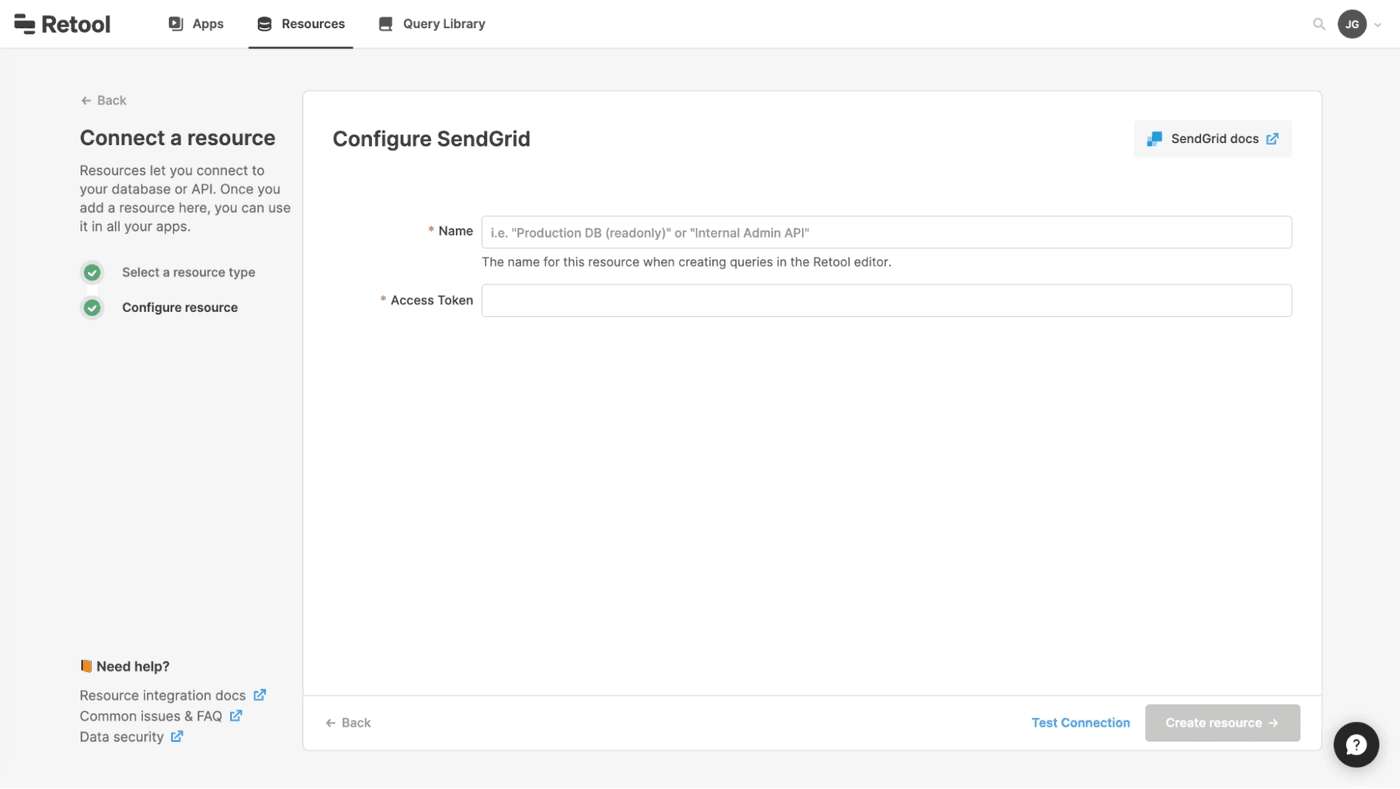
Pick a useful name, paste in your key, click “Create resource” and then you should be good to go.
To send emails, we’ll need people to send them to. The basic UI we’re going to build is a table to display our users and a search input to filter by email.
The first thing we’ll want to do is write a query to get our users. We’ve already got a Postgres DB connected, but you can read more about how to do that here. Another thing worth noting – you can swap out Postgres for whatever your system of record is for users (Firebase, MongoDB, etc.).
Head to your query editor (bottom panel) and click “New” – then choose your Postgres resource from the dropdown. We’ll put in a basic query to select some user info – most important being their email. Note that we’ve set a LIMIT here for simplicity’s sake, but you can server-side paginate Retool tables if you’ve got too many users to display.
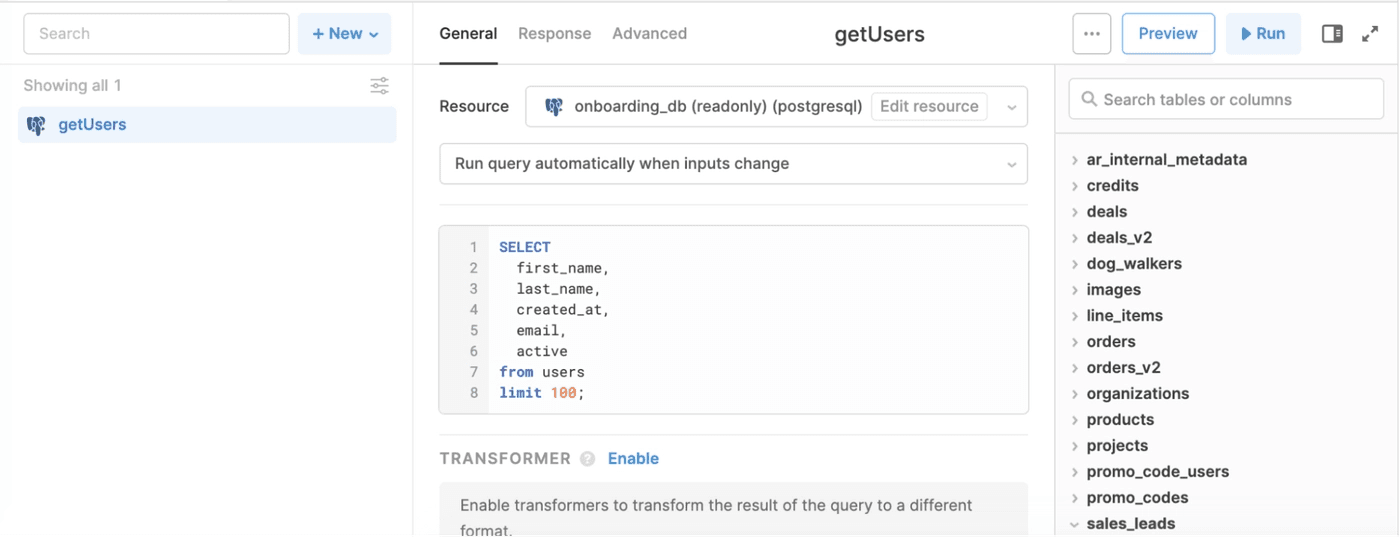
Click “Save and run” and you should see some results populate at the bottom of your screen.
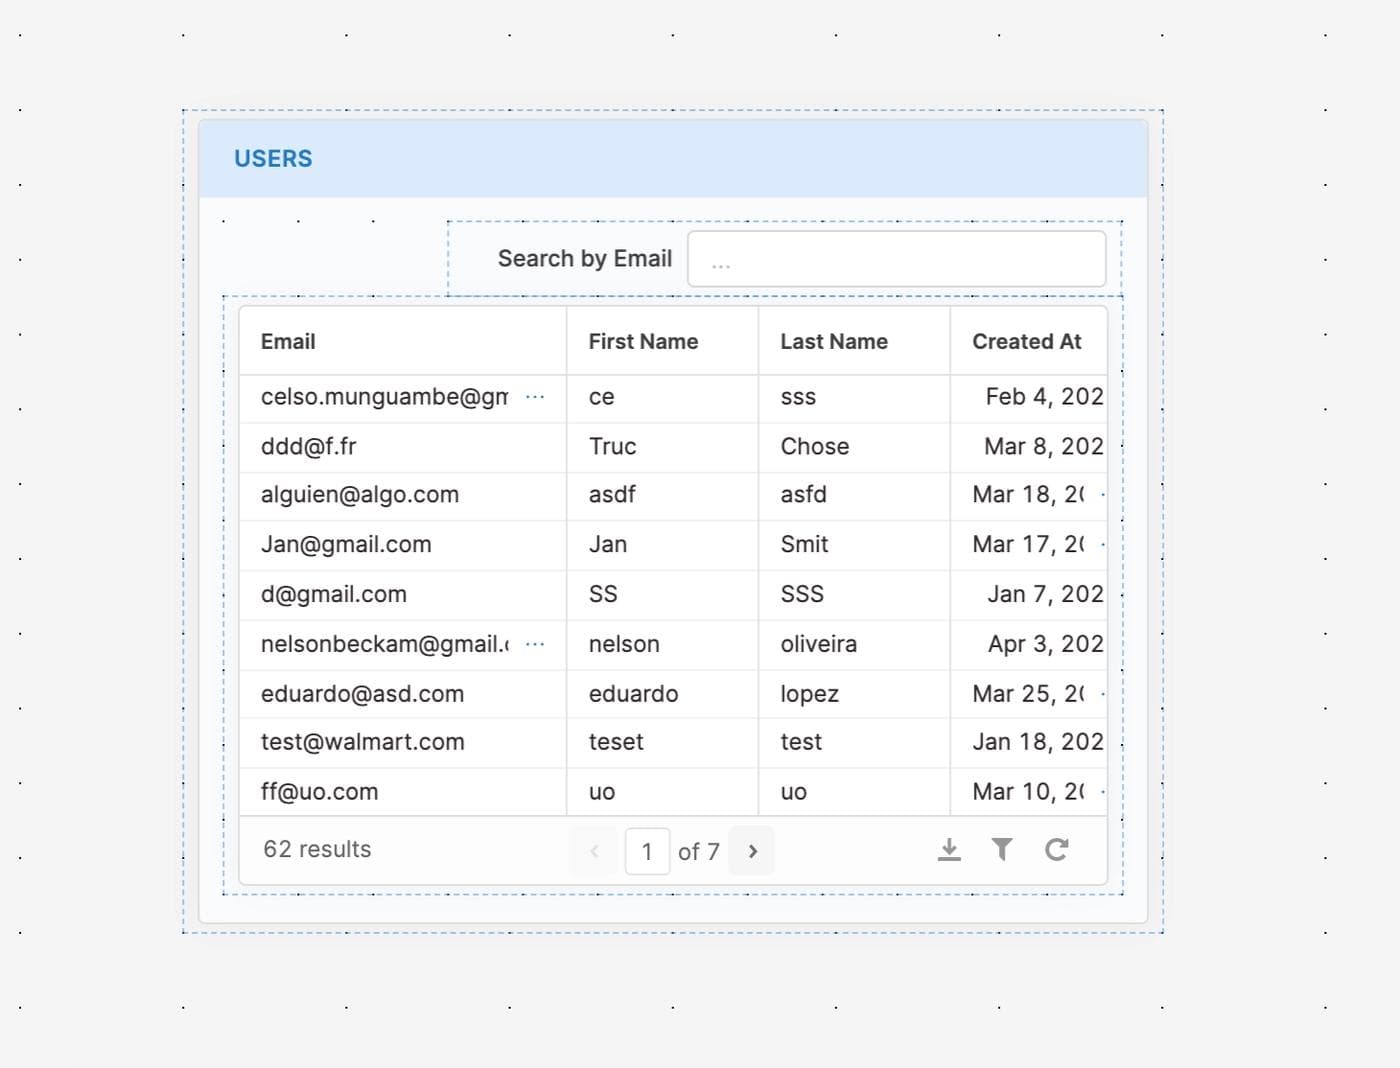
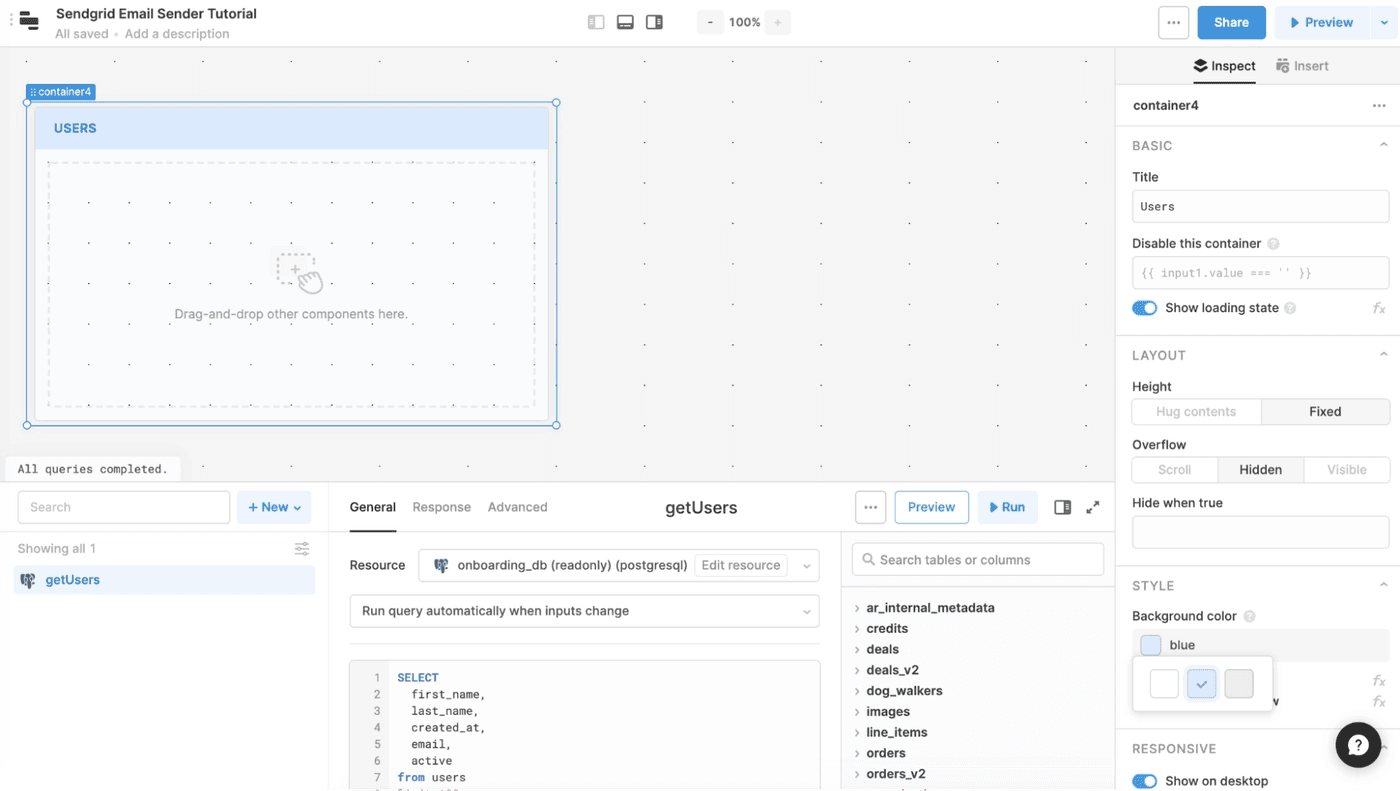
Next, we’re going to pull this data into a table to display to our users. We’ll start with a container component to make things look nice – we can update the title to “Users” and change the background color to blue (or whatever you like).
Next, we’ll drag a table component inside the container. It should automatically populate with the data from our getUsers query – but if it doesn’t you can always edit the “Data” property on the right hand side with a reference to {{ getUsers.data }}.
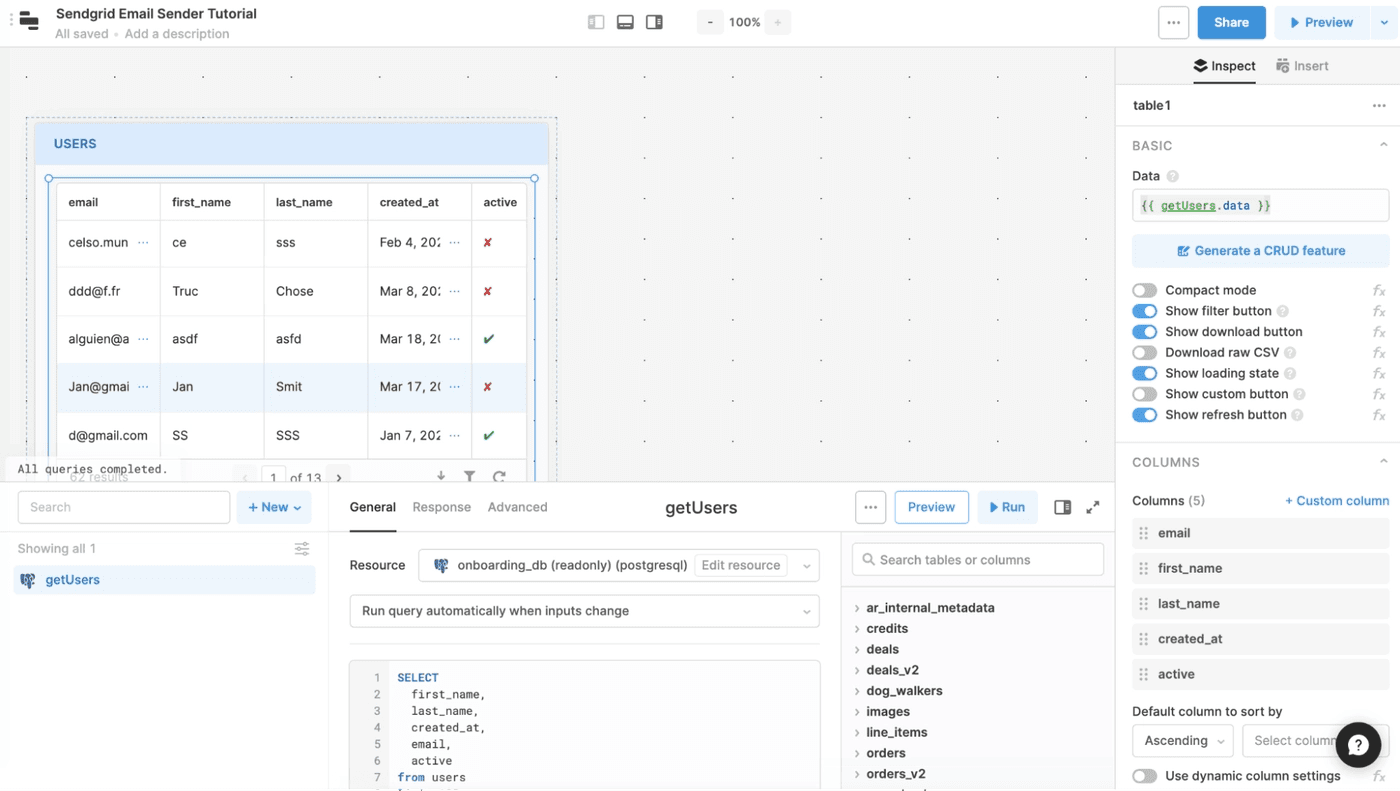
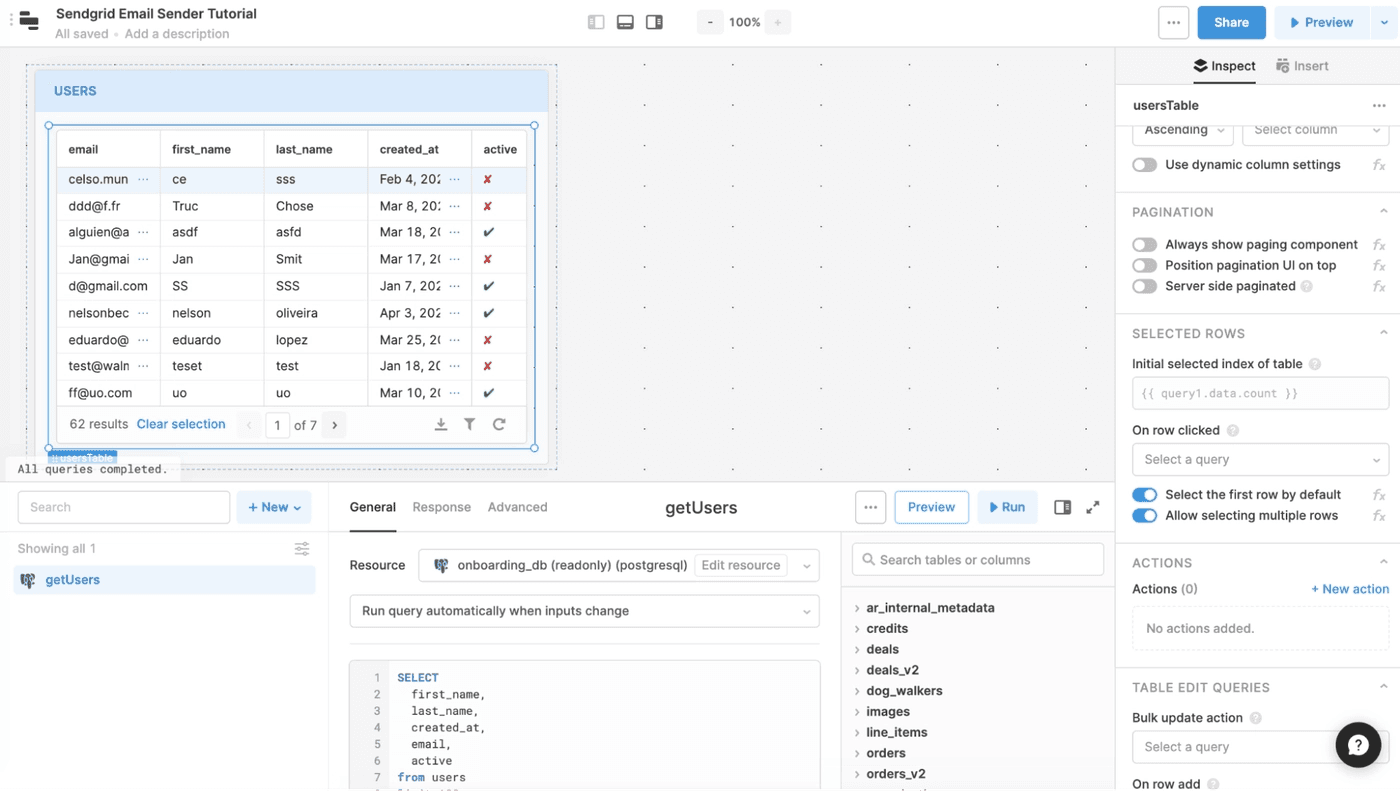
To make the table more readable, we’ll also toggle on “Compact mode.” Let’s also enable selecting multiple rows in the table so we can send emails to multiple users. Finally, we’ll rename the table component by clicking on the name up top in your right sidebar – I called it usersTable for easy referencing.
The last thing we want here before moving on to working with SendGrid (which is why you’re here) is to make this table searchable. We’ll start by dragging a text input component onto the canvas, and updating the label to tell our user it’s a search bar:
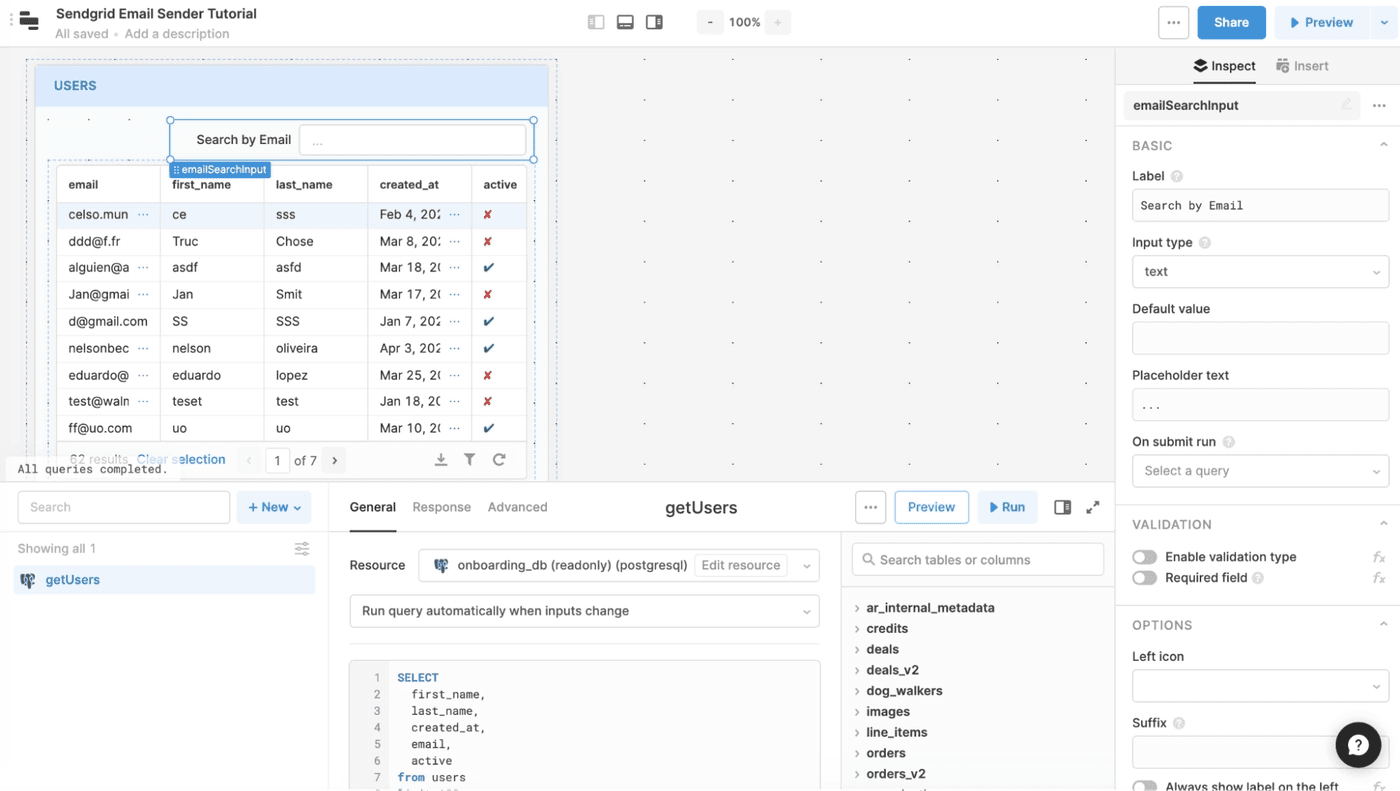
To get this to actually do something though, we’ll need to update our getUsers query to reference its value.
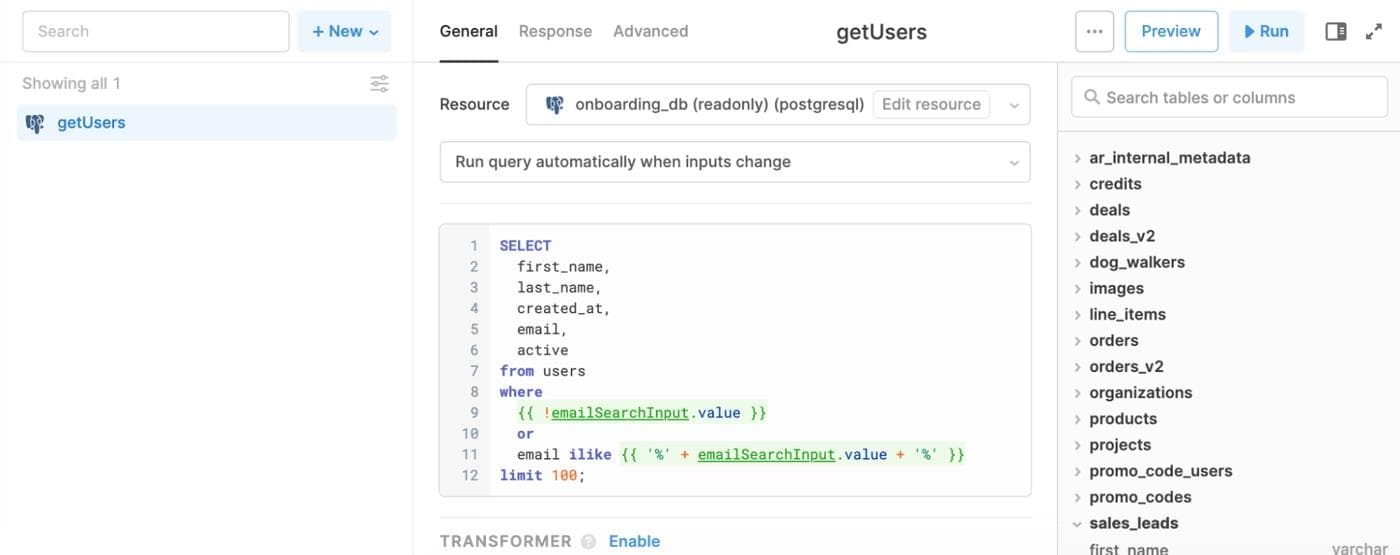
The first part of the WHERE clause has the query return all results if the text input is empty – and the rest filters for email addresses that contain whatever is in the search bar when it is populated. Click “Save and run” and voila! You’ve got working search on your users table.
The basic email sender UI has three pieces to it:
- A main container where our users can write an email and click to send it via SendGrid
- A details pop up modal that lets users adjust email settings and details
- A recipients modal that lets users see their selected recipients
Here’s what the finished product is going to look like:

Let’s get started!
For the basics, we’ll lay down a container and a rich text editor component inside.
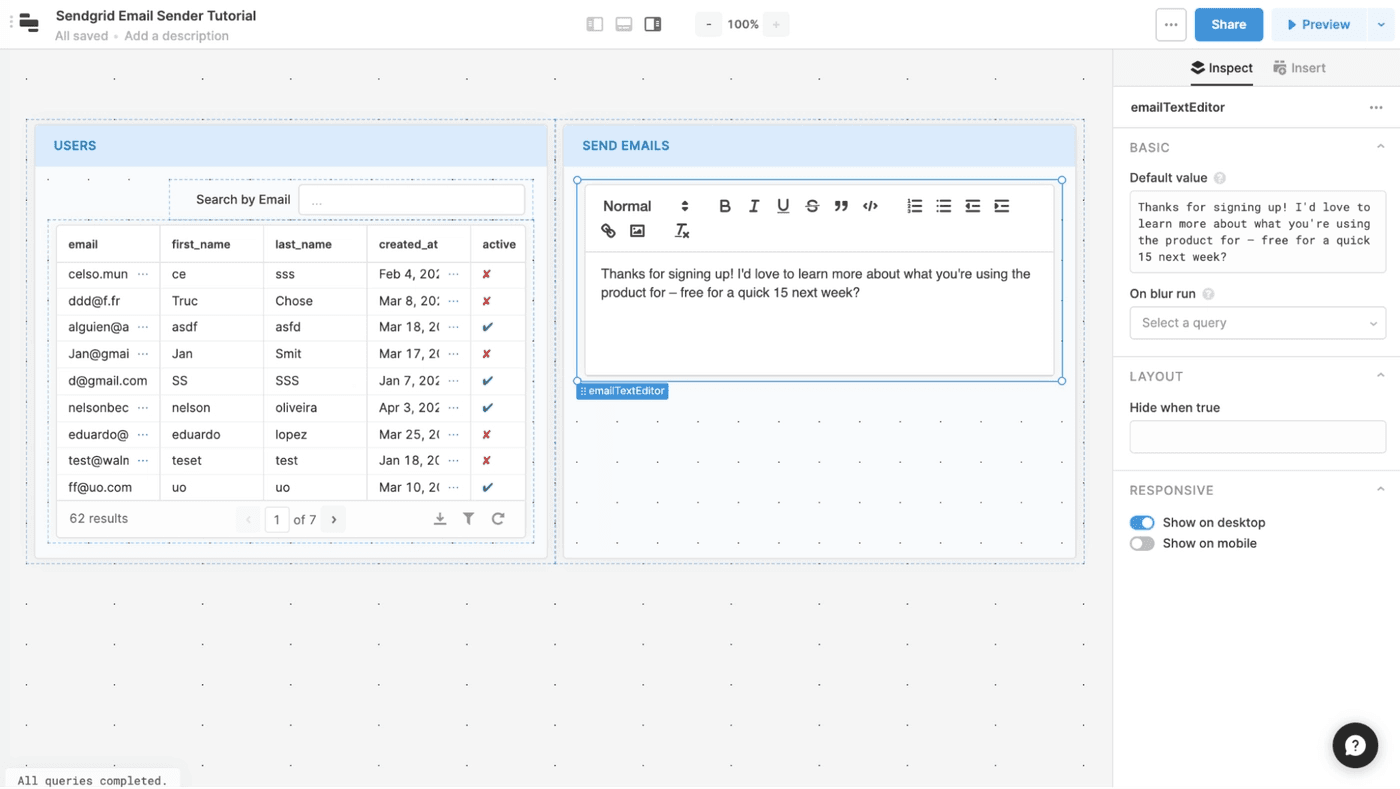
You can add in default text for the rich text editor if you plan on sending standardized emails – also keep in mind that you can add Javascript within {{ }}, so you can make that default text dynamic too.
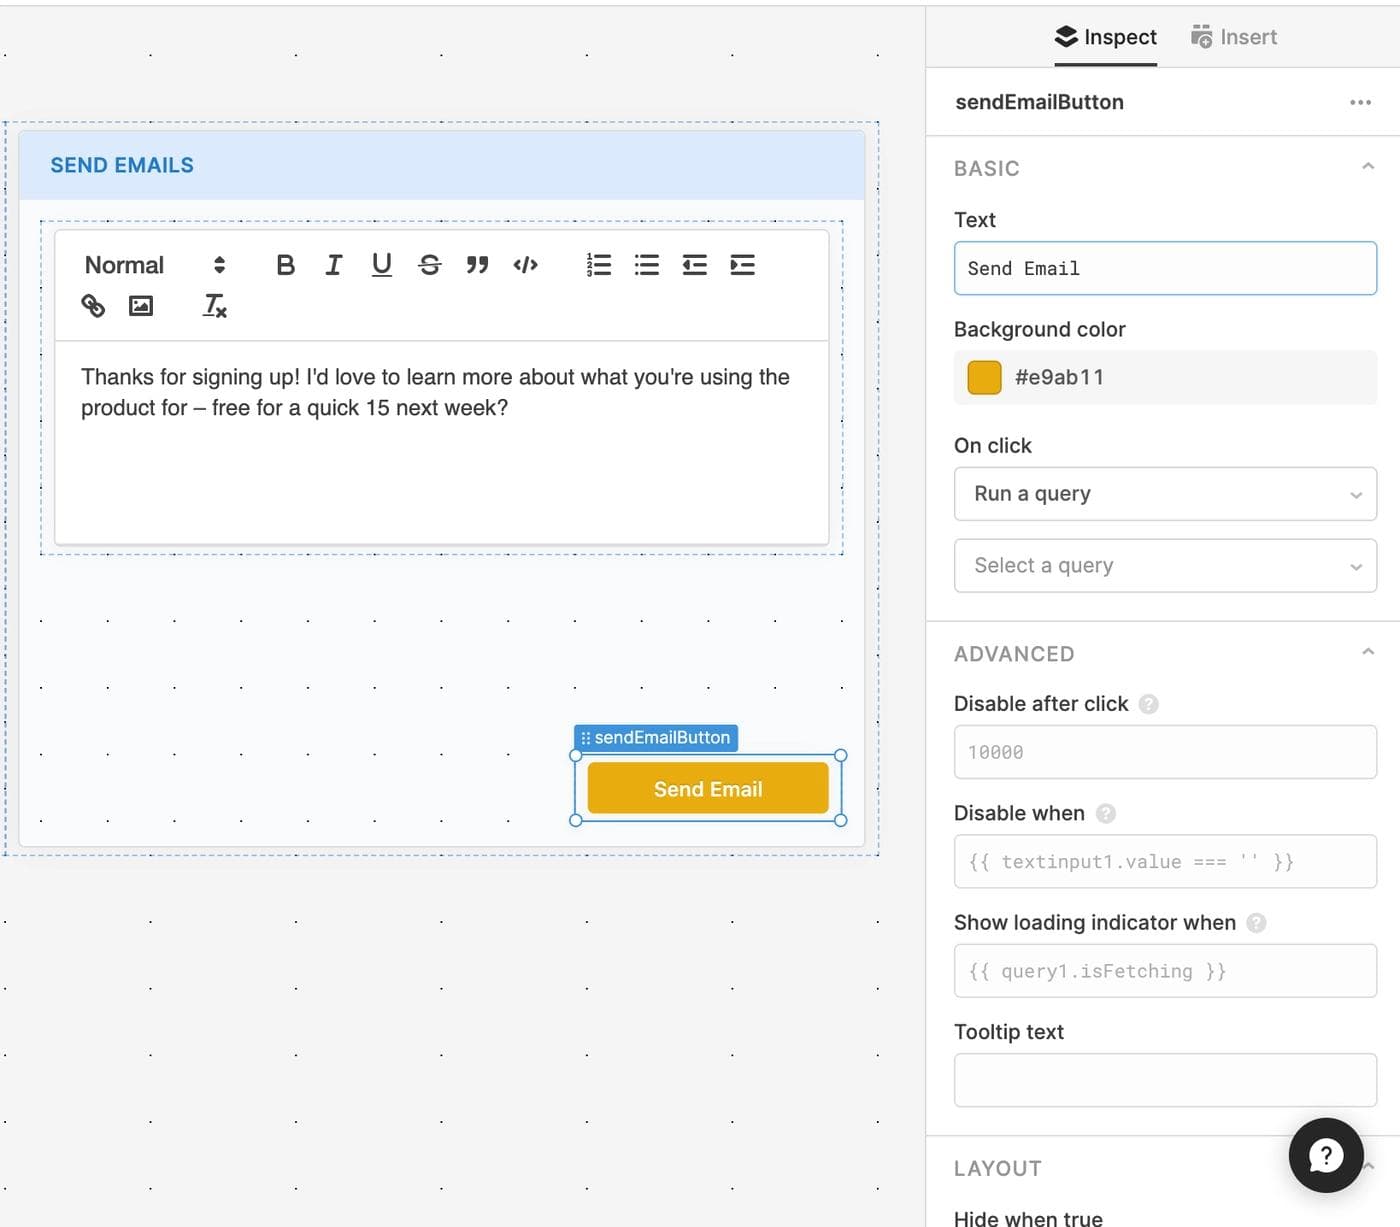
Next, let’s add a button to actually send the email(s) – we’ll hook this up to a request to the SendGrid API in just a bit.
To make sure our end users know who they’re sending emails to, we can also add an alert component that displays how many users in the table are selected.
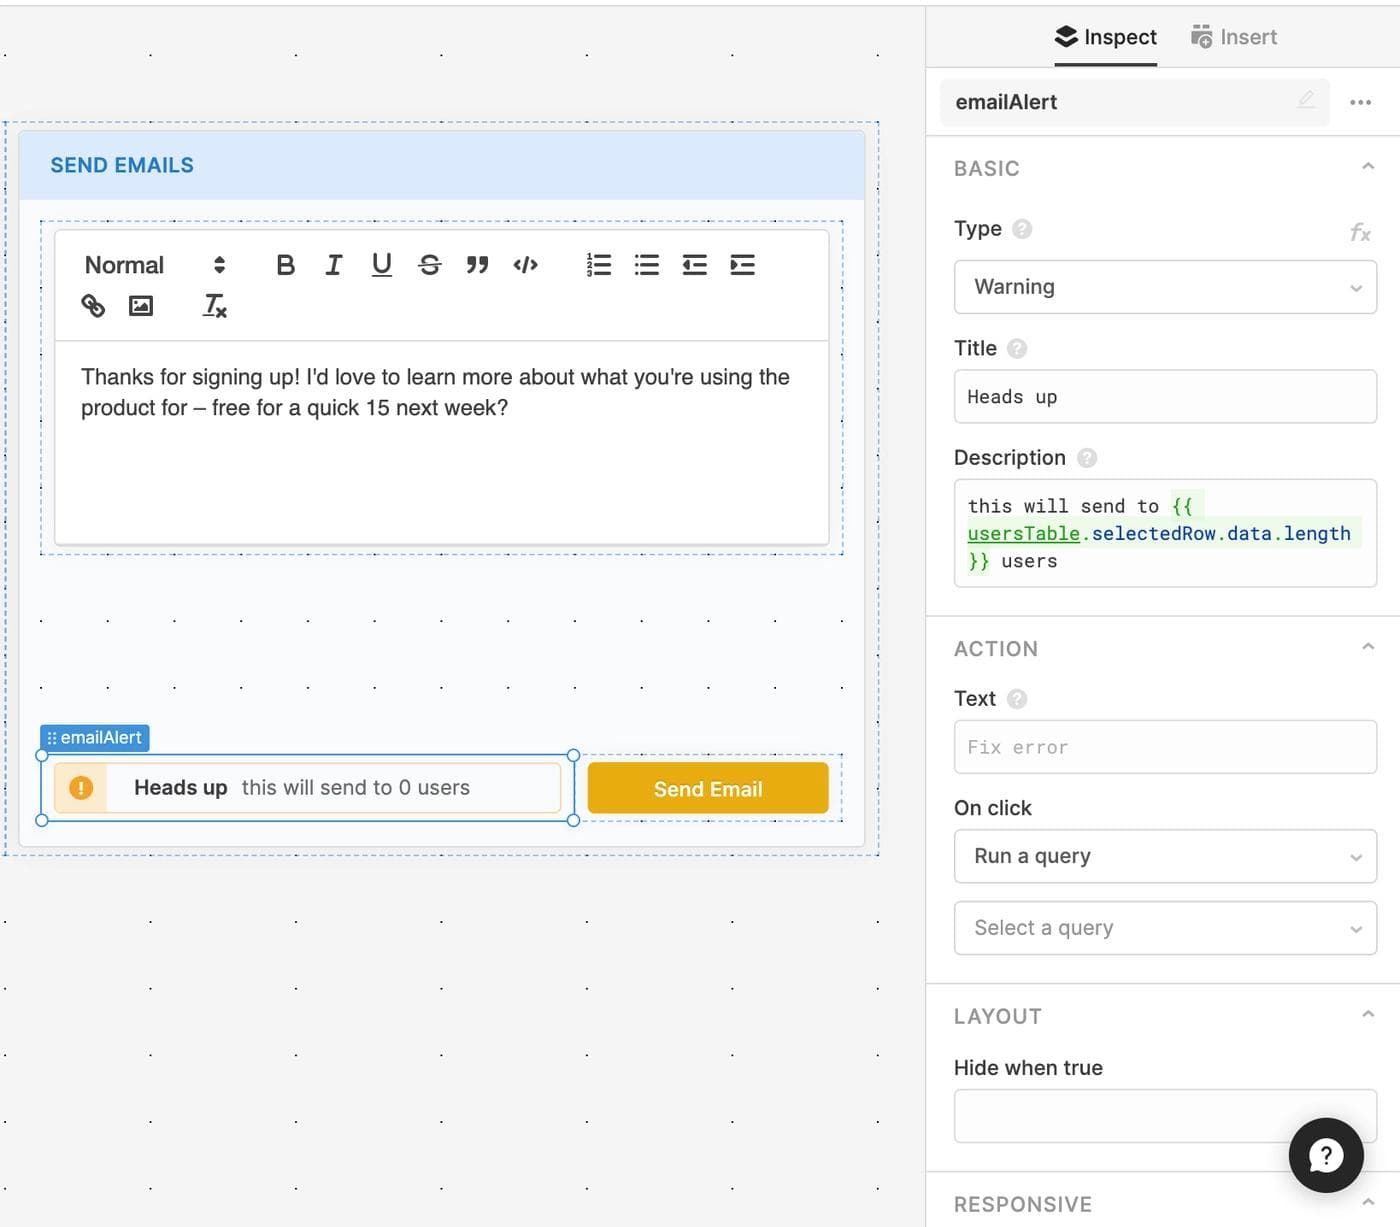
We’ve updated the alert type to “Warning” and added “Heads up” as the title. In the “Description” field, you can add a little Javascript that references the number of selected rows in our users table, which will be the number of users we’re sending emails to. If you want to get really fancy, you can add in a ternary operator that changes “users” to “user” if there’s only one row selected:
This will send emails to {{ usersTable.selectedRow.data.length }} {{ usersTable.selectedRow.data.length > 1 ? 'users' : 'user' }}
We definitely don’t want to alert our users if 0 rows are selected – as no emails will be sent – so let’s conditionally hide this alert component in that case:
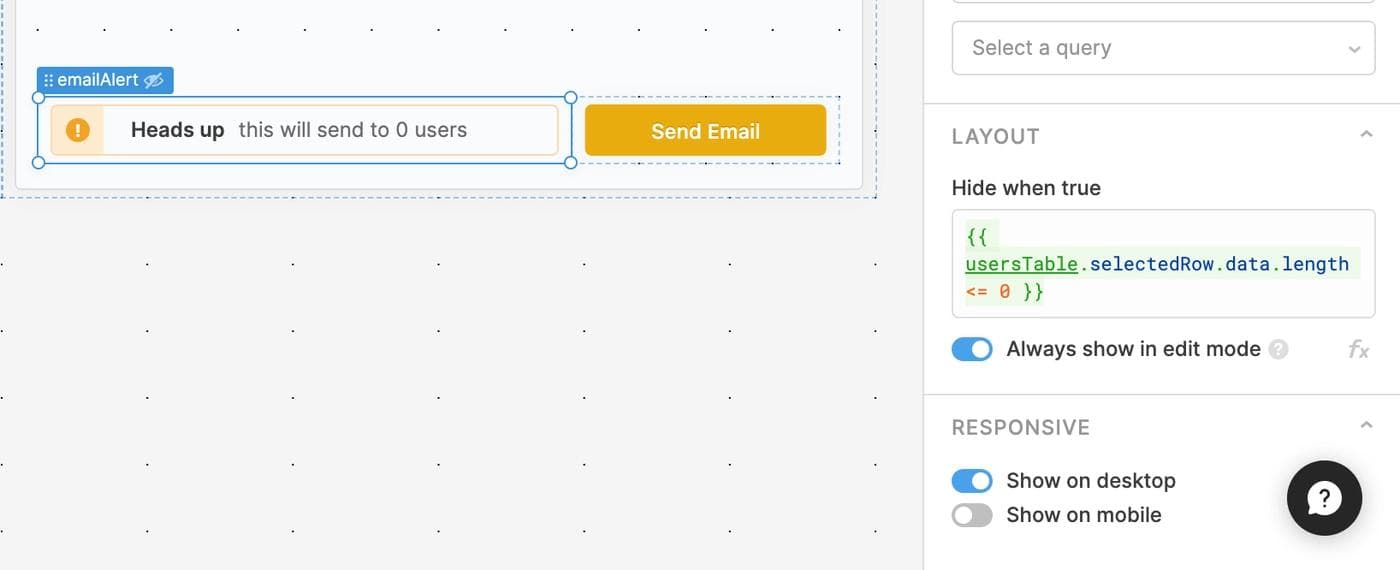
You can switch on the “Always show in edit mode” toggle to always show the component when you’re editing (in my experience, this makes things easier). The little “eye” icon to the right of the emailAlert component label shows that the component is going to be hidden in end user mode.
We want our users to be able to edit email details, like CCs and BCCs. Let’s drag a modal component into the email container:
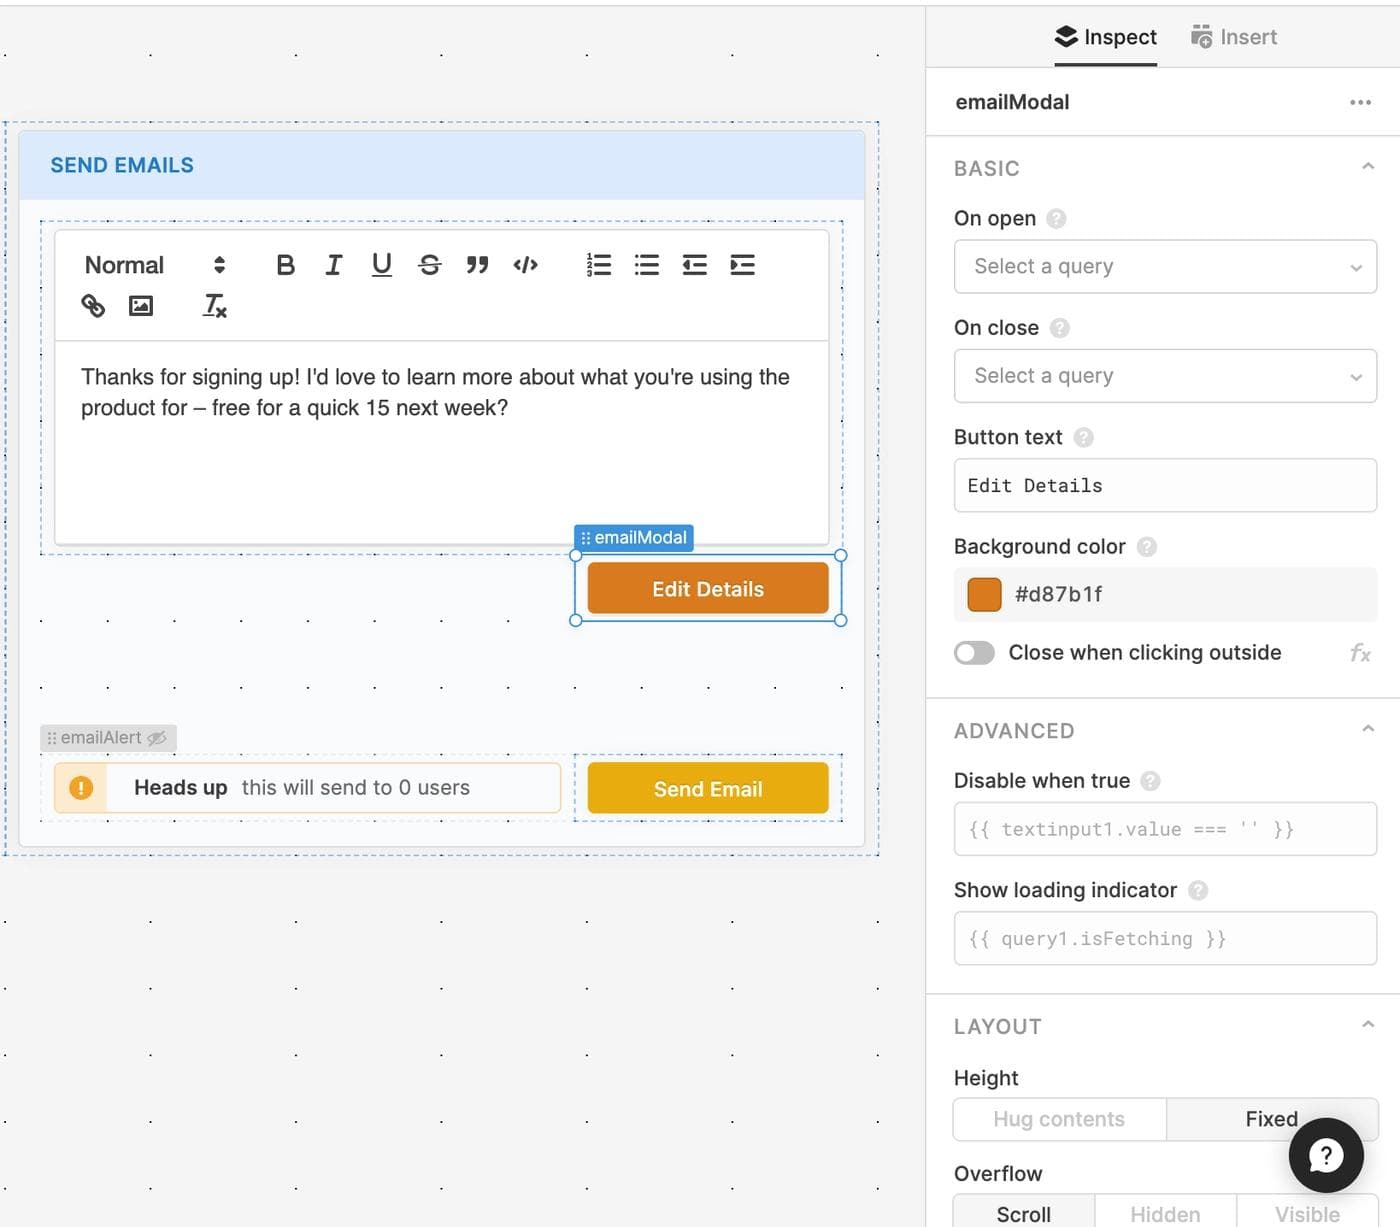
You can update the name to something like emailModal, change the button text to whatever you like, and also work with the background color. When you click the button (if you’re in edit mode, you’ll need to double click it), you should see a modal open.
In the modal, we’re going to add 3 groups of components for editing email details:
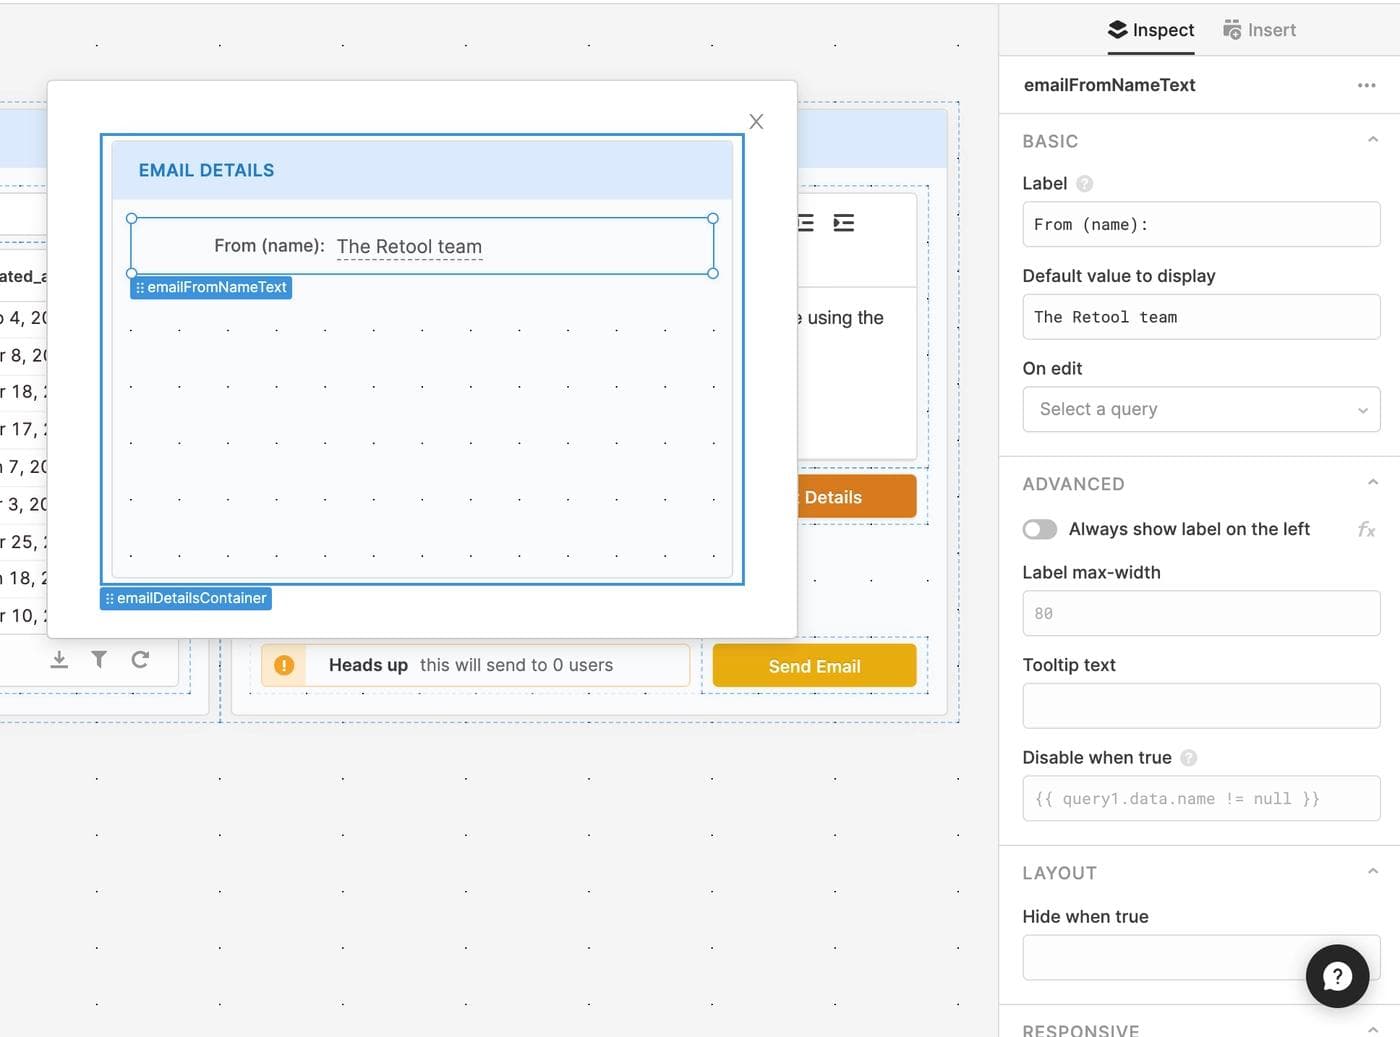
- A “from” name field
This one is pretty straightforward. Drag an editable text component into your modal, and set the default value to whatever you want (in our case, “The Retool Team” works).
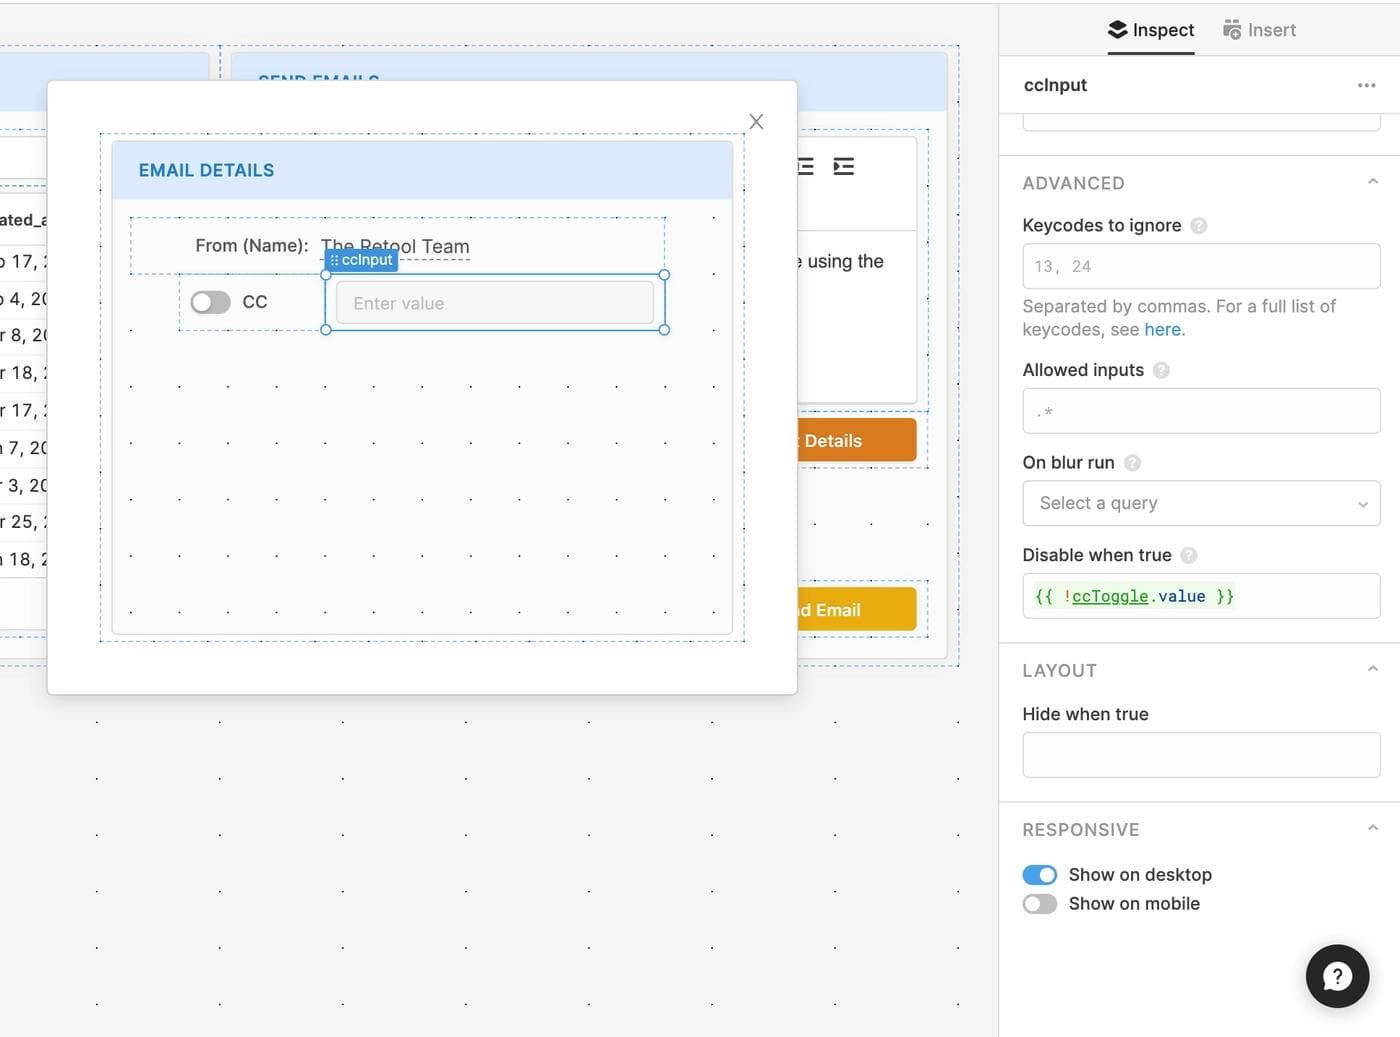
- A “CC” field
Here, we’re going to use a toggle component and a text input component. Starting with the toggle:
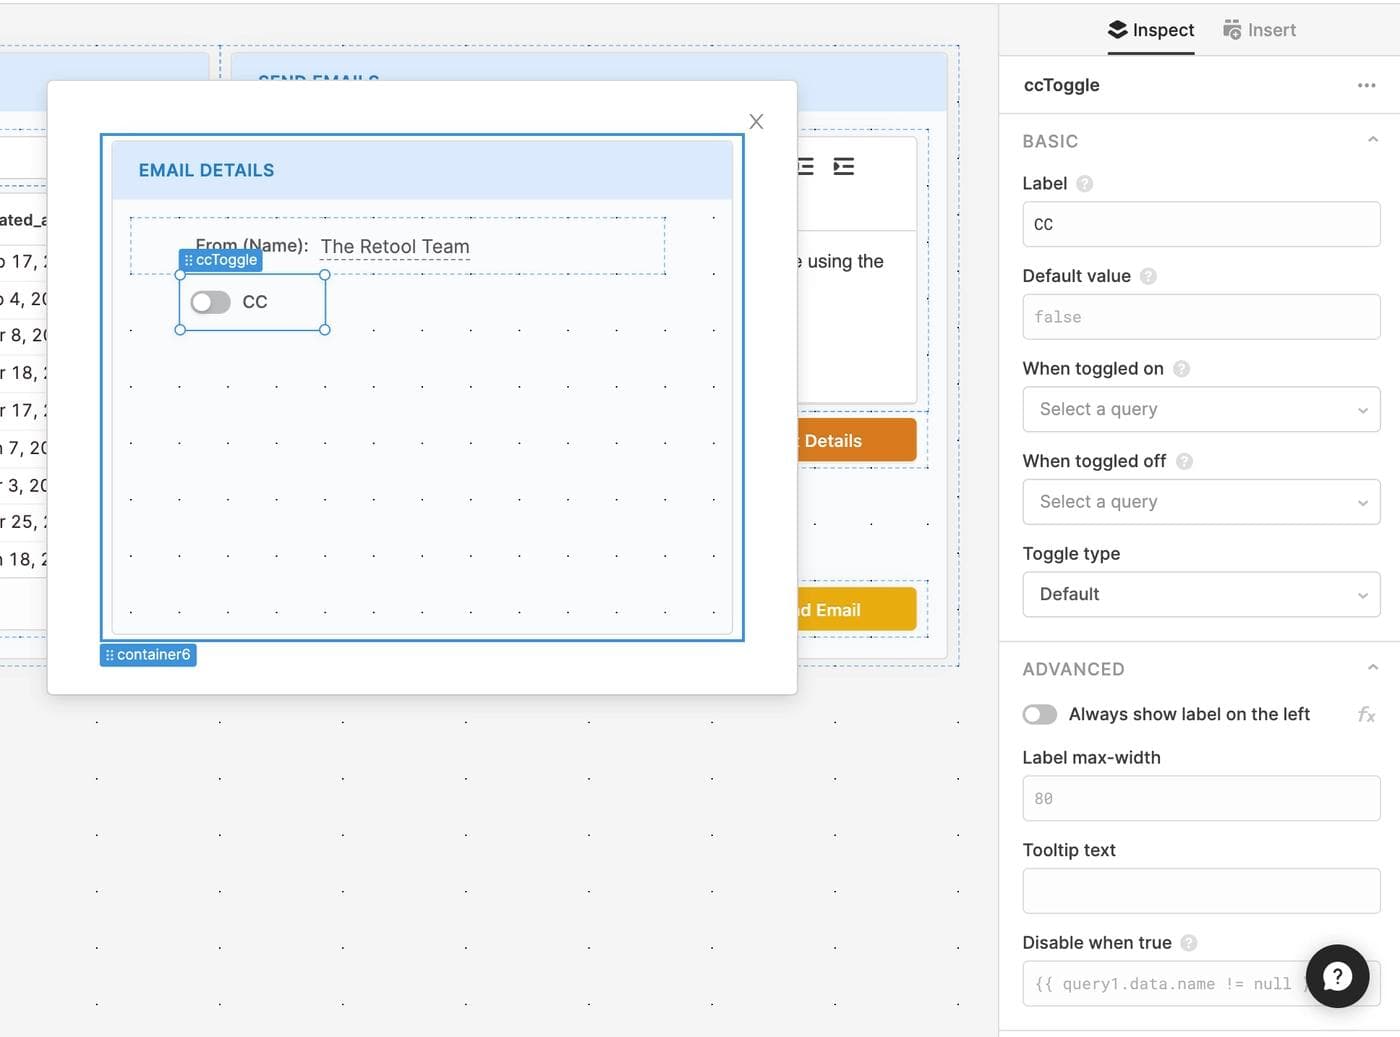
Then we’ll add a text input, remove the label, and set it to be disabled when the toggle is toggled off:
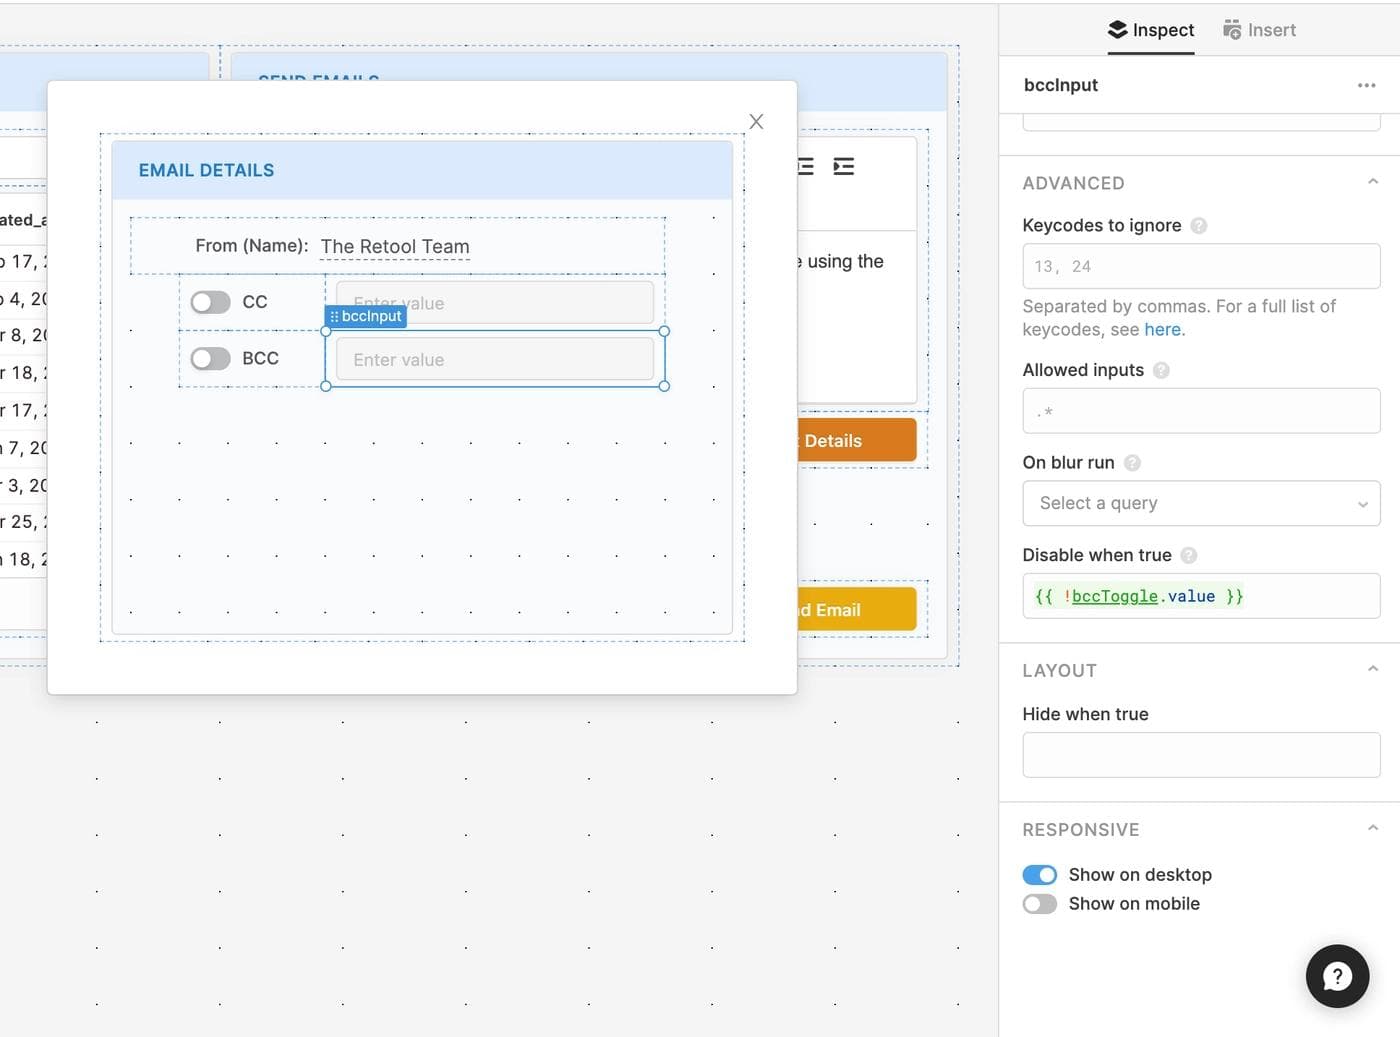
- A “BCC” field
Now, let’s follow the exact same steps as above, but with a BCC field:
Let’s also shrink the height of this container to make things look a bit cleaner.
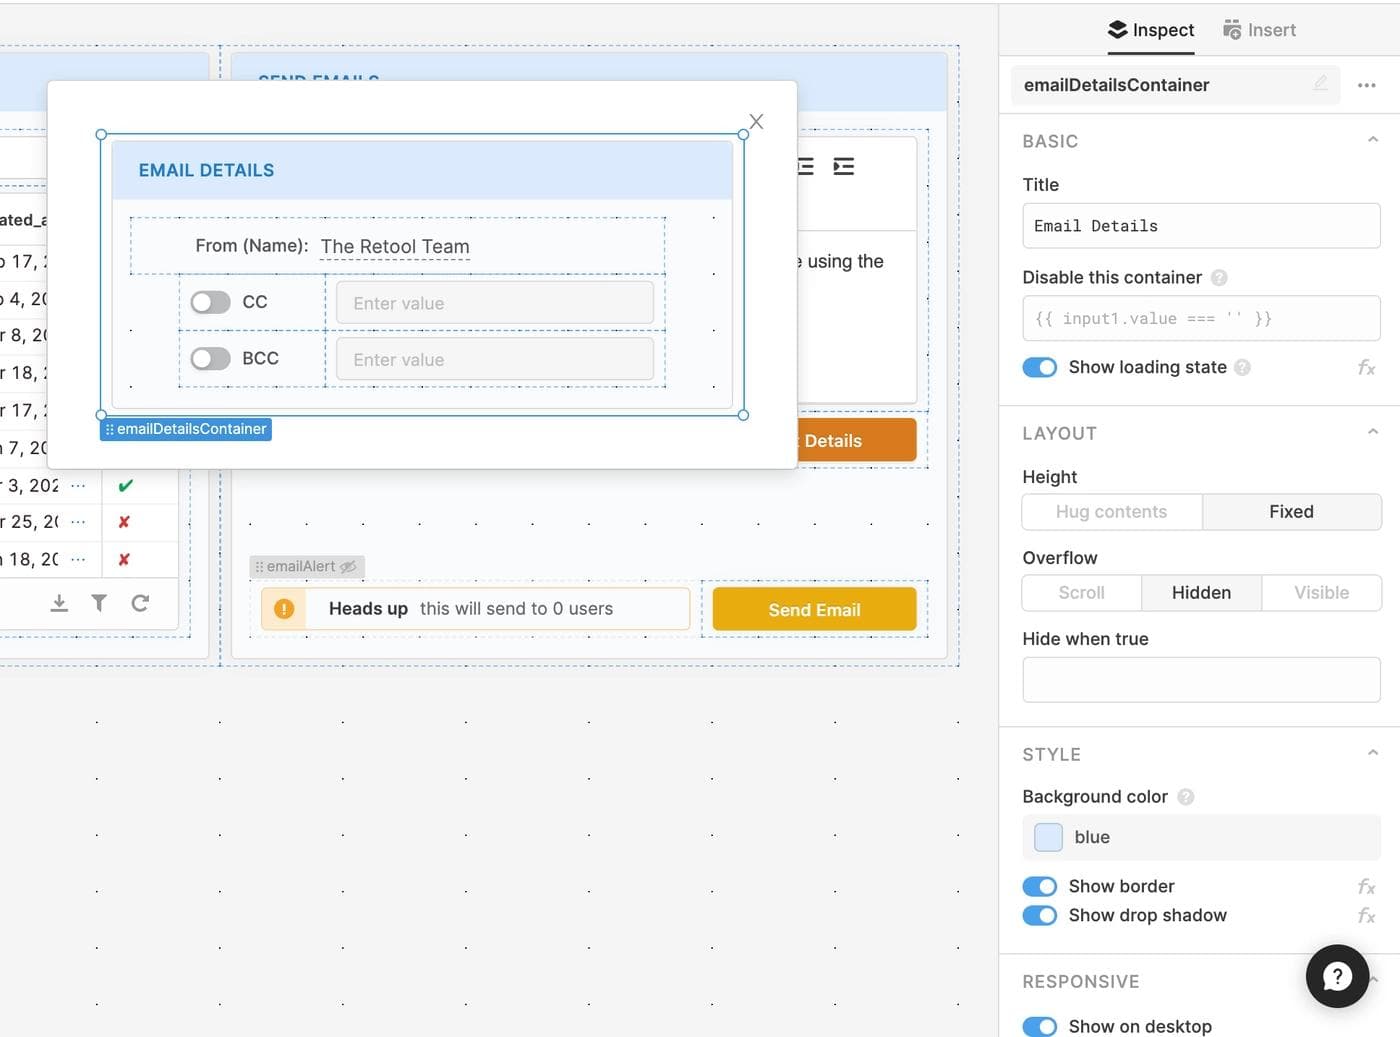
Since we have the modal set to hug its contents, it shrinks its height automatically to match that of the container (we could also use the “Hug contents” setting in the container itself!).
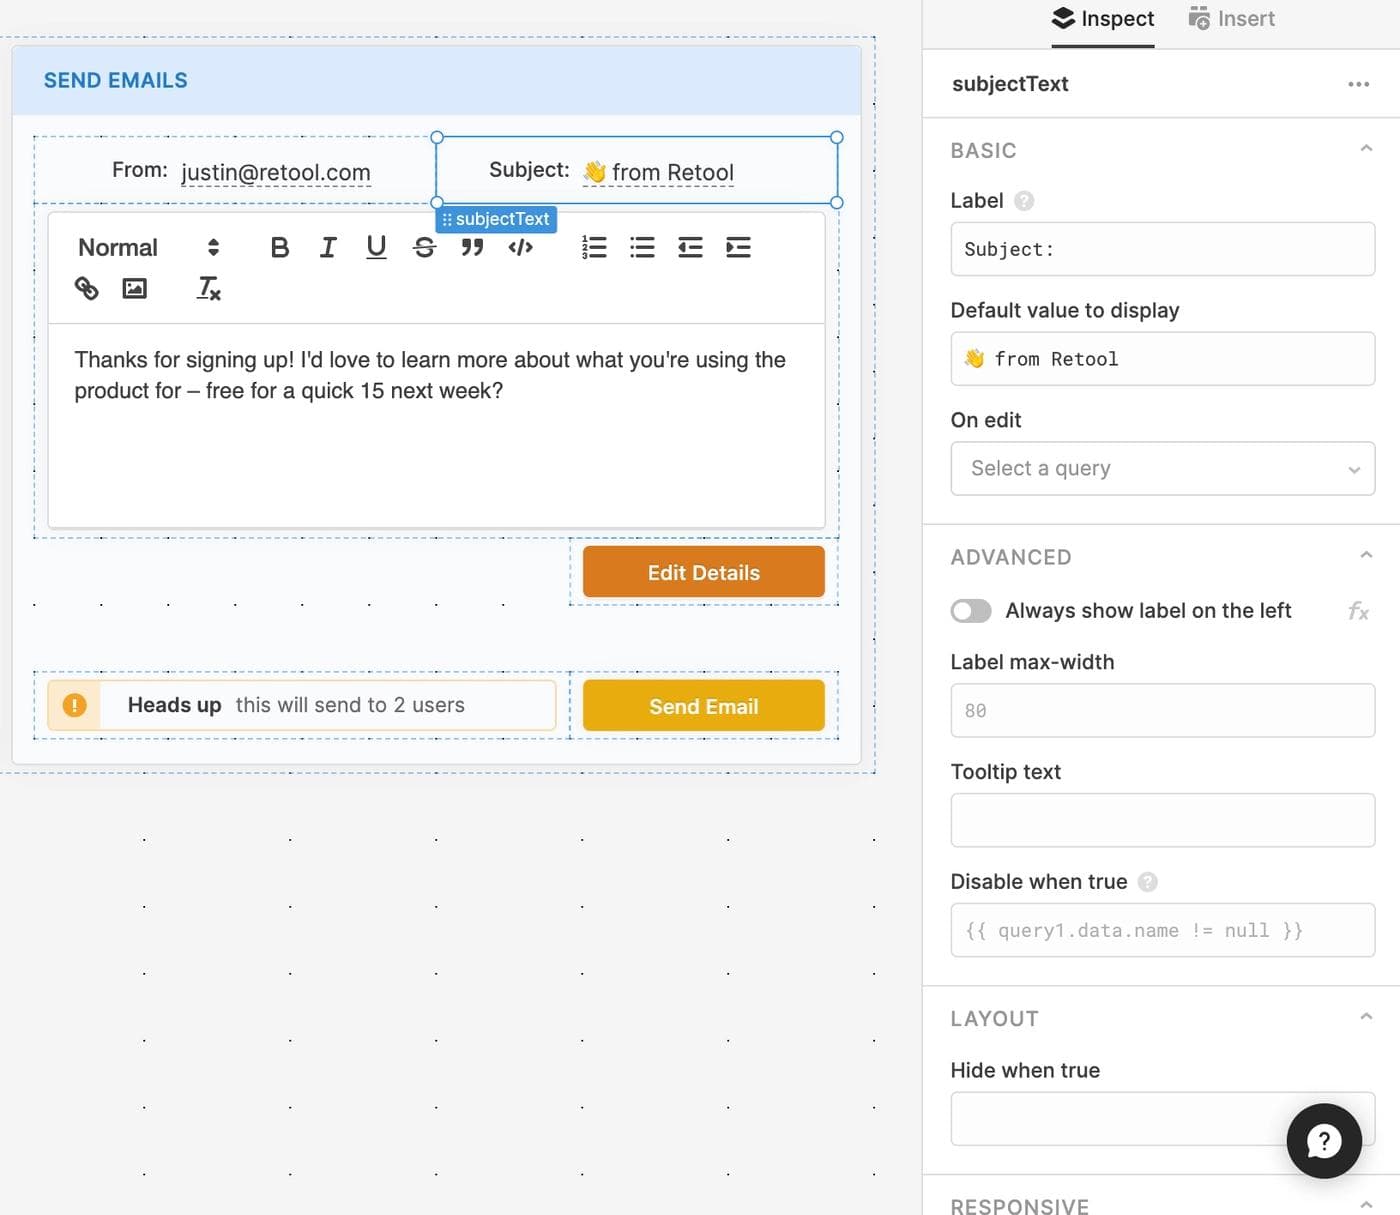
Finally, let’s add editable text fields for “from” and “subject” so our users can easily edit those on a per email basis.
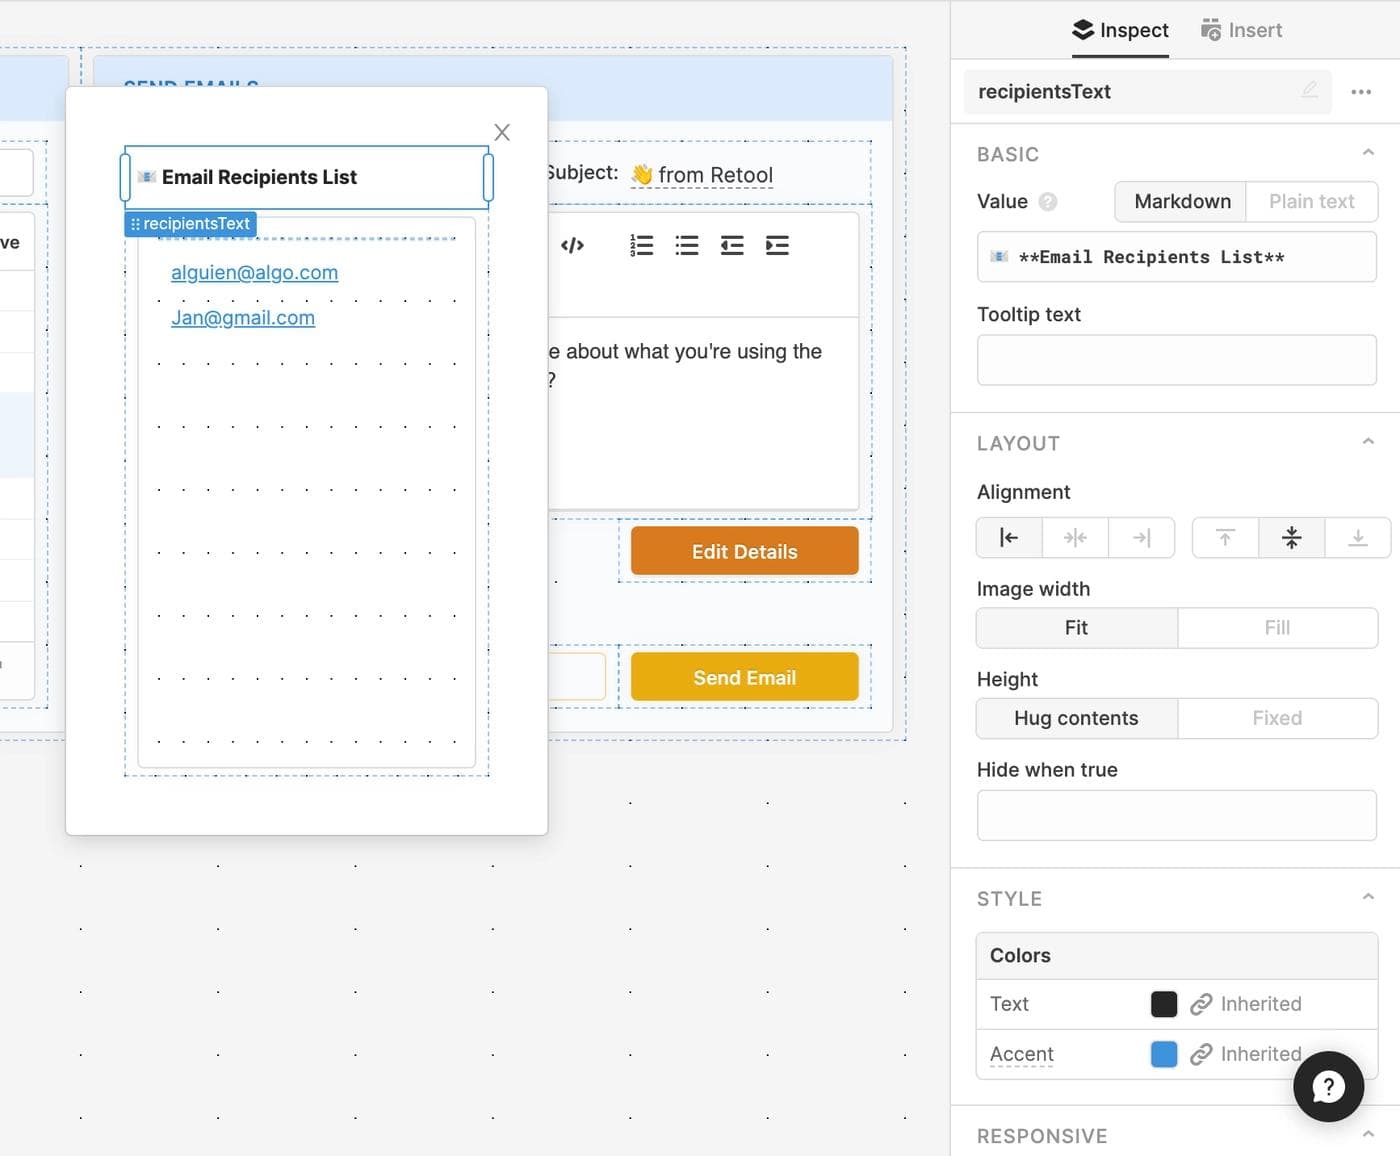
Now we’re ready to add the last part of our UI – the recipients list modal.
Start by dragging another modal component onto the canvas. Inside of this one, we’re going to add a listview component – it lets us create an arbitrarily long repeating list of components. In our case, it’s going to be a list of all of the emails we’ve selected from the table.
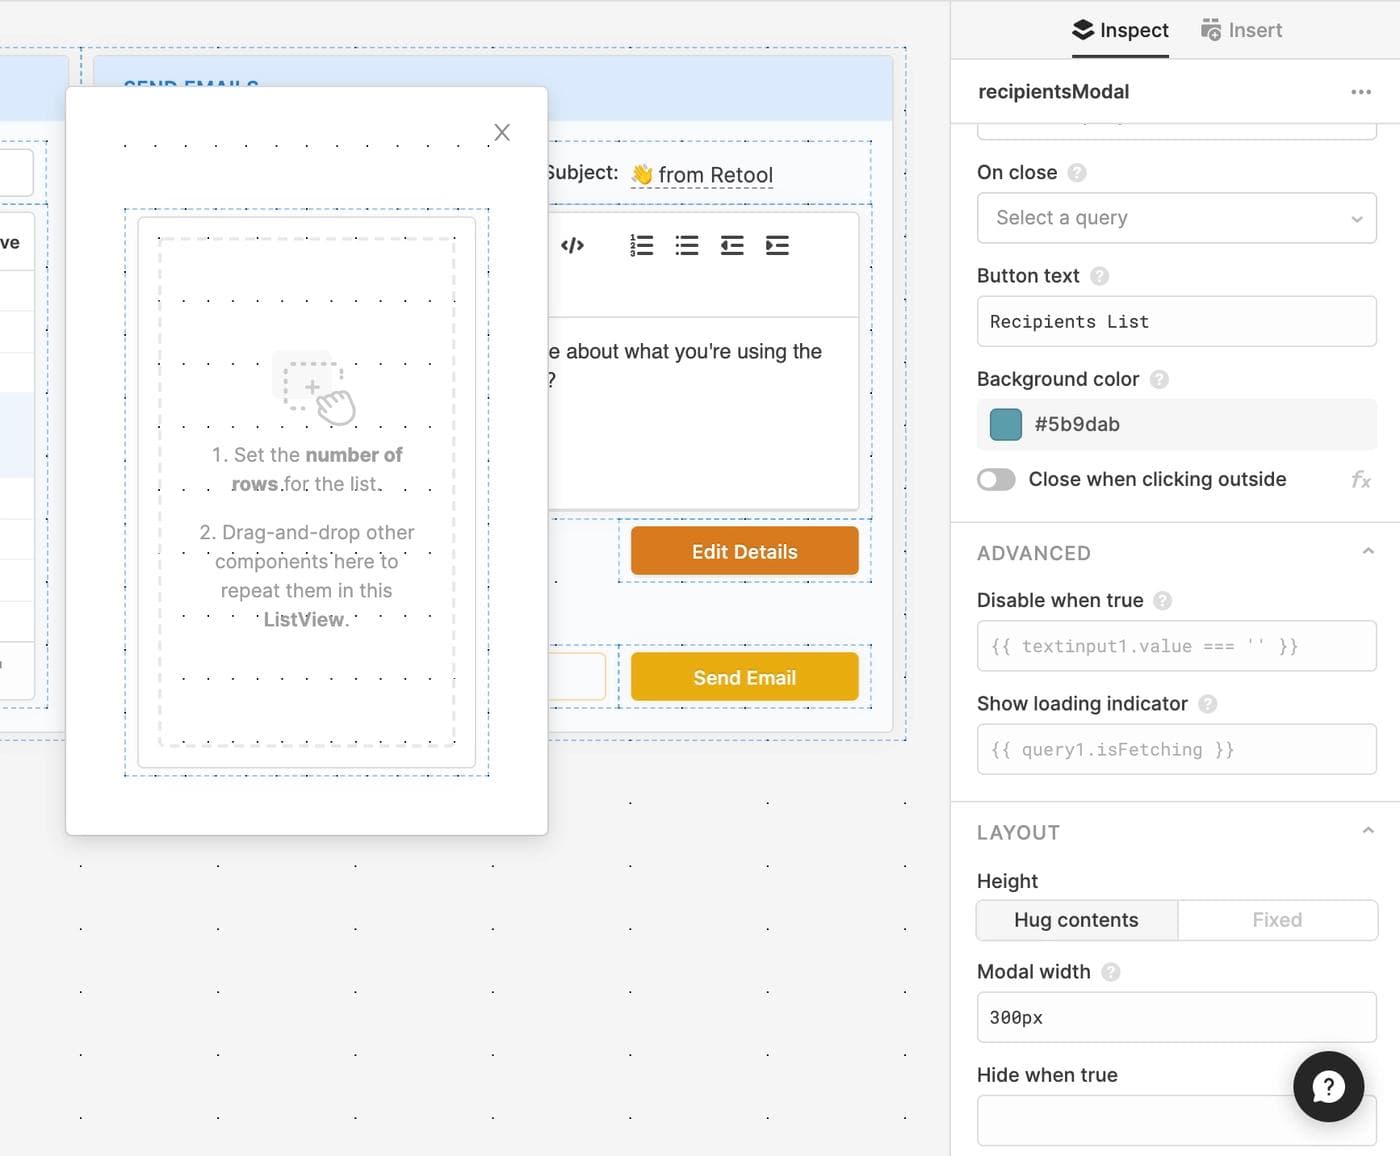
We’ve also set the modal to hug contents for height, updated the color to something more in scheme, and set the width to 300px for ease of viewing.
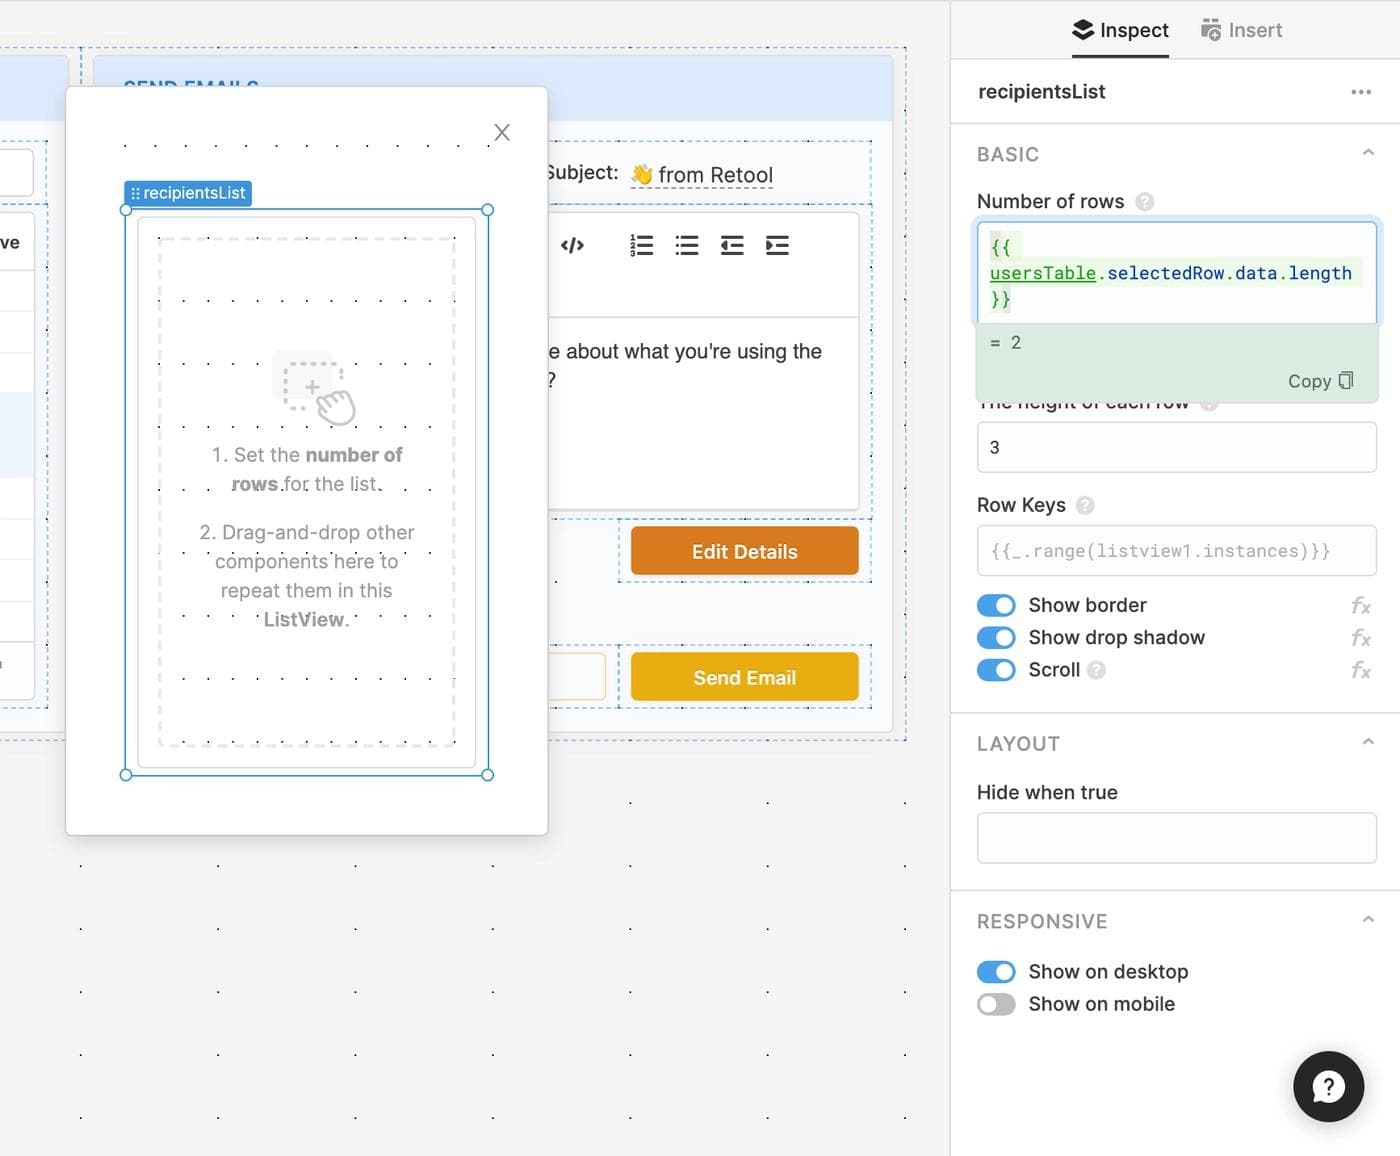
Now, for the listview – we need to set the number of rows, and then drag a text component into it that will act as our repeating component. For the number of rows, we’ll just reference the number of selected rows in the users table:
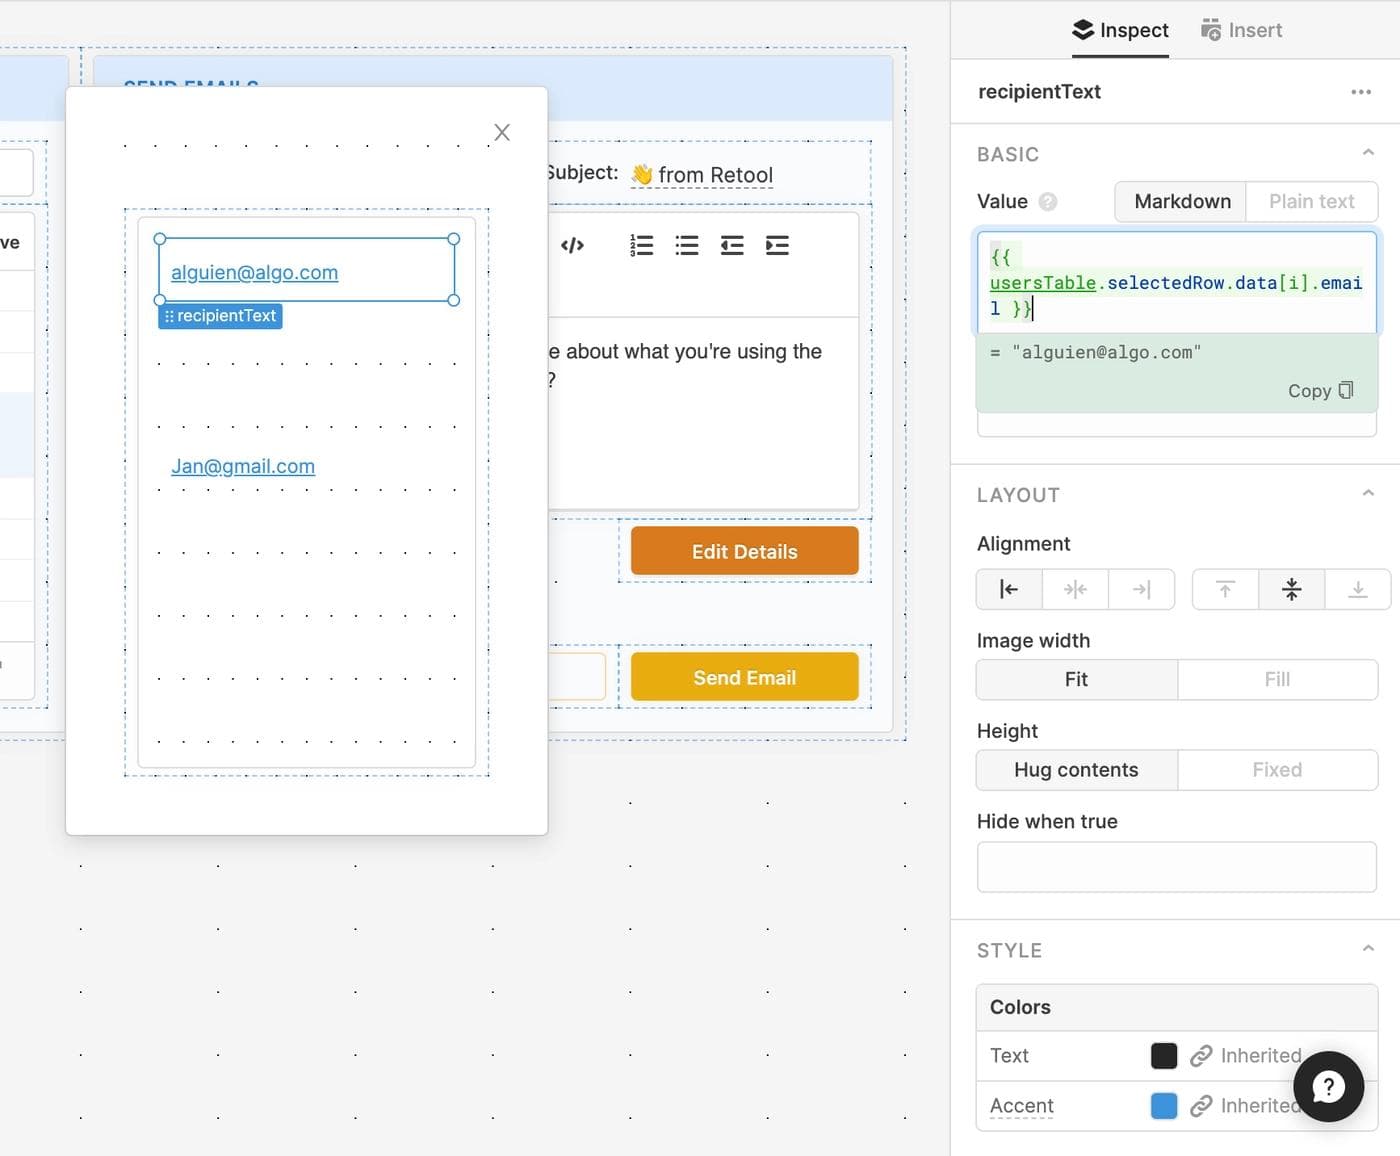
Next, we’ll drag a text component into the listview - you’ll see it repeat a few times (depending on how many rows you have selected in the table). In that text component, we’ll reference the current row of the listview with the i variable. So for the first row i will be 1, for the second row it will be 2, etc.
For more about how listviews and indices work (it’s complex!), check out our docs here.
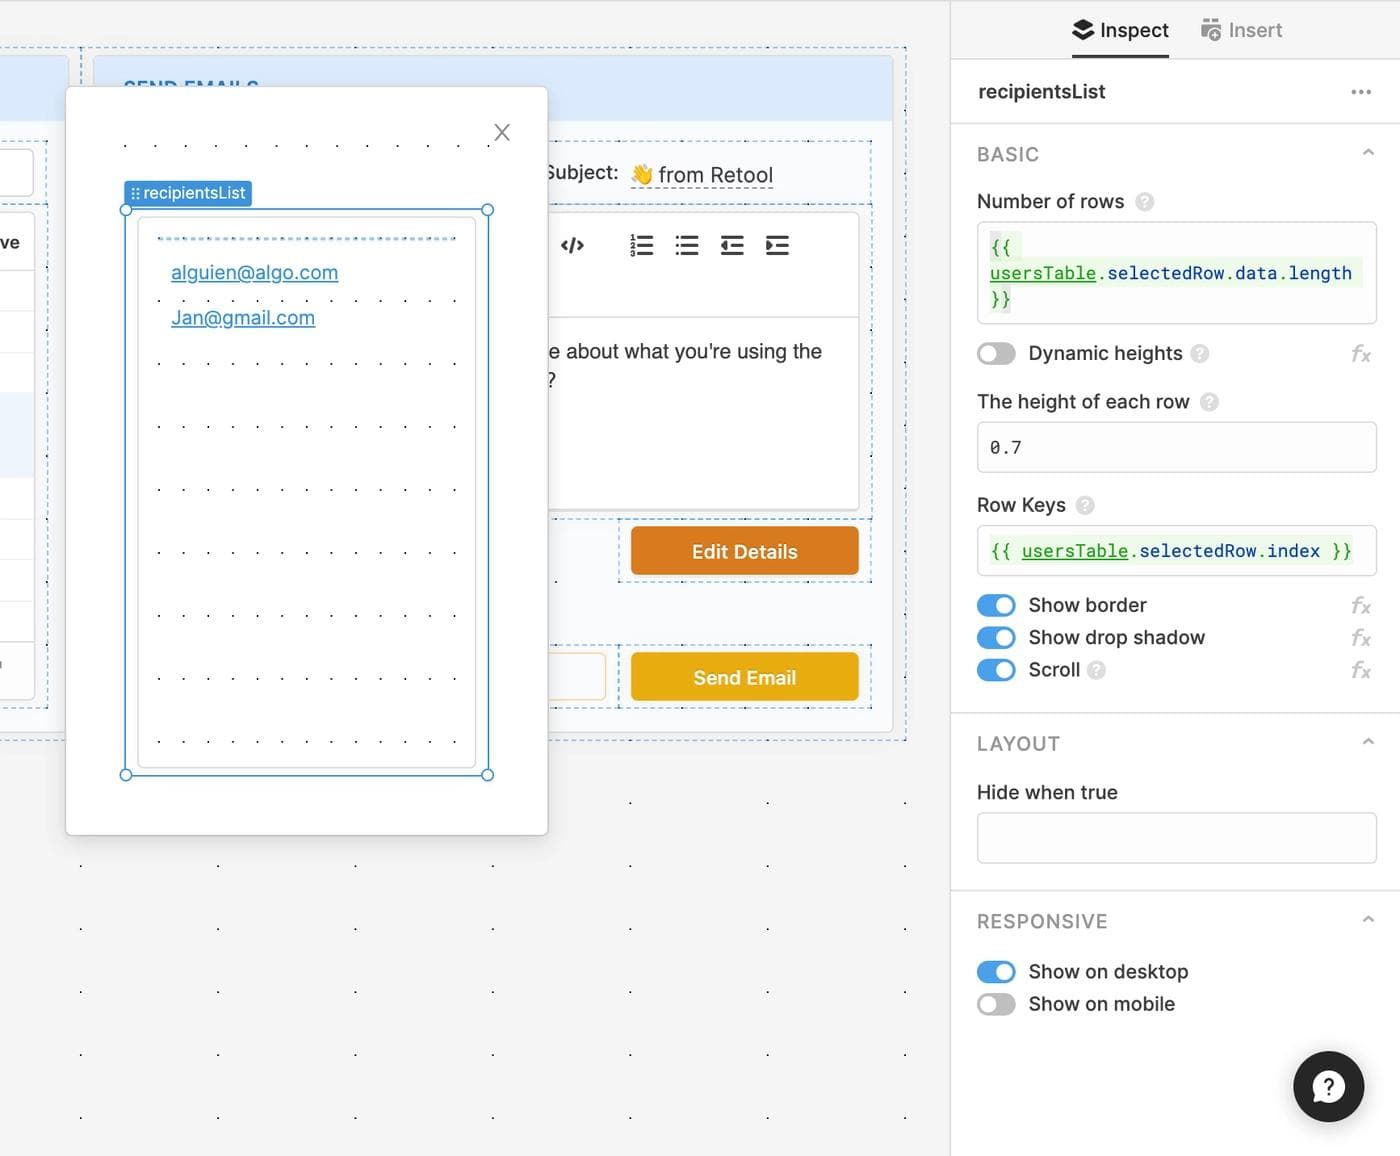
To make things look a bit nicer, let’s set the height of each listview row to be 0.7. We’ll also add in a reference to the table’s selected row indices as keys so each row stays unique.
Finally, let’s finish things with a text component up top.
All right!! The UI is all laid out. Now it’s time for the fun part – hooking all of these components up to the SendGrid API and actually sending a request.
We’re going to write 3 basic queries that will map what’s happening in our components to the SendGrid API:
- A Javascript transformer to format the email content
- A query that makes a single
POSTrequest to the SendGrid API to send an email - A Javascript query that iterates through each recipient and sends an email
Let’s get started!
We’ll be using SendGrid’s Mail Send API (v3), and it requires very specific formats for body params.
Head over to your query editor, click “New” and select “JavaScript transformer” from the dropdown. We’ll call it formatContent and have it return a basic JSON object with two keys: type and value – this is the format that the API requires. For the value, well, value, we’ll reference the value of the text editor component we layed out earlier.
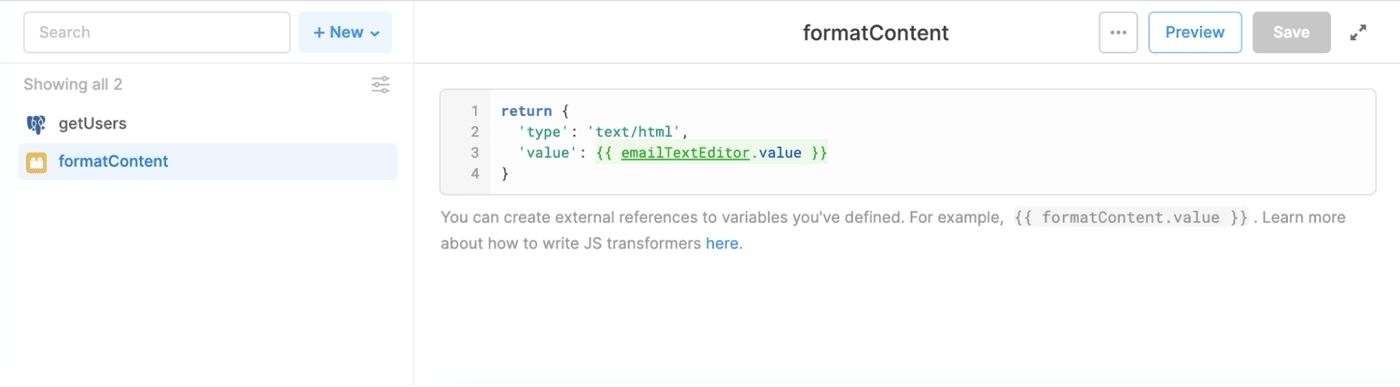
Click “preview” to get a preview of the returned data if you’re curious. Note that we’ll reference the returned value of this transformer in a bit with {{ formatContent.value }}.
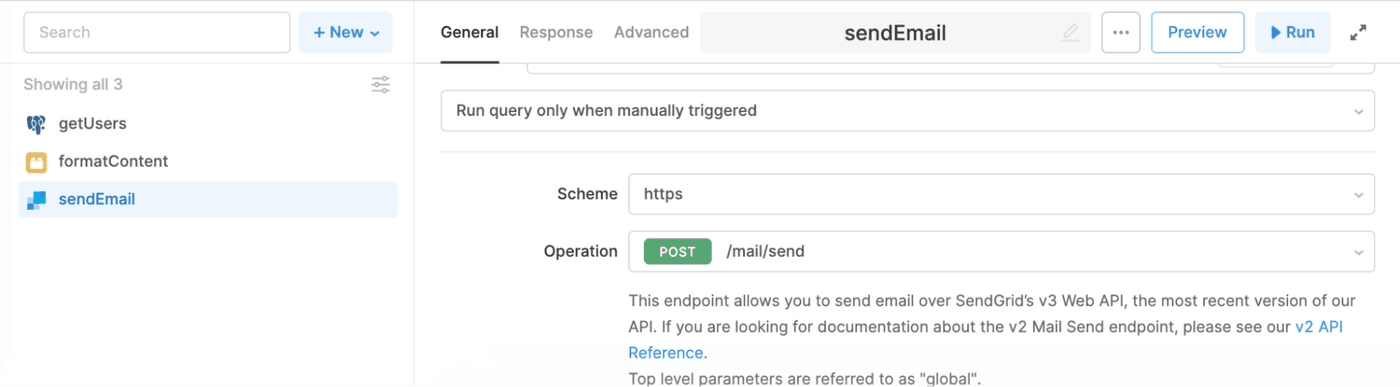
To send an email via the API, we’ll make a POST request to the https://retool.com/mail/send endpoint. Create a new resource query and then select our connected SendGrid resource from the dropdown. Keep “https” as the scheme, and then select the mail send endpoint. We’ll also rename the query sendEmail so we know what we’re working with.
Now, the fun part – filling in the request body. This is what the final set is going to look like, but we’ll go through each one by one.

- Body.content – reference the value of the content formatting transformer with
{{ formatContent.value }} - Body.subject – reference the value of the editable text component for the email subject with
{{ subjectText.value }} - Body.from.email – same as above, but for the email sender with
{{ fromEmailText.value }} - Body.from.name – same as above, but for the email sender name with
{{ fromNameText.value }}
Note that if you did an audible on any of the component names, you’ll need to adjust these references accordingly.
The** Body.personalizations** deserves special treatment, as it’s the most complex part. We’re going to reference a variable that actually doesn’t exist yet – called additionalScopeEmail – and nest it in an object that looks like this:
1 2 3 4 5 6 7{ “to”: [ { “email”: {{ additionalScopeEmail }} } ] }
We’re going to define this variable in the next step, but you can think of it as referencing whatever the current user email is in the JS loop we’re going to run. The complex-ish object format is just SendGrid being SendGrid. You can read more about how they want this array of objects formatted in their docs here.
Note: if you’re copying and pasting the above code, make sure your string quotes get encoded properly! If you get errors when running your queries, this might be why.
Last step: we’ll create a JavaScript query that iterates through each selected email address and runs the above SendGrid query for each. Click “New” and create a JavaScript query. We’ll call this one sendEmails.
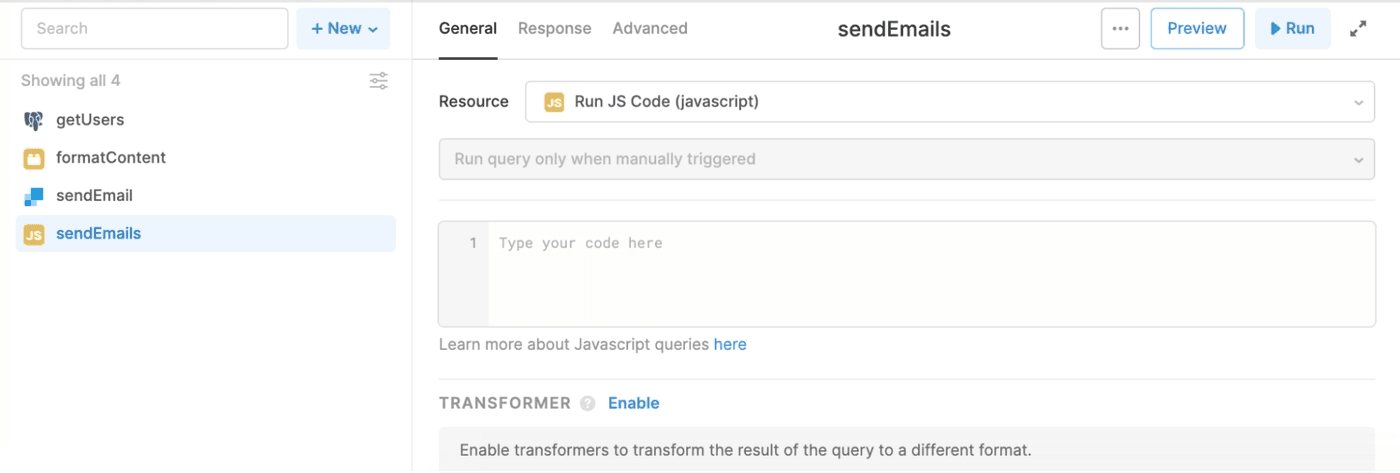
In the code input, we’ll iterate through each selected row and fire off our sendEmail query for each one. For each request, we’ll pass through the current email as additionalScope – and that’s where the additionalScopeEmail variable from above gets defined.
1 2 3 4 5 6 7 8var emails = usersTable.selectedRow.data.map(row => row.email) emails.forEach(function(email) { sendEmail.trigger({ additionalScope: { 'additionalScopeEmail': email } }) })
You can read more about query params like additionalScope in our docs here.
One more thing to do – let’s add a confirmation modal so that our users don’t send out emails willy nilly.
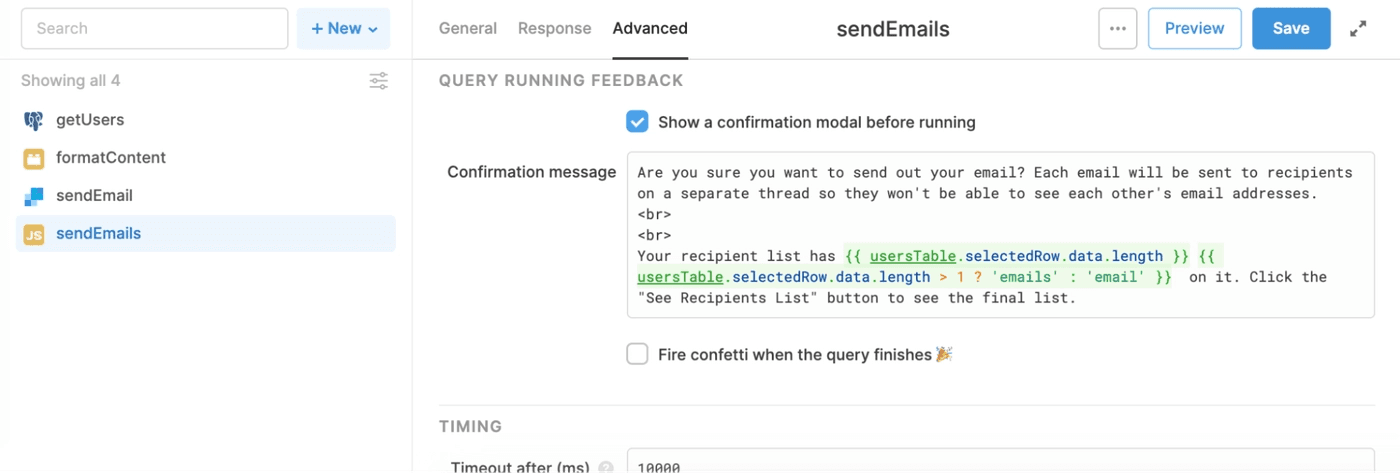
There’s a lot of text in there, and a conditional to remind our users how many emails they’re about to send:
1 2 3 4Are you sure you want to send out your email? Each email will be sent to recipients on a separate thread so they won't be able to see each other's email addresses. <br> <br> Your recipient list has {{ usersTable.selectedRow.data.length }} {{ usersTable.selectedRow.data.length > 1 ? 'emails' : 'email' }} on it. Click the "See Recipients List" button to see the final list.
That’s it! You should be good to go with queries. The last (really, last!) thing we need to do is just hook up this JavaScript query to the “send email” button.

Make sure you pick the sendEmails query (our Javascript loop) and not the sendEmail query (the single SendGrid request).
Congrats! You’ve built a fully functional email sender app with the SendGrid API in under an hour. There’s a lot more you can do with SendGrid and Retool, like:
- Add attachments to your emails with a file picker component
- Update your query to send emails to one recipient with selected emails in BCC
- Templatize your emails with the first names of your recipients
Keep your eyes out on the Retool blog for more 🙂
Reader