

This post was created in collaboration with Anshuman Bhardwaj.
Microsoft SQL Server is a hugely popular SQL database. It's ACID compliant, making it an excellent choice for financial applications, while its optimistic concurrency model is good for large-scale applications with frequent writes, such as e-commerce platforms.
However, MS SQL admins typically find directly managing the database overwhelming. And, more importantly, allowing admins to directly interface with the database opens security risks. The solution to these problems is to create an isolated admin layer between the team and database. This technique ensures data safety by limiting the range of available actions. Plus, it offers a better user experience.
In this tutorial, you will build an admin panel for a team managing a database of shops. You will use an MS SQL database to store the information and create a user interface using Retool to show a table containing the stores. Admins will be able to view the owners' contact information, make changes to store information, and remove a closed store from the database. You will also create a form for admins to easily add newly opened stores to the database.
To follow this tutorial, you must first sign up for a free Retool account and an MS SQL server to host your database.
Note: This tutorial uses Azure as the database provider platform, but you can follow the same steps with any provider.
To get started, create a new SQL database in your provider.
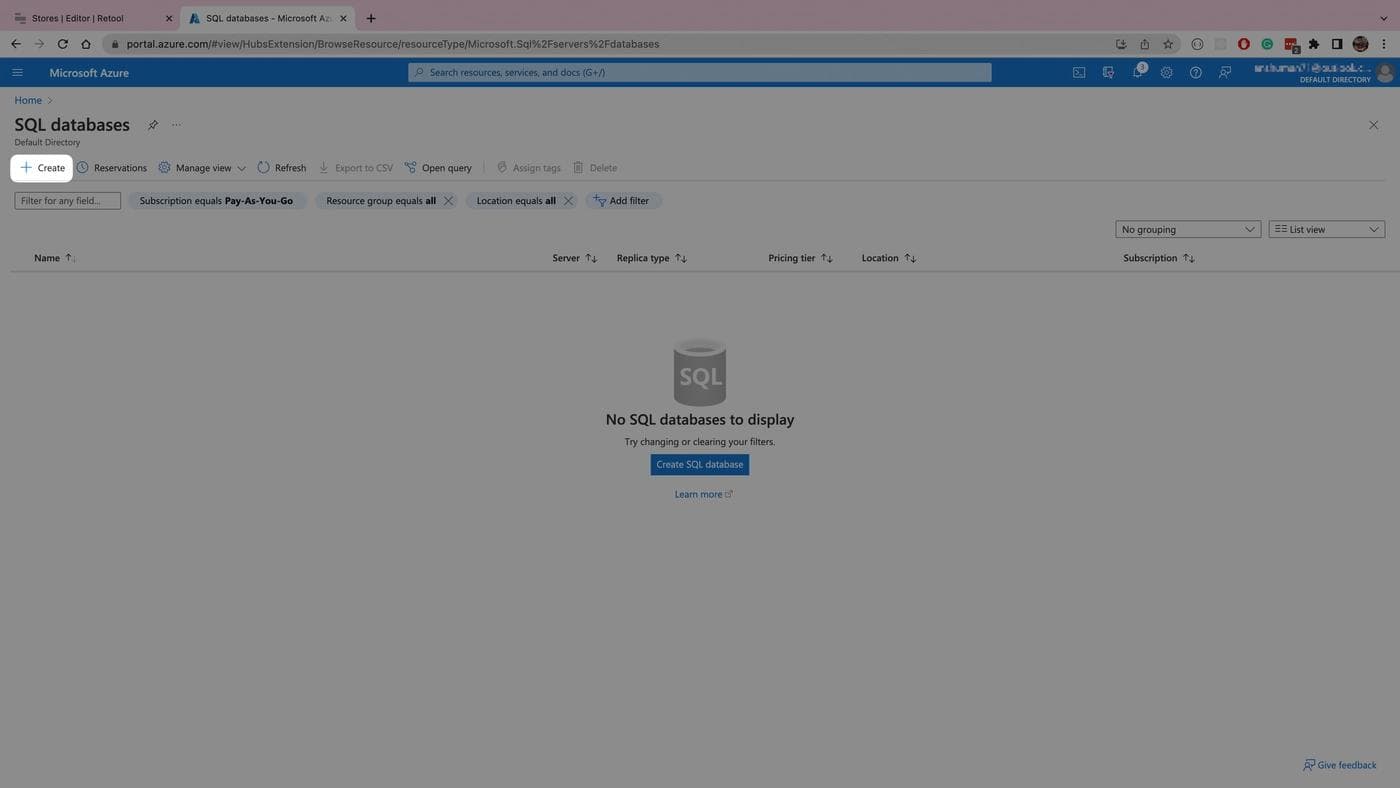
Select an existing server or create a new server; then create a new database called retool-example.
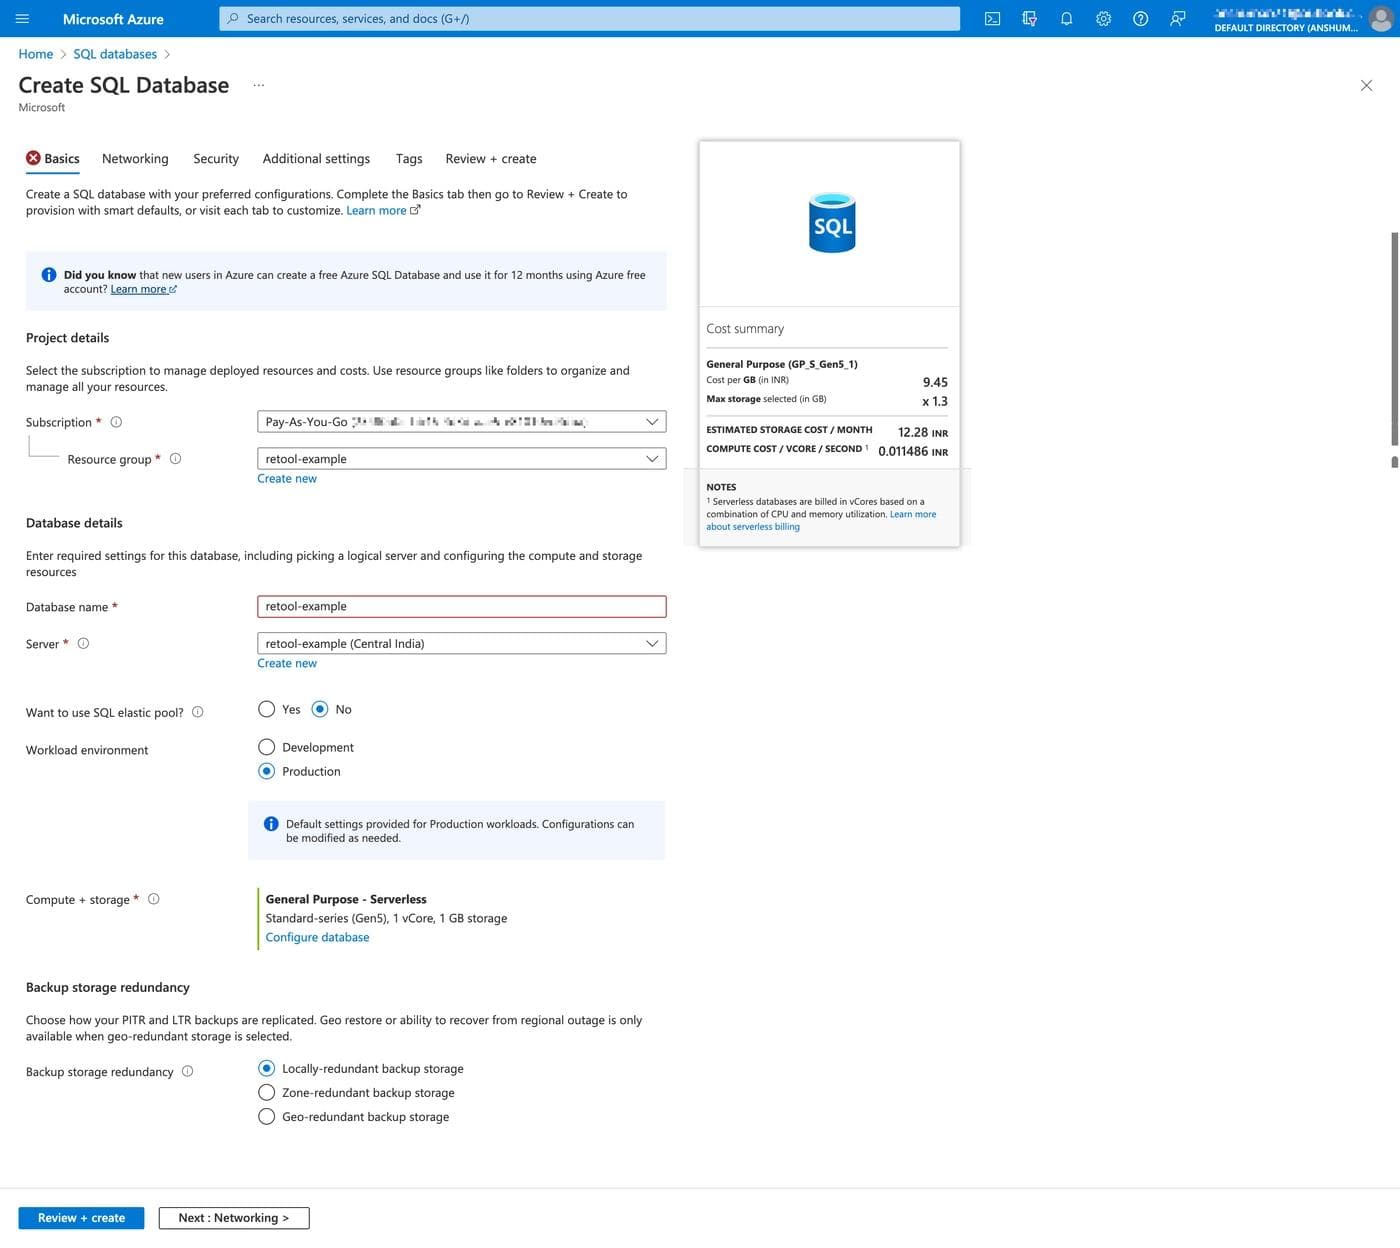
Create the admin login credentials for your database. Save the server name, username, and password securely to use later.

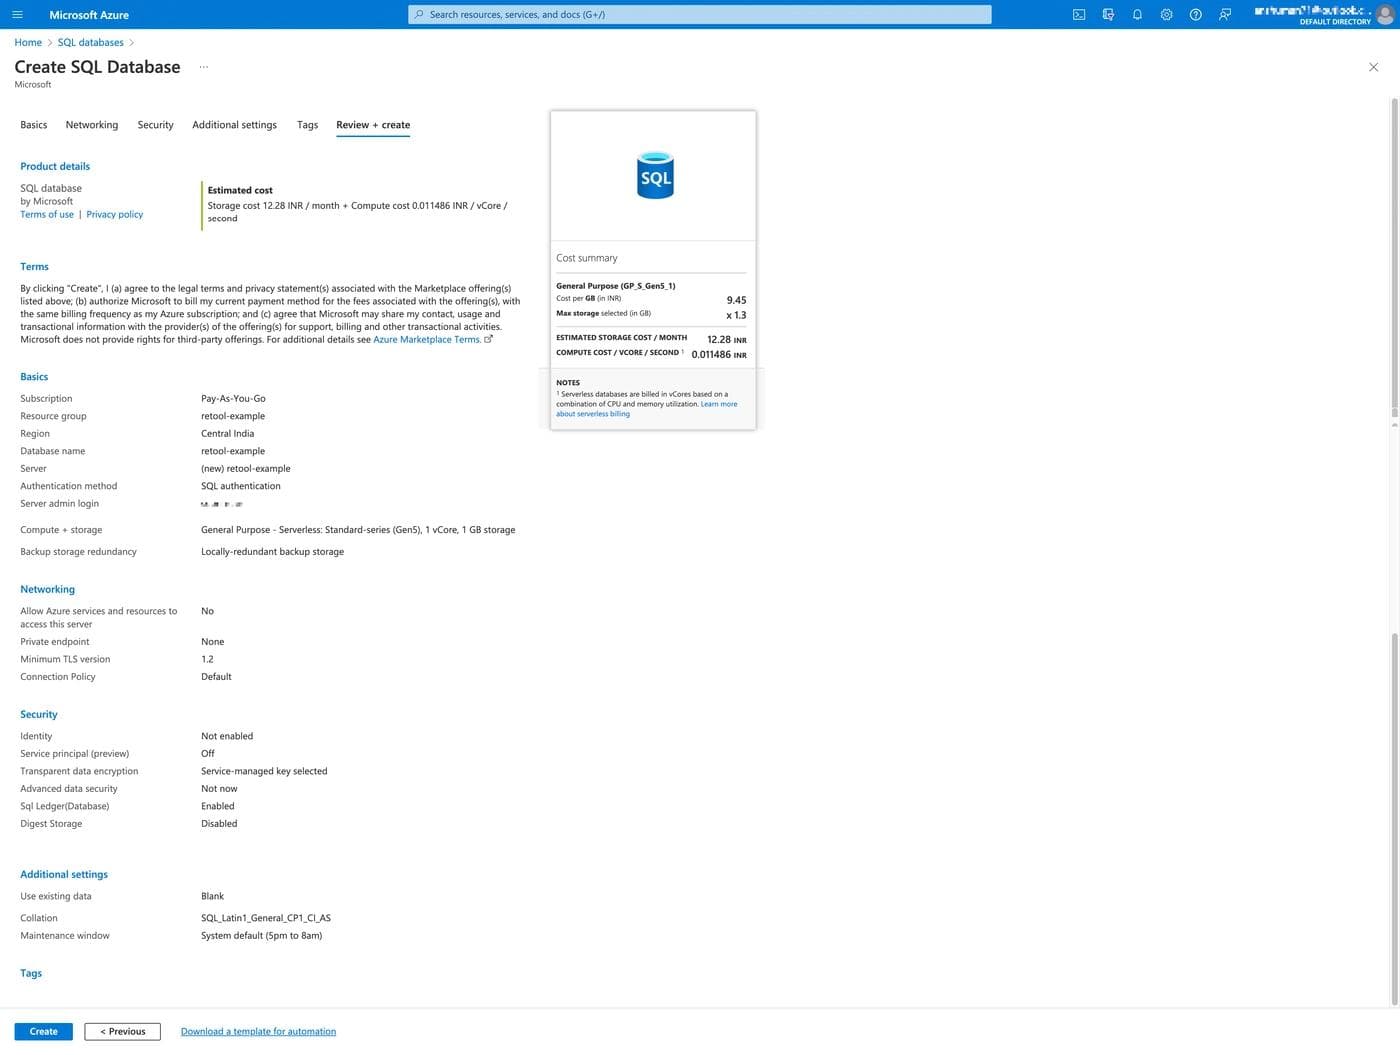
You can use the configuration below to get started quickly. Alternatively, you can choose the server configuration to suit your database needs.
With the database in place, create the stores table and migrate the sample data so you can reference this while creating queries in the Retool application.
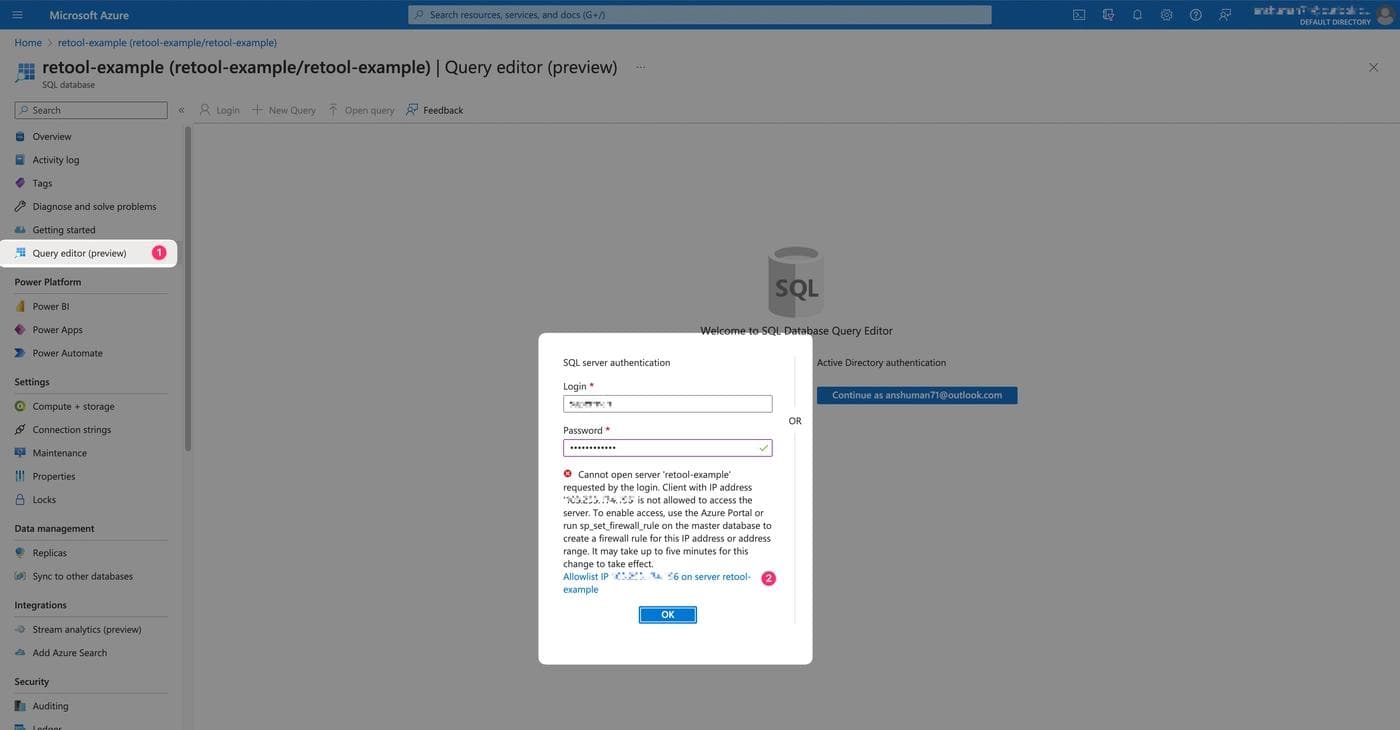
Go to the retool-example database page on the Azure dashboard and click Query editor on the left navigation.
Now log in with the admin credentials you created in the previous step. You might get an error because the database server doesn't allow access from any public address, so you'll see an error on the first attempt. Click on Allowlist IP: on server retool-example in the error message to proceed. Then click OK.
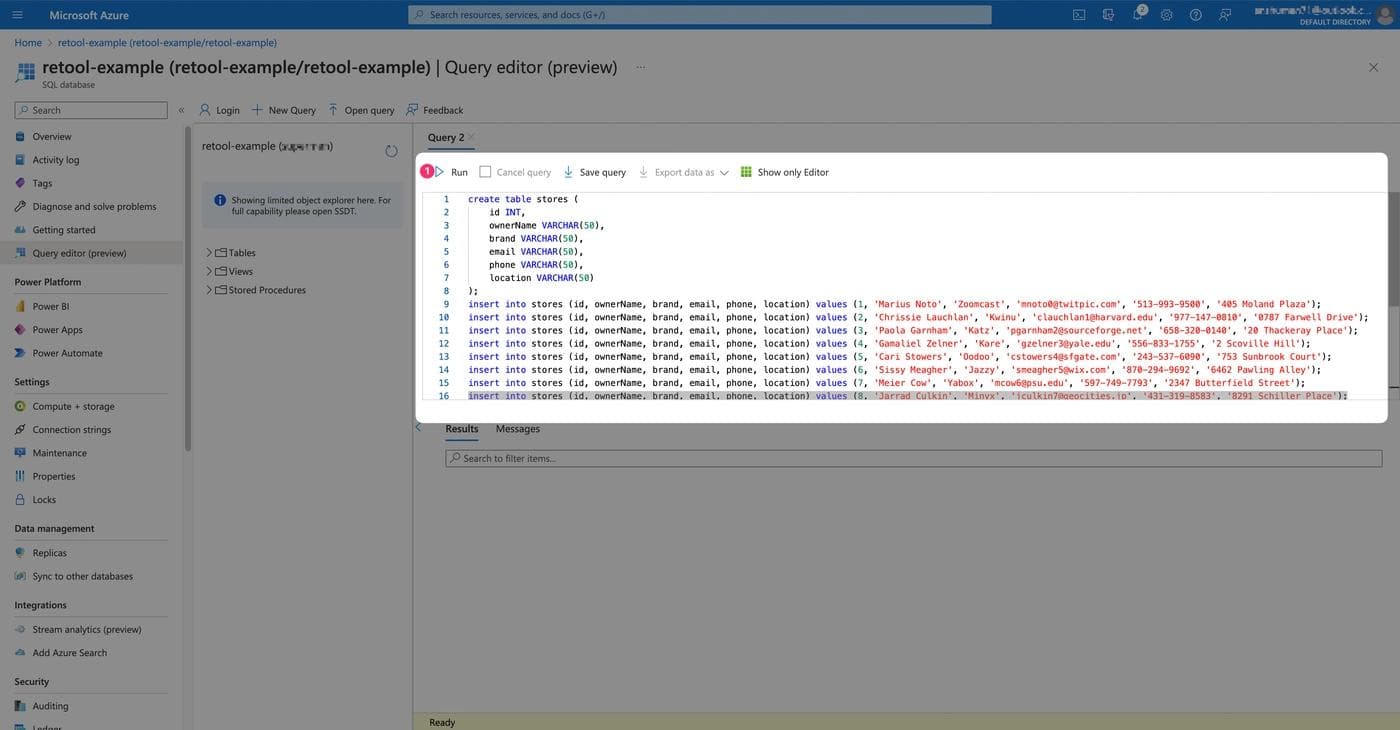
In the query field, paste the following SQL queries to create a new stores table and insert the mock data. Click Run to execute the queries:
1 2 3 4 5 6 7 8 9 10 11 12 13 14 15 16 17 18 19 20 21 22 23 24 25 26 27 28create table stores ( id INT, ownerName VARCHAR(50), brand VARCHAR(50), email VARCHAR(50), phone VARCHAR(50), location VARCHAR(50) ); insert into stores (id, ownerName, brand, email, phone, location) values (1, 'Marius Noto', 'Zoomcast', 'mnoto0@twitpic.com', '513-993-9500', '405 Moland Plaza'); insert into stores (id, ownerName, brand, email, phone, location) values (2, 'Chrissie Lauchlan', 'Kwinu', 'clauchlan1@harvard.edu', '977-147-0810', '0787 Farwell Drive'); insert into stores (id, ownerName, brand, email, phone, location) values (3, 'Paola Garnham', 'Katz', 'pgarnham2@sourceforge.net', '658-320-0140', '20 Thackeray Place'); insert into stores (id, ownerName, brand, email, phone, location) values (4, 'Gamaliel Zelner', 'Kare', 'gzelner3@yale.edu', '556-833-1755', '2 Scoville Hill'); insert into stores (id, ownerName, brand, email, phone, location) values (5, 'Cari Stowers', 'Oodoo', 'cstowers4@sfgate.com', '243-537-6090', '753 Sunbrook Court'); insert into stores (id, ownerName, brand, email, phone, location) values (6, 'Sissy Meagher', 'Jazzy', 'smeagher5@wix.com', '870-294-9692', '6462 Pawling Alley'); insert into stores (id, ownerName, brand, email, phone, location) values (7, 'Meier Cow', 'Yabox', 'mcow6@psu.edu', '597-749-7793', '2347 Butterfield Street'); insert into stores (id, ownerName, brand, email, phone, location) values (8, 'Jarrad Culkin', 'Minyx', 'jculkin7@geocities.jp', '431-319-8583', '8291 Schiller Place'); insert into stores (id, ownerName, brand, email, phone, location) values (9, 'Ronald Keoghan', 'Trilith', 'rkeoghan8@businessweek.com', '986-607-6971', '08 Elka Center'); insert into stores (id, ownerName, brand, email, phone, location) values (10, 'Aurel Bosket', 'Bluejam', 'abosket9@w3.org', '225-732-4952', '13 Jenifer Place'); insert into stores (id, ownerName, brand, email, phone, location) values (11, 'Cody Temprell', 'Topiczoom', 'ctemprella@cloudflare.com', '574-793-7255', '9 High Crossing Parkway'); insert into stores (id, ownerName, brand, email, phone, location) values (12, 'Walther Goldes', 'Quinu', 'wgoldesb@shinystat.com', '403-324-5092', '25831 Badeau Place'); insert into stores (id, ownerName, brand, email, phone, location) values (13, 'Angelle Peach', 'Eazzy', 'apeachc@irs.gov', '649-480-2335', '14985 Warner Place'); insert into stores (id, ownerName, brand, email, phone, location) values (14, 'Bonni Fasler', 'Oozz', 'bfaslerd@tinyurl.com', '539-841-9438', '2 Fulton Junction'); insert into stores (id, ownerName, brand, email, phone, location) values (15, 'York Minet', 'Flashdog', 'yminete@un.org', '989-150-7007', '58401 Dapin Place'); insert into stores (id, ownerName, brand, email, phone, location) values (16, 'Benjamin Calender', 'Twitterworks', 'bcalenderf@topsy.com', '906-221-8347', '6 Anzinger Pass'); insert into stores (id, ownerName, brand, email, phone, location) values (17, 'Audrye Grimwade', 'Youopia', 'agrimwadeg@mail.ru', '228-810-0608', '67 Moulton Lane'); insert into stores (id, ownerName, brand, email, phone, location) values (18, 'Vaughan Sherred', 'Mynte', 'vsherredh@angelfire.com', '404-465-7635', '25 Warrior Circle'); insert into stores (id, ownerName, brand, email, phone, location) values (19, 'Jordan Ruggs', 'Oodoo', 'jruggsi@ycombinator.com', '428-287-6650', '5 Iowa Place'); insert into stores (id, ownerName, brand, email, phone, location) values (20, 'Sascha Calvie', 'Wordware', 'scalviej@jigsy.com', '414-856-4442', '4 Fuller Circle');
The image below shows how the Azure dashboard's query editor should look after the above code is pasted.
Now that you've got the database ready, it's time to create and connect the SQL server to Retool. To do that, log in to your Retool account and go to the Resources page by clicking on the Resources tab on the top navigation. On this page, hover over Create new and click Resource.

Select Microsoft SQL as the resource type.
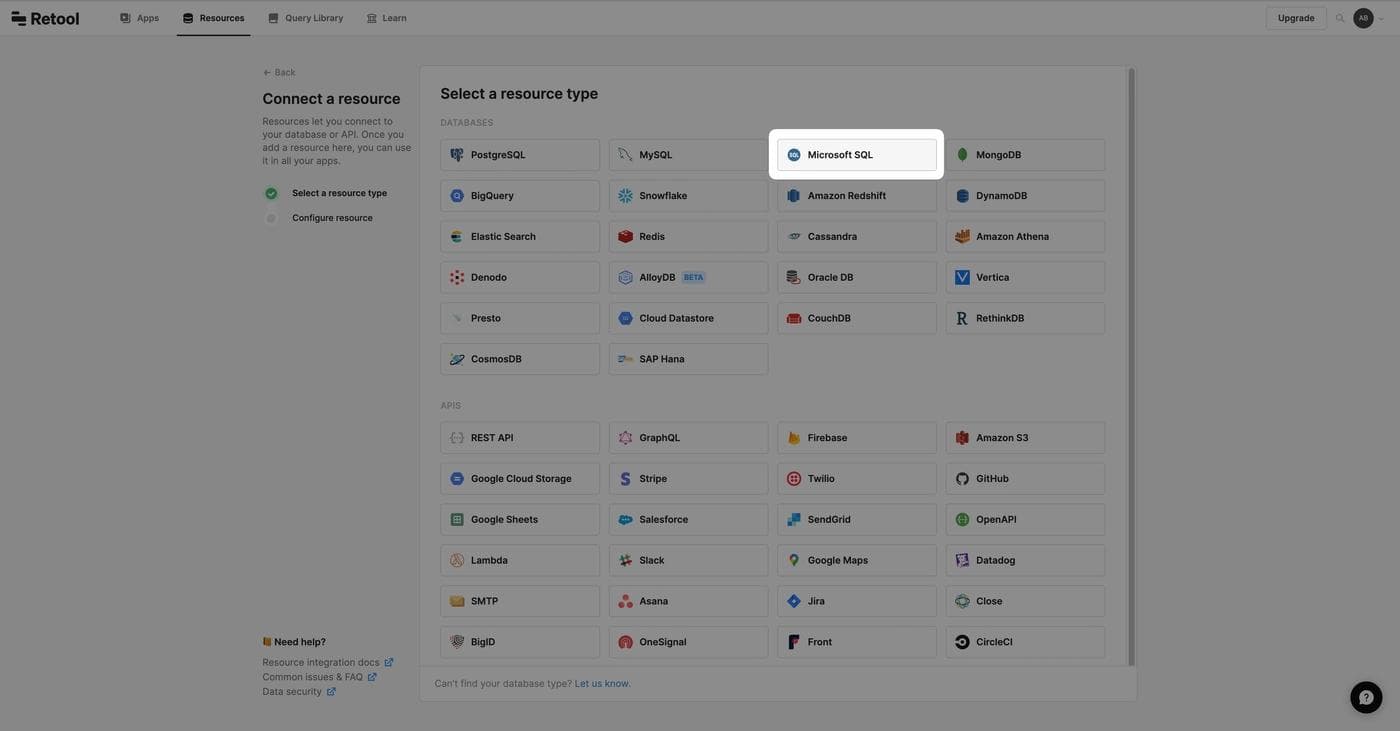
Now fill in the configurations for this resource as follows:
- Name: stores-example
- Host:
<server-name>.database.windows.net - Port: 1433
- Database name: retool-example
- Database username:
<copied-from-azure> - Database password:
<copied-from-azure>
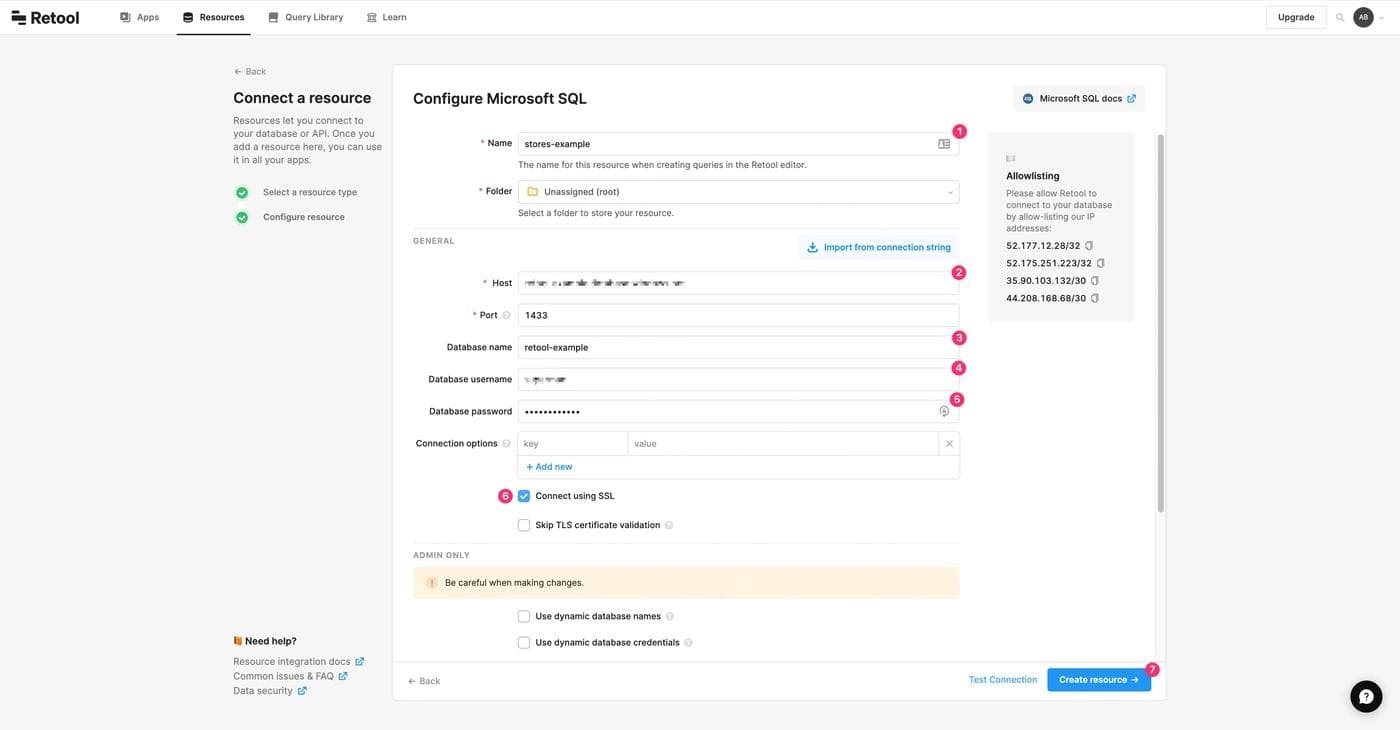
Check the Connect using SSL option to enable an encrypted connection to the database. Before finishing the form, you need to add the Retool IP addresses to your Azure database server's allowlist.
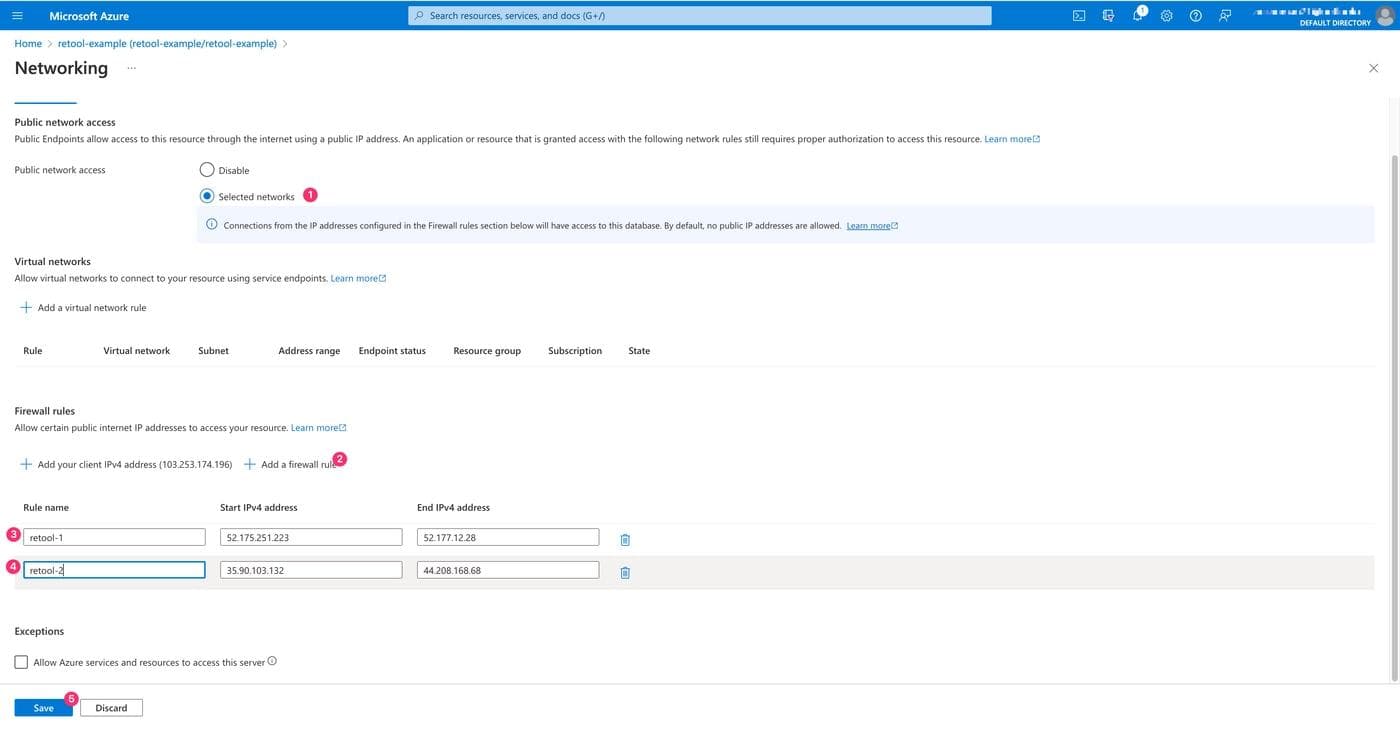
To do that, go to the Networking page of the database server and choose Selected networks under Public network access. Then click Add a firewall rule to add the IP addresses range shown on the Connect a resource page on Retool. Once that's done, click Save to save the configuration.

Now go to the retool-example database page on the Azure dashboard and click Set server firewall on the top menu.
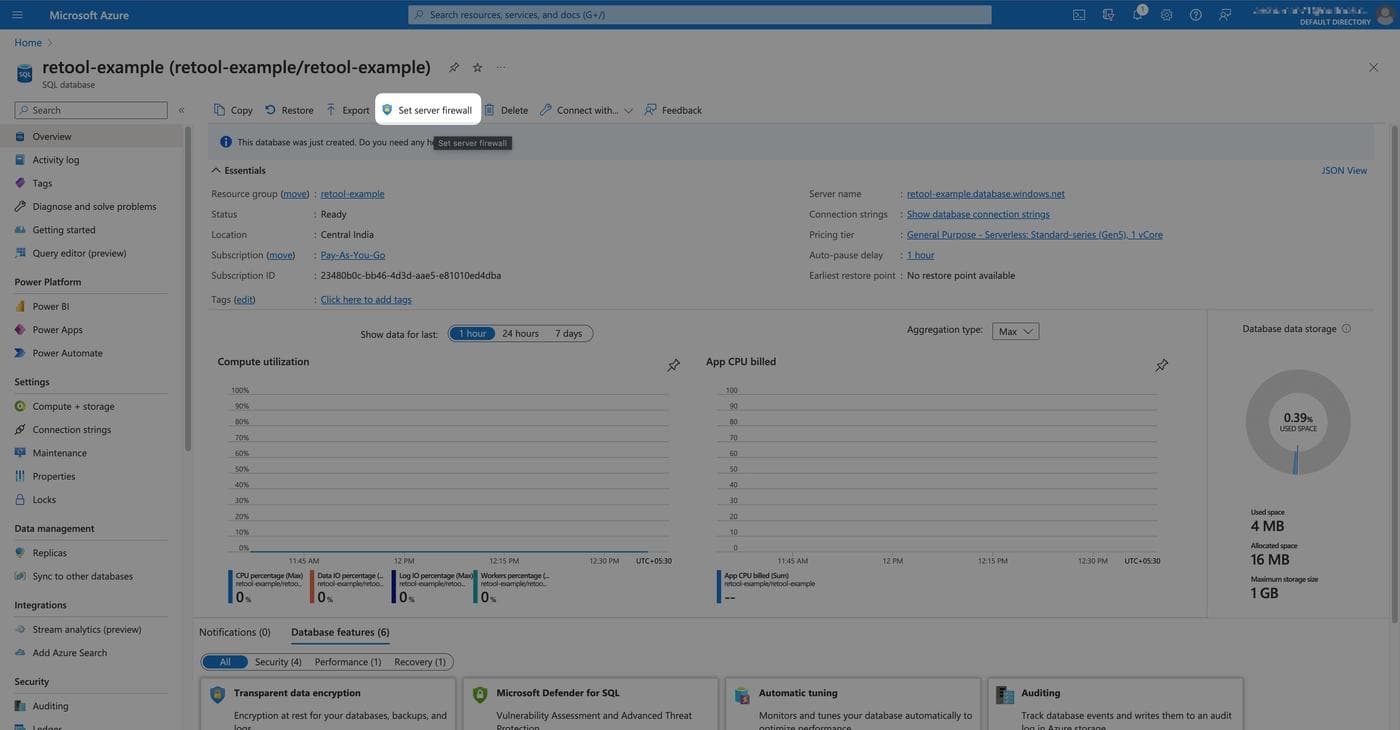
On the retool-example database's Networking page, click on Add a firewall rule to add the IP addresses range shown on the Connect a resource page on Retool. Once that's done, click Save to save the configuration.
Now, go back to the Connect a resource page in the Retool dashboard. Click Create resource at the bottom to finish creating the SQL resource.
Now that you've configured the database as a resource on your Retool dashboard, you can start creating the user interface using the Retool application editor.
On your Retool dashboard, click on the Apps tab on the top navigation bar.
Now select App by hovering over Create new. Fill in with "Stores" as the app name and click Create app.
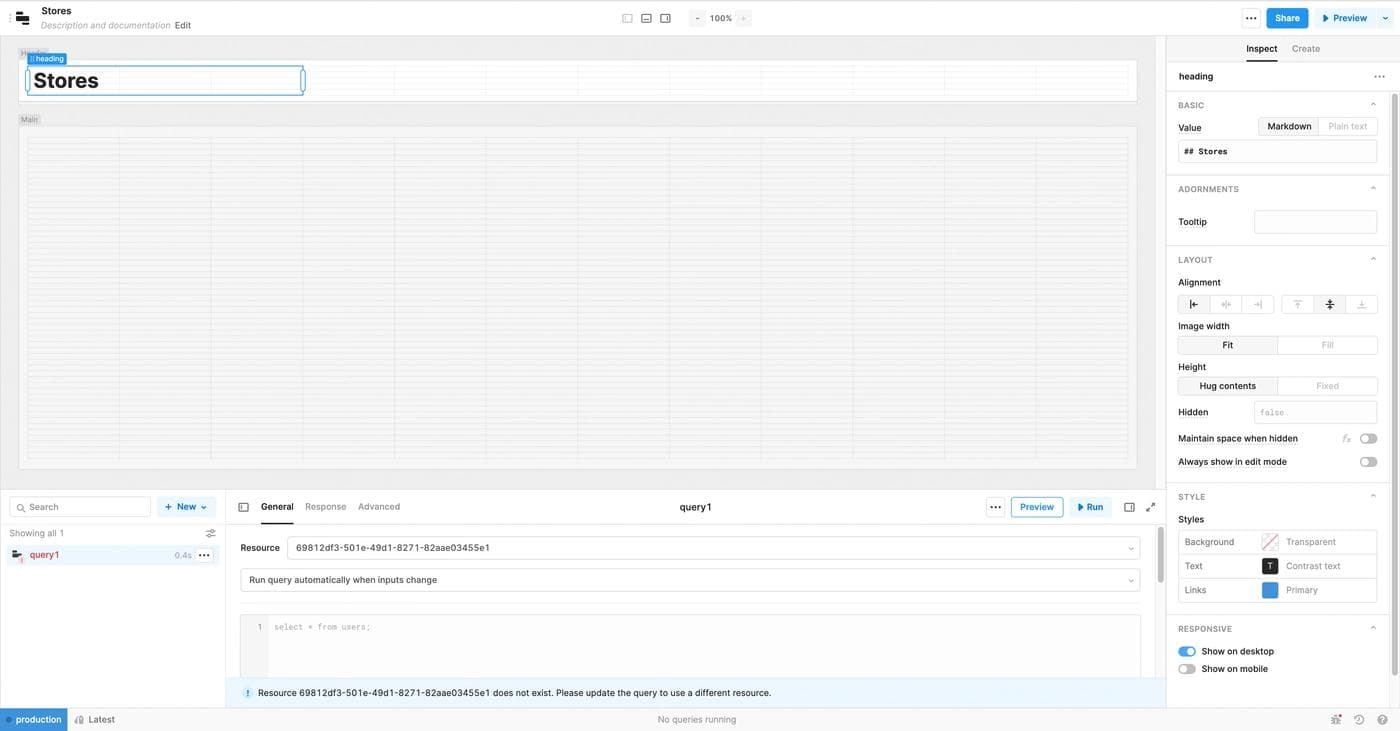
Add a new text component to the heading section from the right pane on the application editor and use ## Stores as its value. With this, the basic admin panel template is ready.
Note that you should always select the newly created stores-example resource while creating a query.
With the basic Retool app ready, you can start creating the queries to read, delete, update, and create database items. You can use Retool to implement the user interface to execute them.
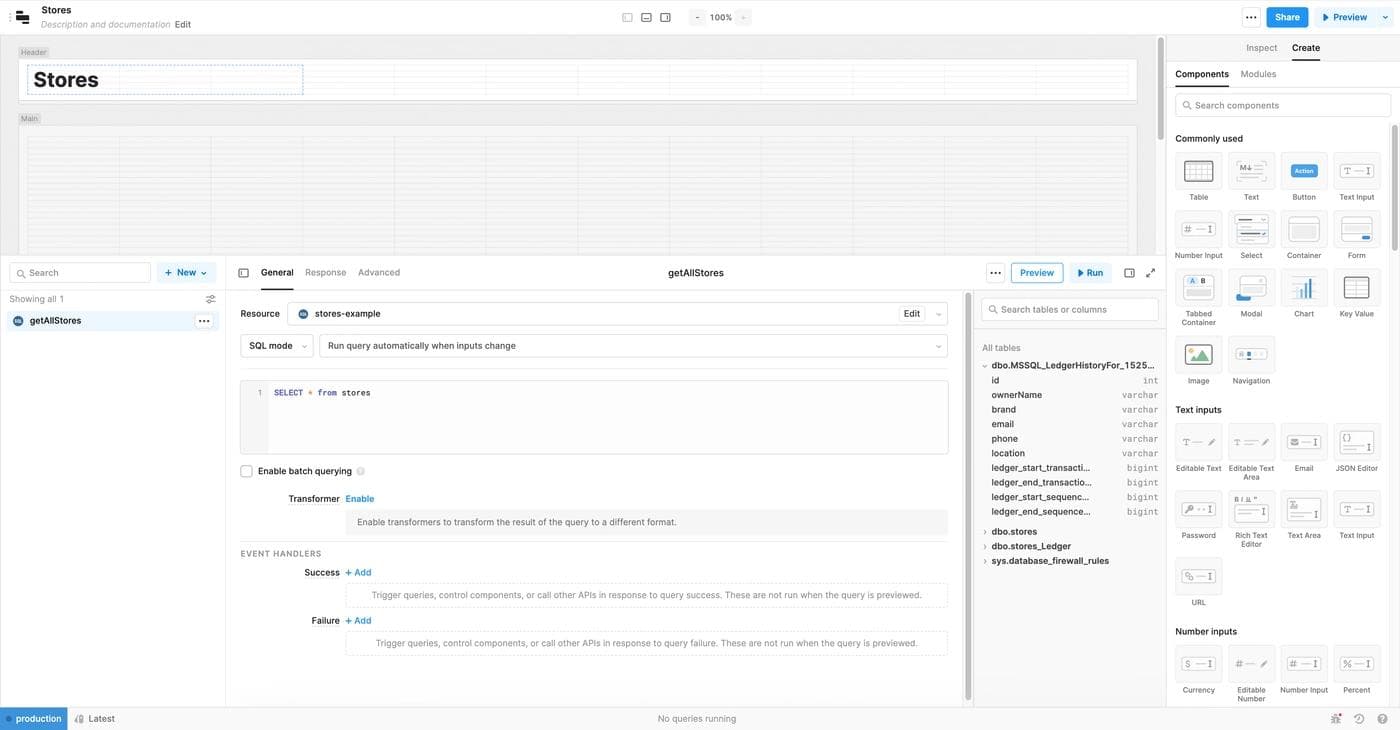
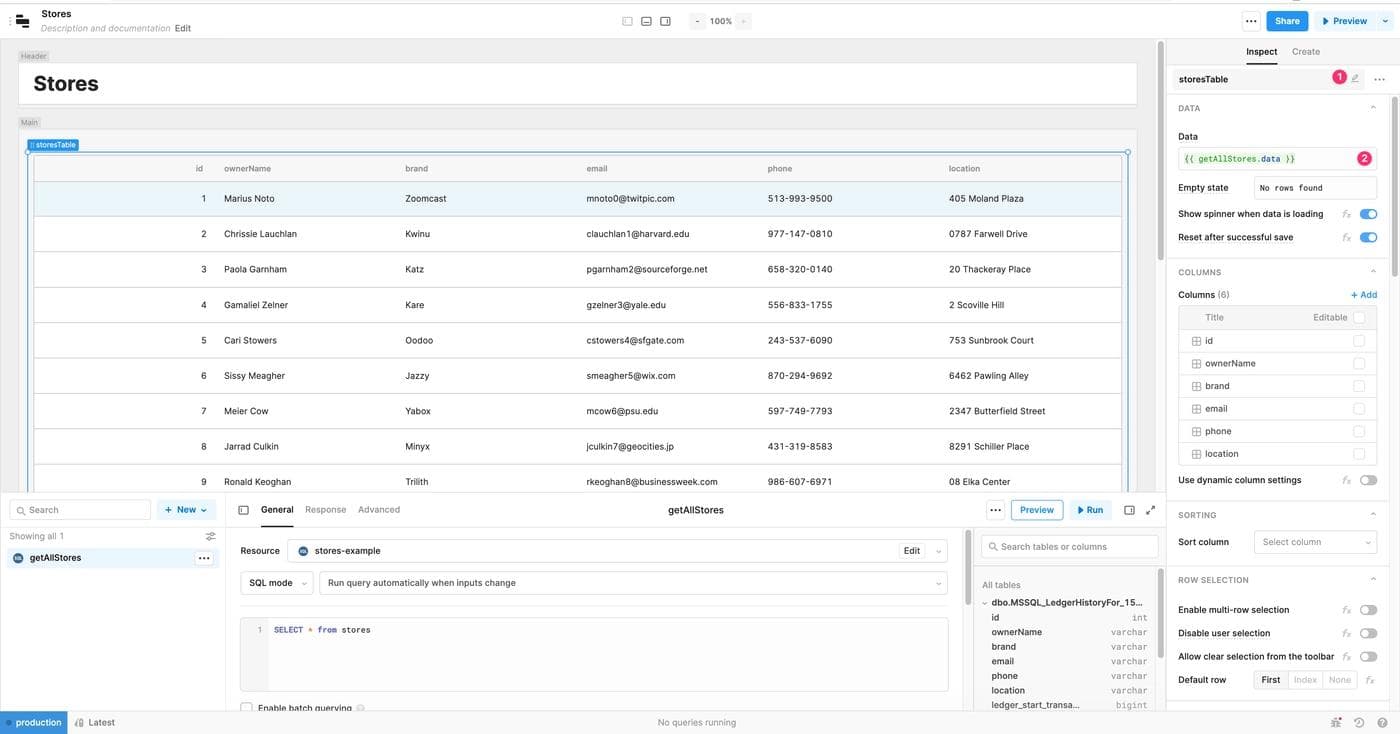
Before showing the stores in a table, you first need to fetch the data from your SQL server database to display a list of all stores in a table. Rename the default query in the bottom section of the application editor as getAllStores. Use the SELECT * from stores SQL query. Click Run to test the query.
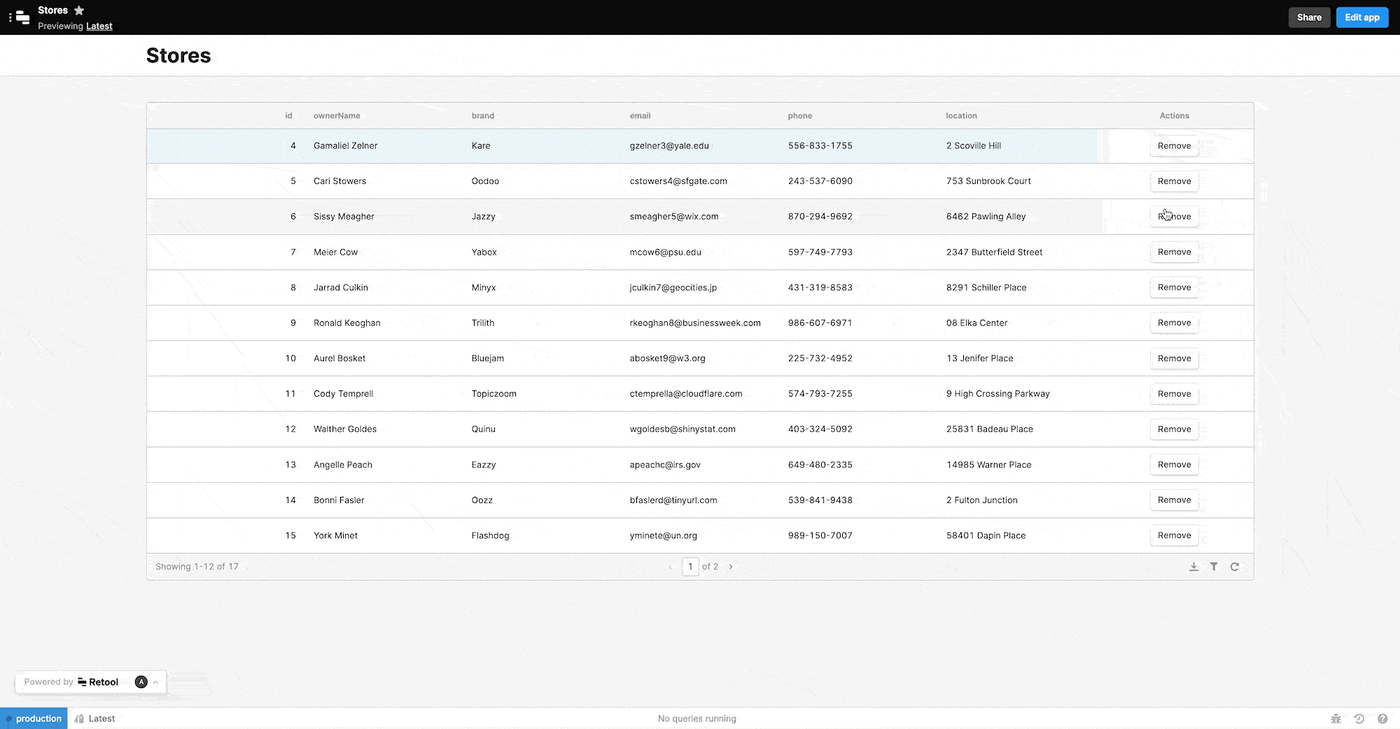
Now that the getAllStores query is ready, drop a Table component from the right pane in the Main section of the application editor. Rename the Table component to storesTable for easy access and specify {{ getAllStores.data }} as the Data field for this component. You'll see that the table automatically shows the data fetched from the stores table of your database.
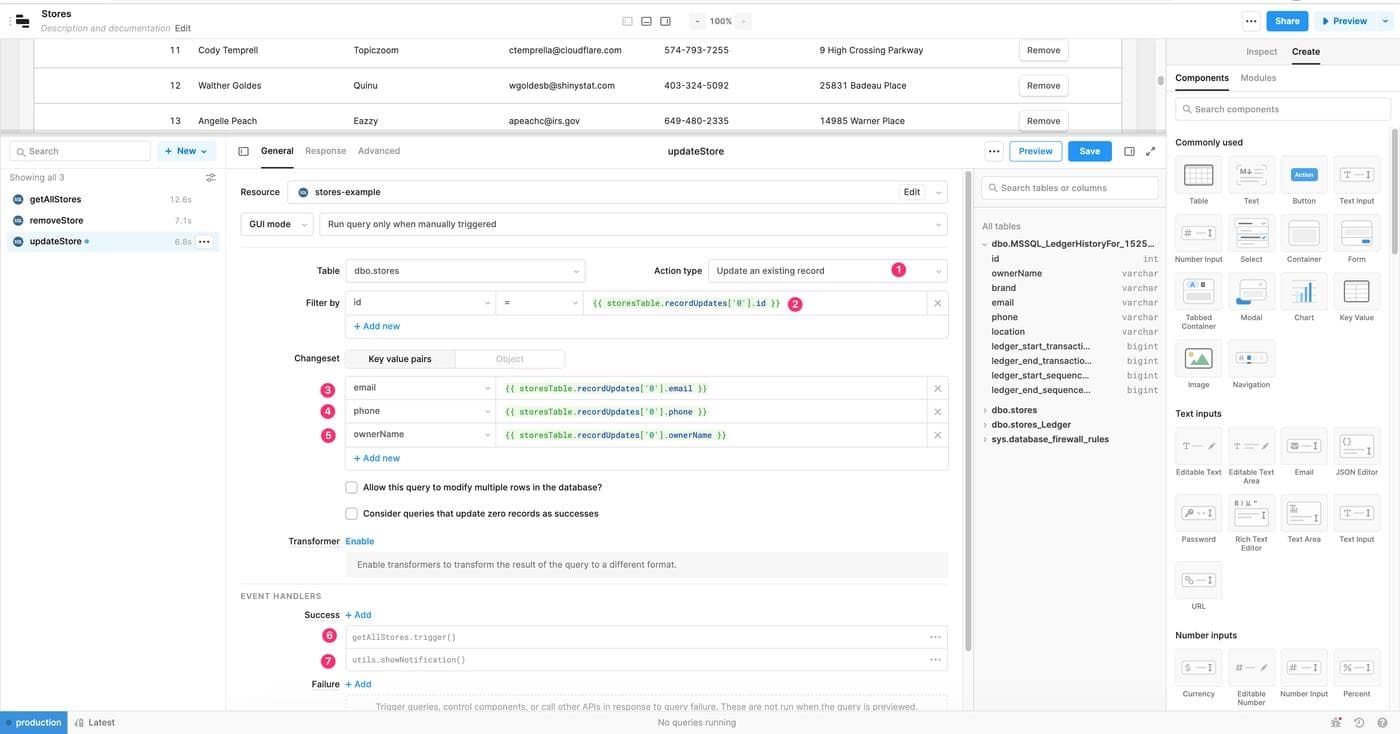
When a store is shut down, the admin will have to remove the store from the database. To add this feature, create a new query removeStore using the GUI mode feature of the Retool query editor, select dbo.stores as the Table, and Delete a record as the Action type. Set Filter by id = {{ storesTable.data.id[i] }}. This will provide this query with the id of the selected row from the storesTable.
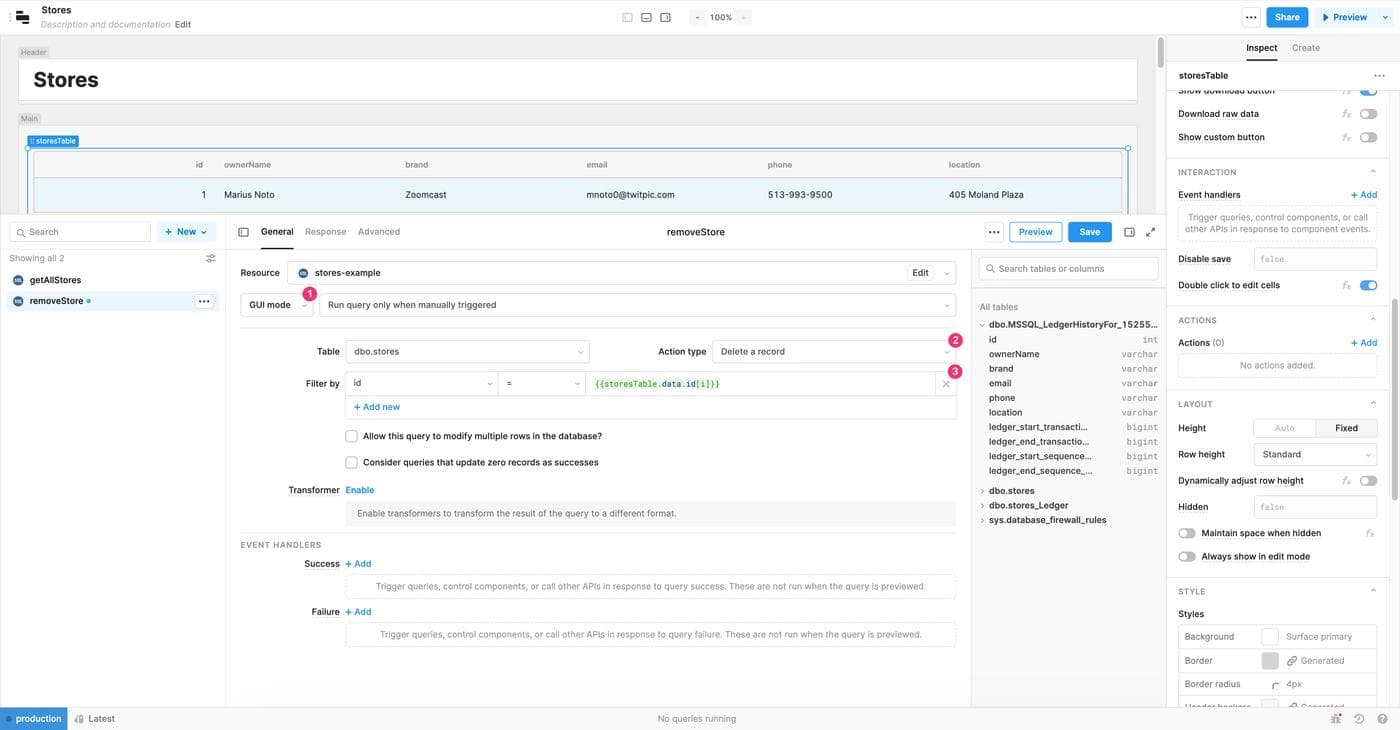
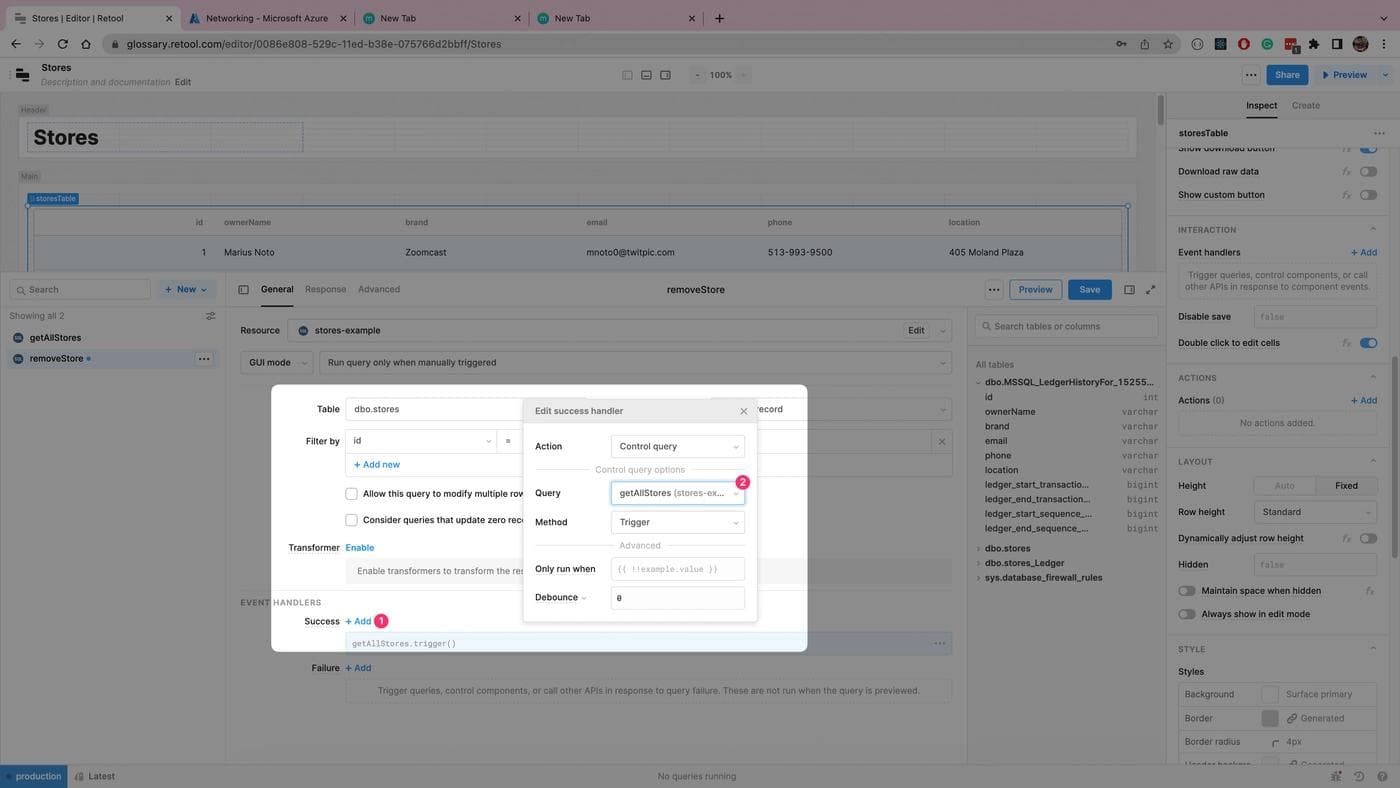
In the Event Handlers section of the query editor, click on Add next to Success to add an event handler to trigger the getAllStores query when the removeStore query runs successfully. This will refresh the table with the latest data after removing a store.
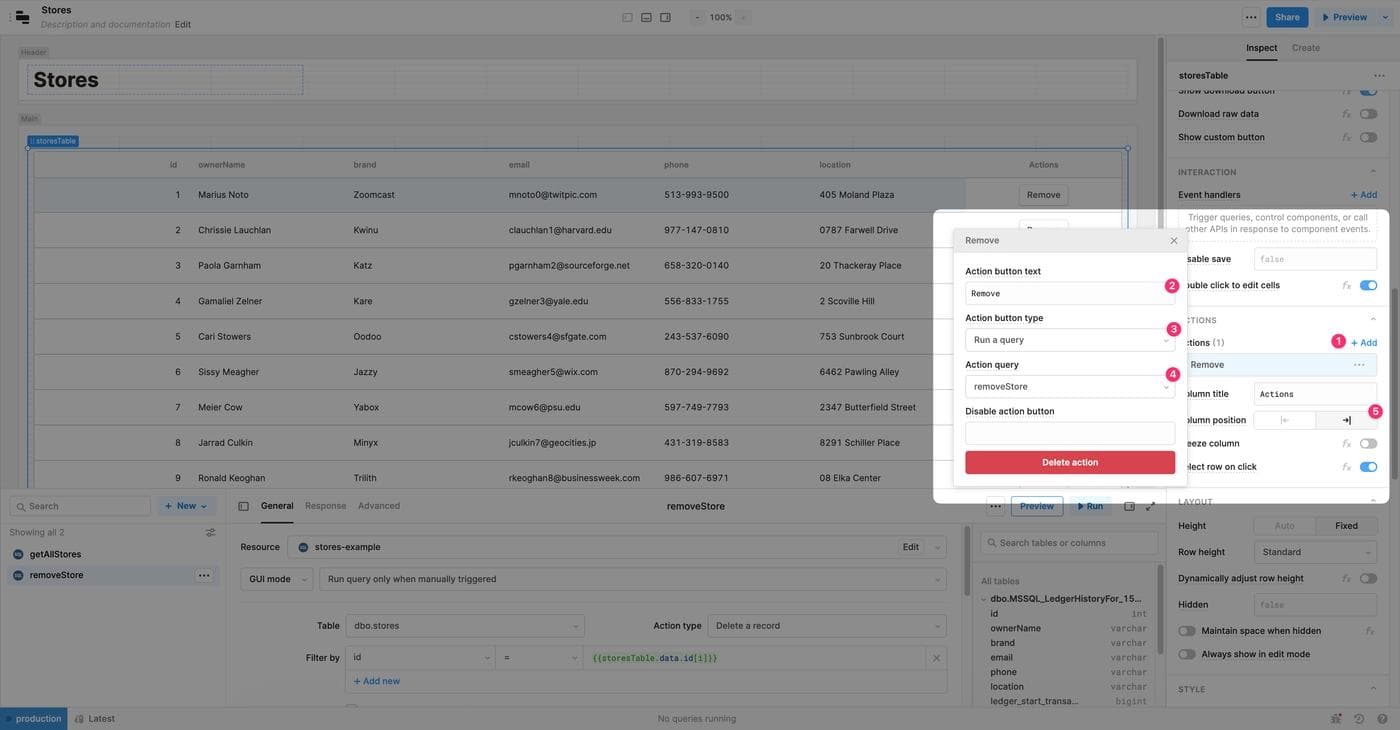
To enable the removeStore query, select the storesTable component and click Add next to the Actions section on the right pane.
Fill out the form as follows:
- Action button text: Remove
- Action button type: Run a query
- Action query:
removeStore
This will add a new Actions column to the table with a Remove button. Select the right column position to make it the rightmost column.
Click Preview on the top right to see the remove store feature in action.
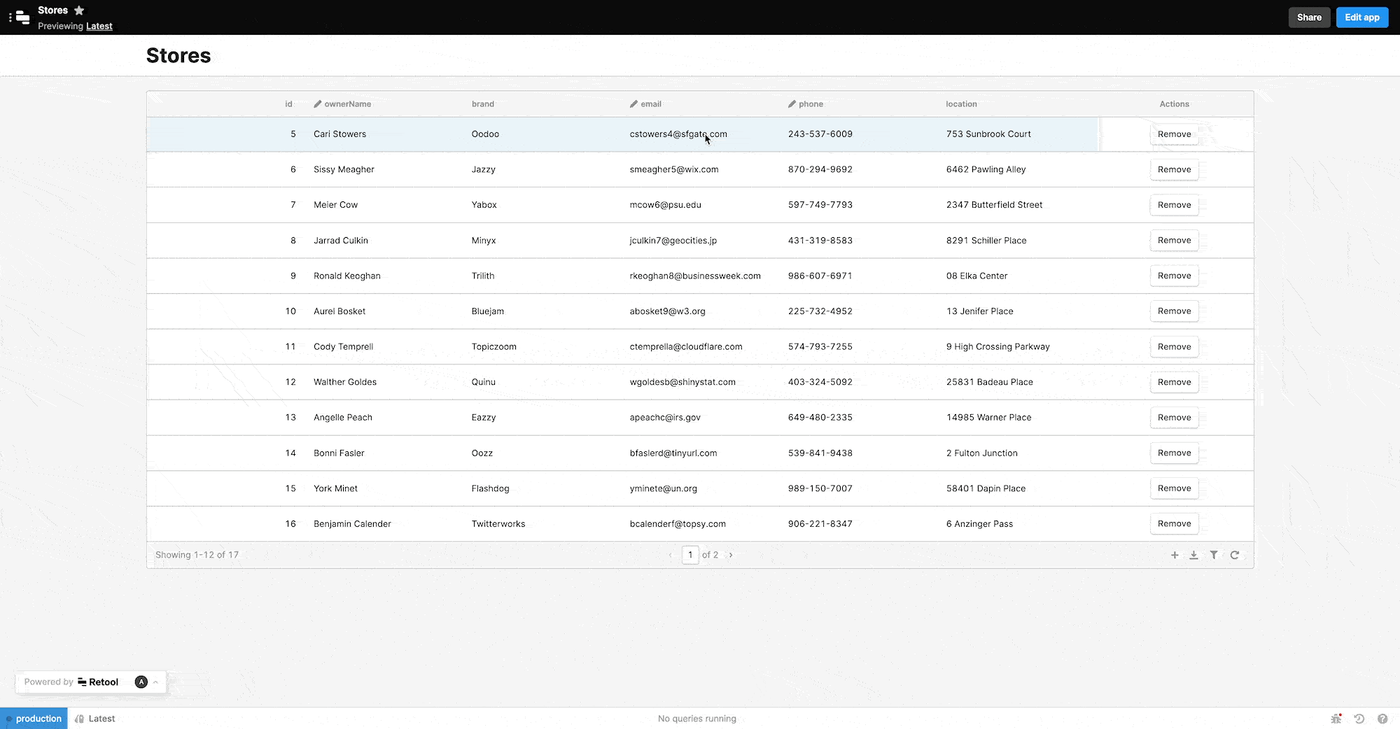
To allow the users to update the store information, make the email, phone, and ownerName columns editable by checking the box next to the column name on the right pane.

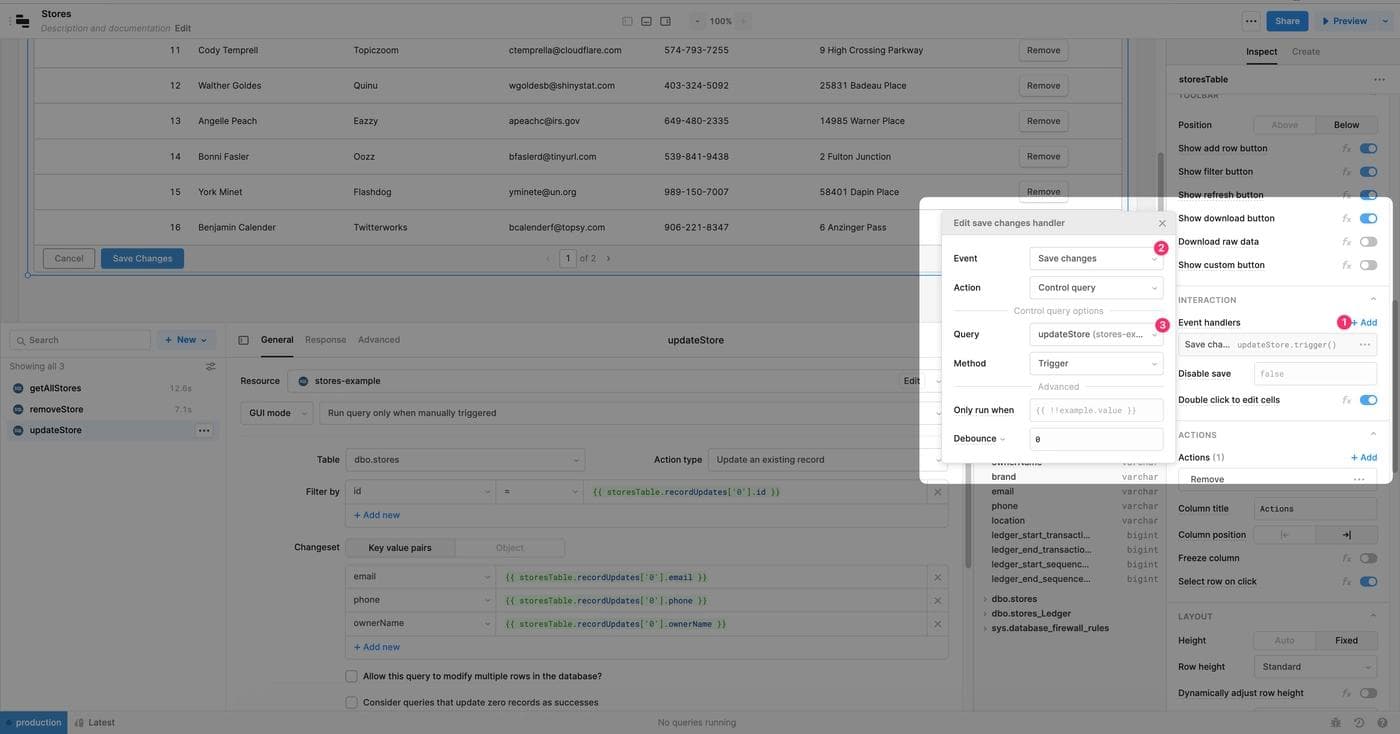
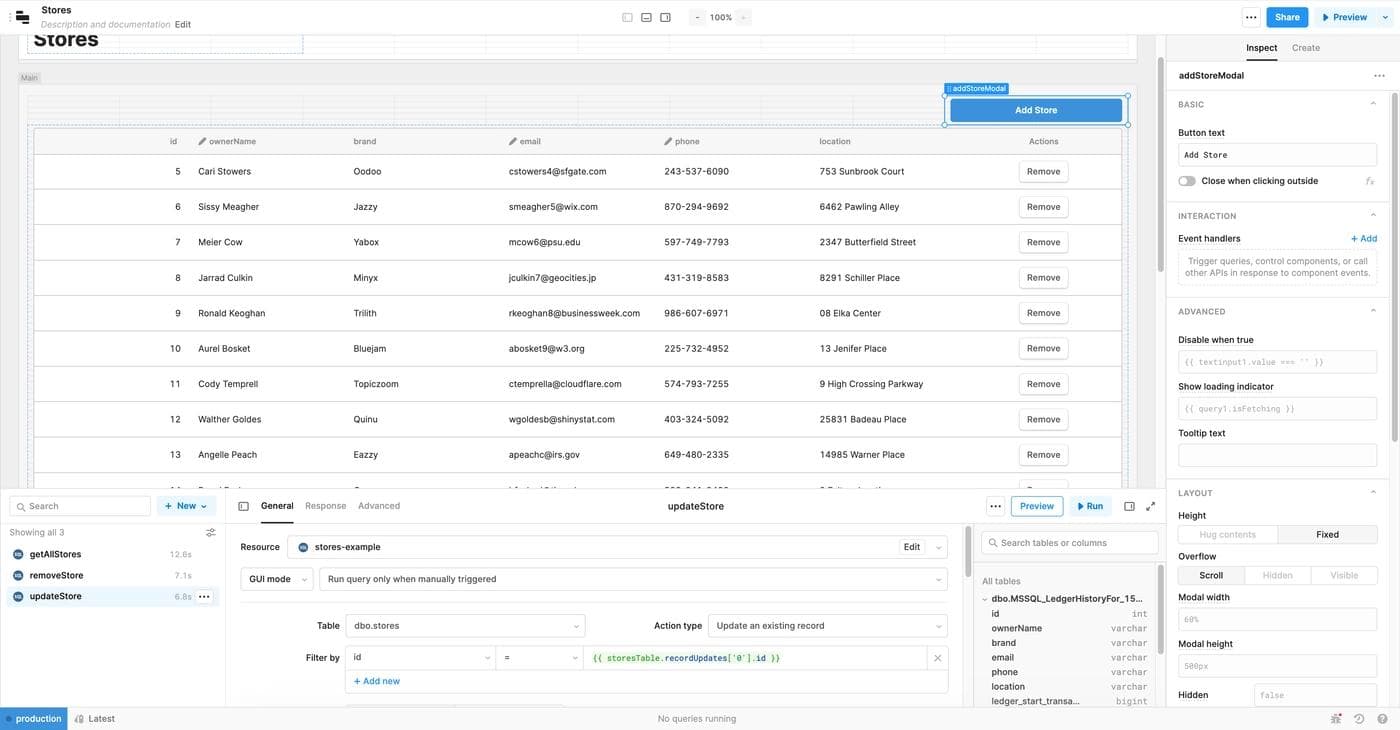
Now create a new query updateStore to save the updated values. Select dbo.stores as the Table and Update an existing record as the Action type. Set Filter by id = {{ storesTable.recordUpdates['0'].id }}, which will provide this query with the id of the updated row from the storesTable.
In Changeset, select the Key value pairs tab and fill in the details as follows:
- email:
{{ storesTable.recordUpdates['0'].email }} - phone:
{{ storesTable.recordUpdates['0'].phone }} - ownerName:
{{ storesTable.recordUpdates['0'].ownerName }}
Add the success event handlers to trigger the getAllStores query and another one to show a notification.
Now select the storesTable component and add a Save changes event handler under the Interaction section on the right pane. Select updateStore in the Query drop-down to trigger it whenever the user clicks Save changes.
Click on Preview on the top right to see the update store information feature in action.
The admins will also like to add new stores to the database from time to time. You need to create a form with which they can submit the store information.
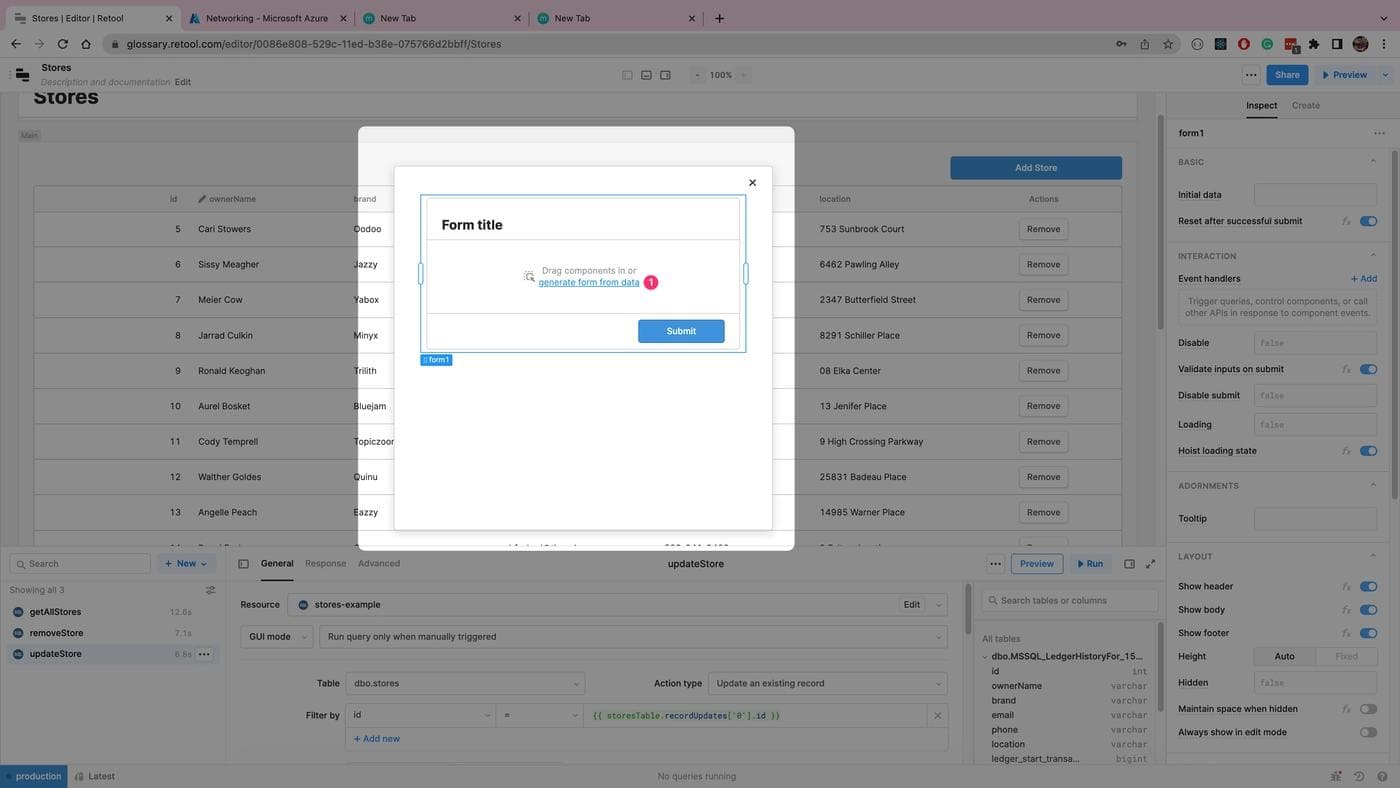
Select a Modal component from the right pane and drop it in the Main section above storesTable. Set the Button text to Add Store and rename the component to addStoreModal.
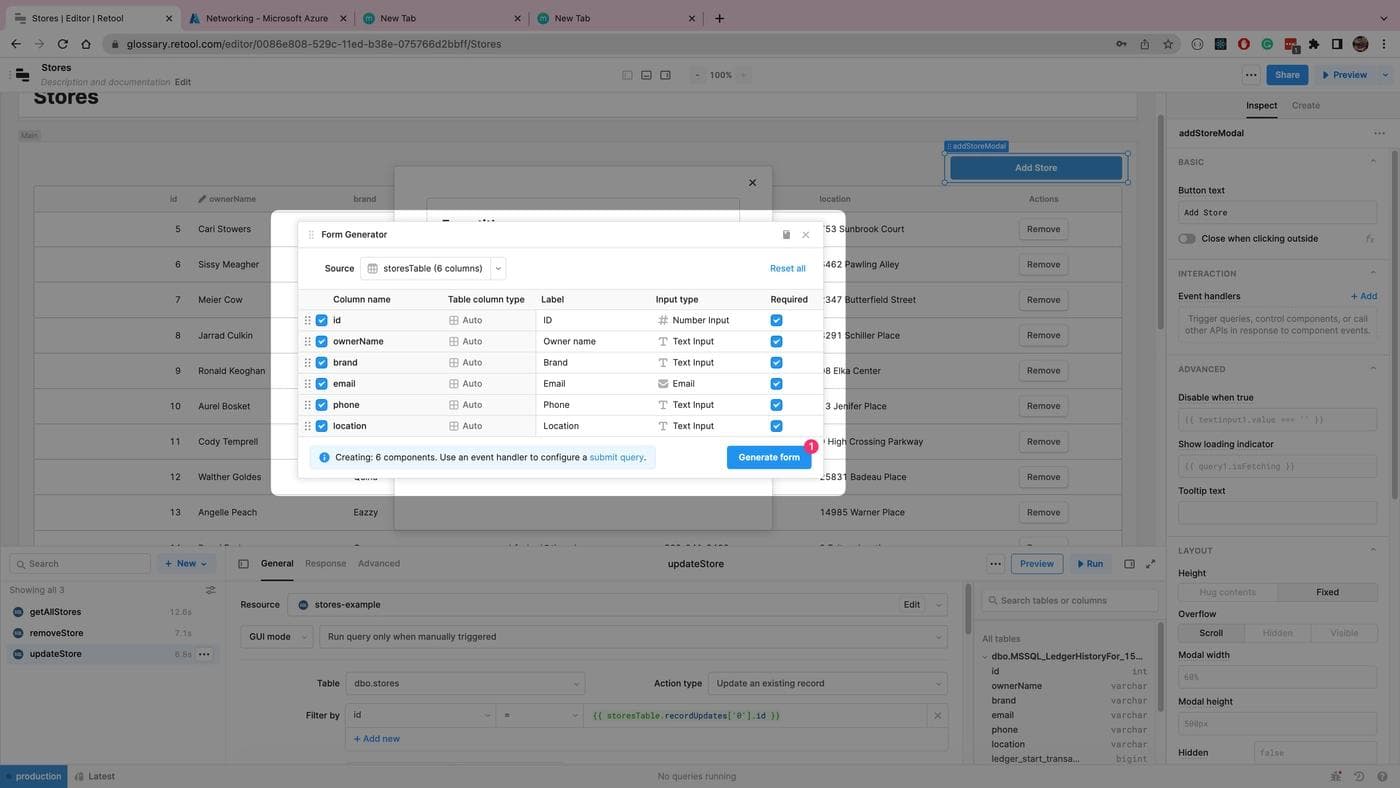
Click Add Store on the editor, which will open the empty modal component. Now drag and drop a Form component from the right pane. Click on generate form from data in the empty form component.
This will open up a form generator and keep all fields selected. Click Generate form. Now rename the form component to newStoreForm and set the form heading text to #### New Store.
In the query editor, create a new query called addNewStore with Action type as Insert a record and Changeset selected as Object, with the value of {{ newStoreForm.data }} to fill the form data on submission. Additionally, add the success event handler to trigger the getAllStores query and another handler to show a notification.
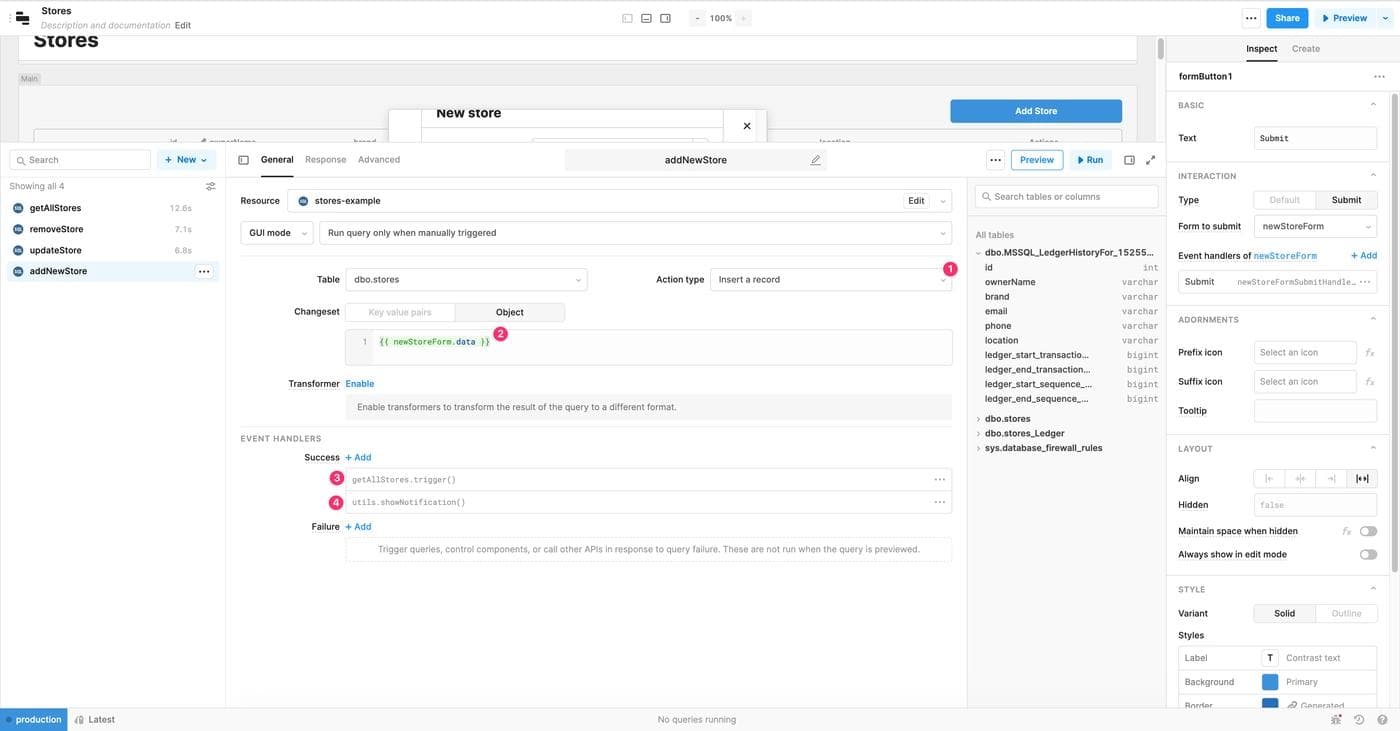
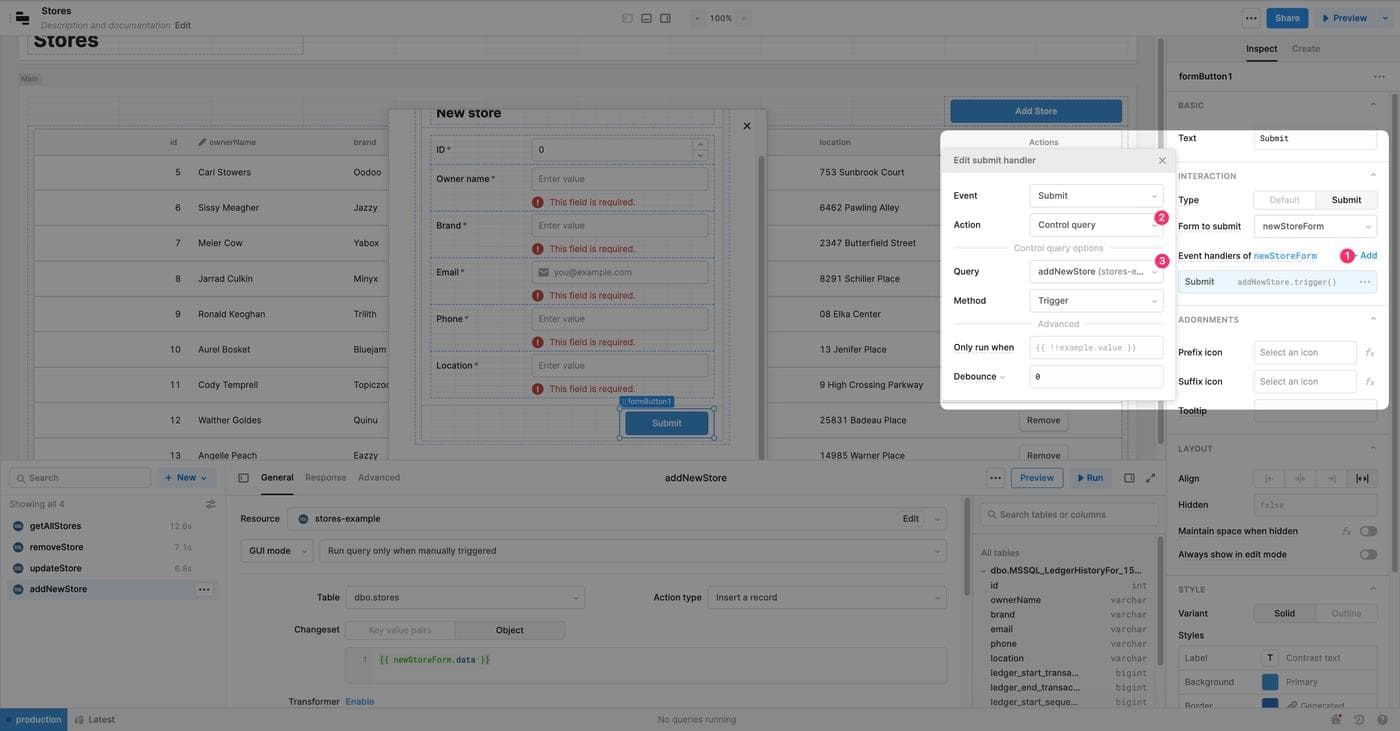
Now select the Submit button of the newStoreForm component in the editor. In the right-pane menu, click Add next to Event handlers of newStoreForm to add a new event handler. This event handler will trigger the addNewStore query and save the form data to the retool-example MS SQL database.
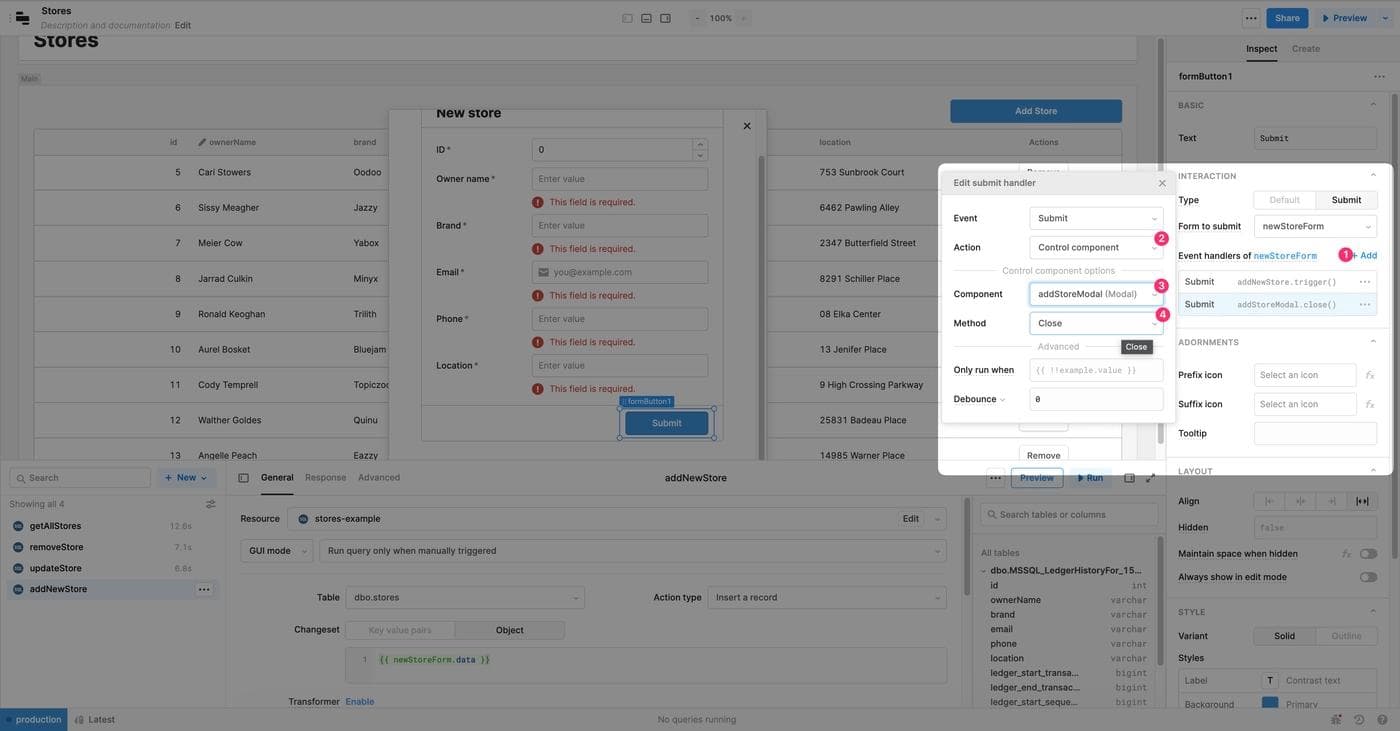
Add another event handler to close the newStoreModal on form submission. Set the Action to Control component, Component to addStoreModal, and Method to Close.
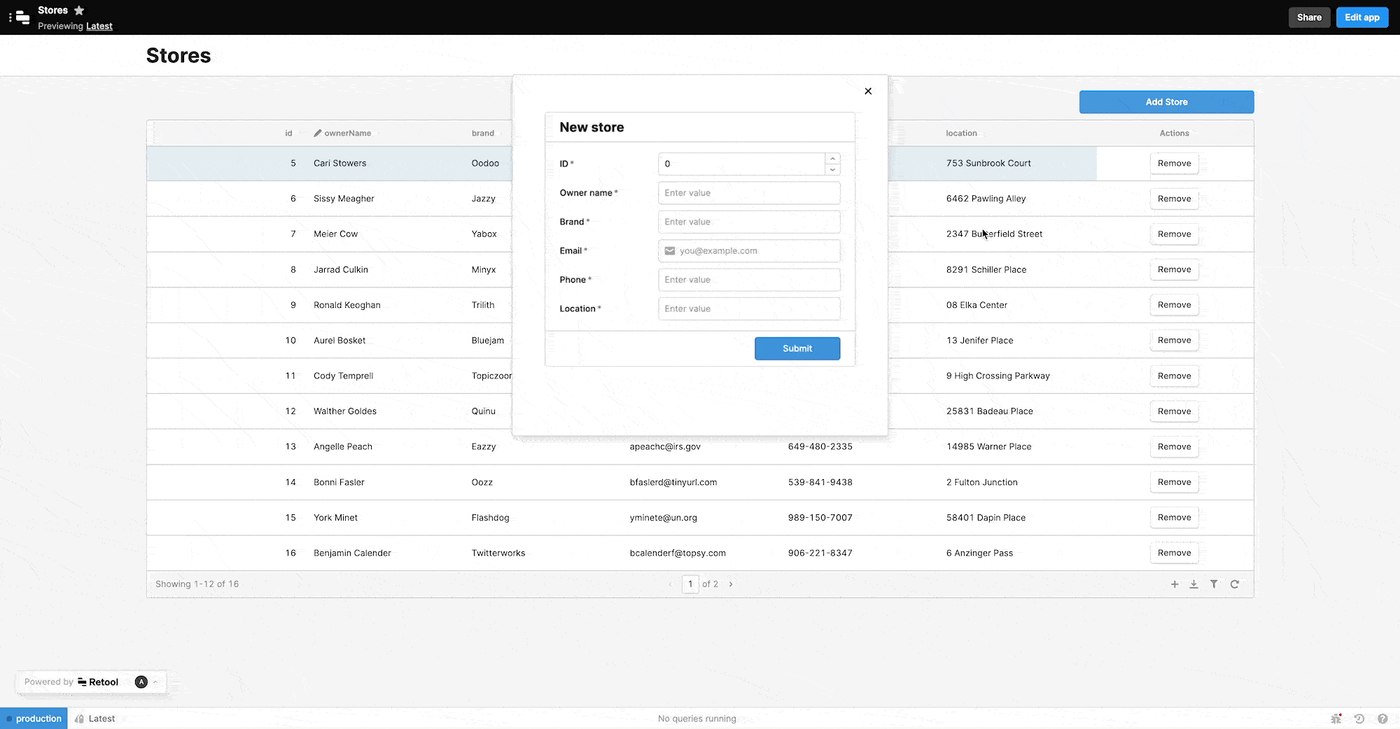
Your form to add a new store is ready. Click on Preview on the top right to see the add new store feature in action.
You've successfully built an admin panel to create, read, update, and delete the information from your MS SQL server database. In particular, you learned how to set up a new database in the Azure dashboard, secure the database server with firewall rules, and integrate it with your Retool application.
If you're looking to efficiently build an admin panel with a familiar user experience and controlled actions when they're accessing a database, you should explore adopting Retool.
Reader