
In this post, you'll learn how to build an app that will load a CSV file into your Firestore database instance.
Importing a CSV file into your Firestore database is one of the most common and fundamental ways of getting information into a database. Learning to do it will enable you to work with one of the most common data-sharing formats. You'll also learn some concepts which can help you get all sorts of other data into your Firestore instance.
We'll build a fairly simple Retool app —you should be able to build it in about 10 minutes. If you’re going to follow along with the tutorial, you'll need to sign up for a free Retool account, and have a simple CSV file to work with. And if you prefer video, watch the tutorial here and come back to this tutorial for the most up-to-date steps.
Start on the Retool home screen, then go to the “Resources” tab in the header bar. Click the blue "Create New" button on the top right.
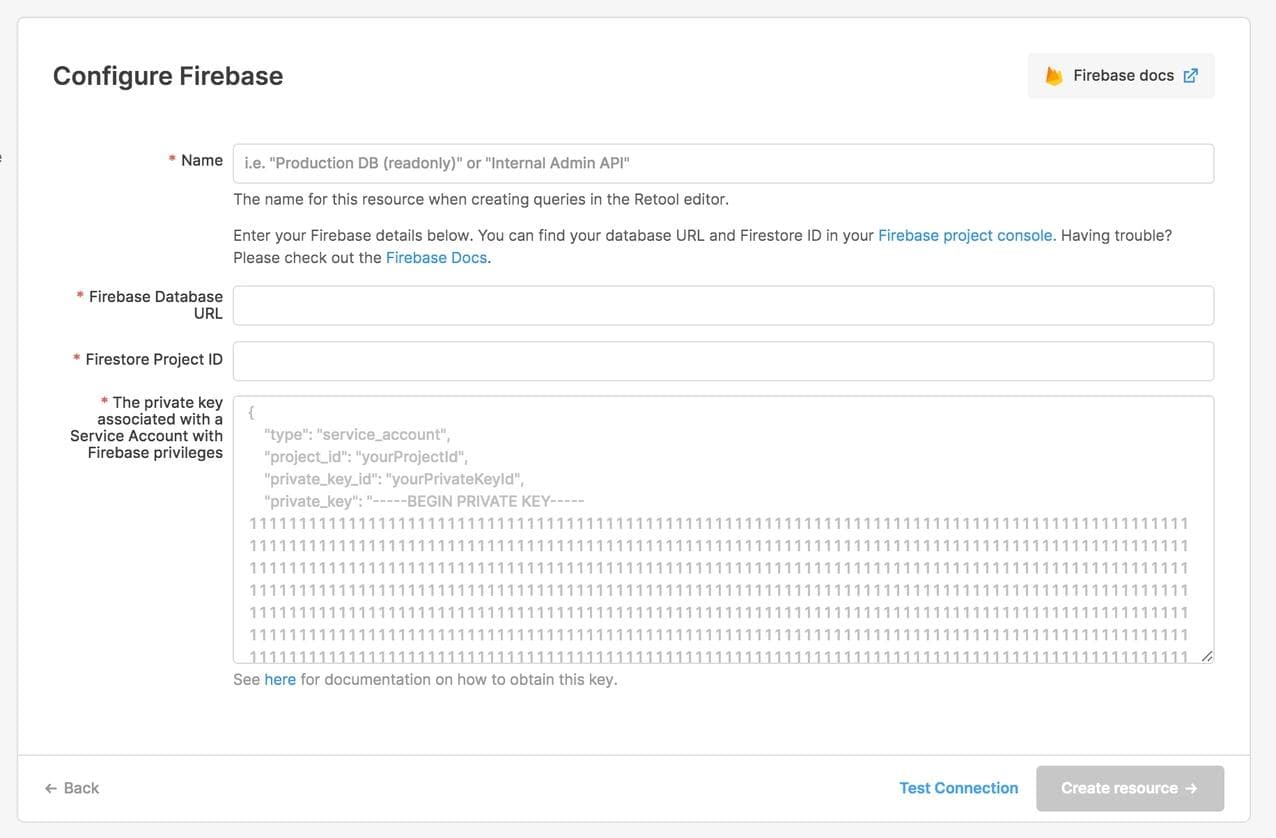
Find the Firebase icon so you can configure the Firebase resource. On the next screen, you'll want to give your Firebase configuration a name.
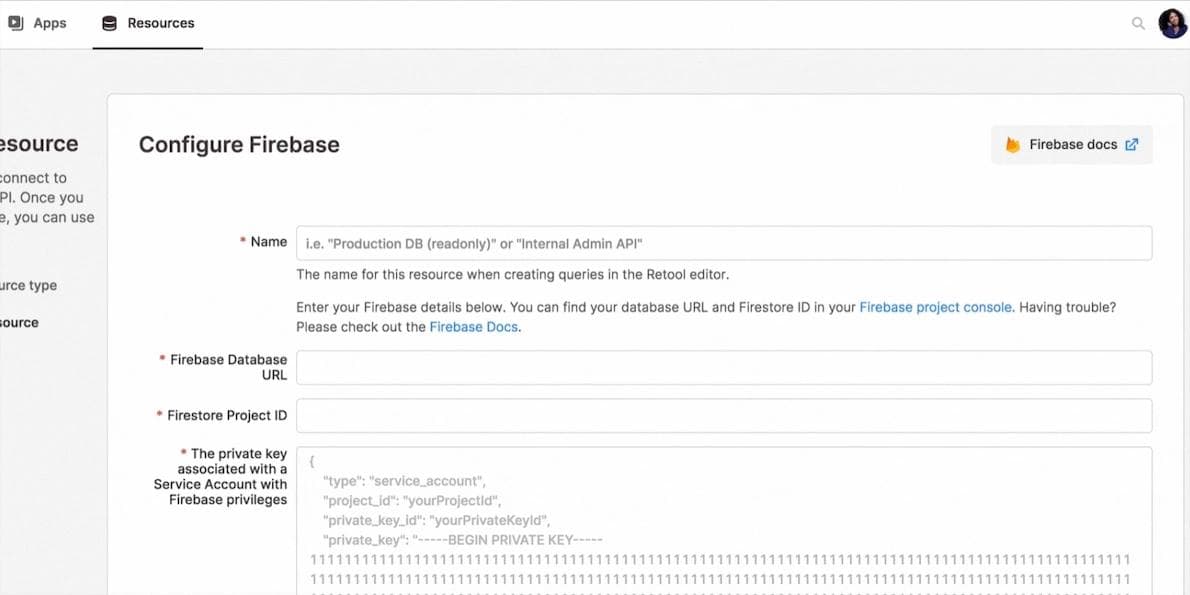
Now you need to configure Firebase. Log into your Firebase instance and look for the gear icon at the top left, click it, then select “Project settings.” In Project settings, you'll find the Project ID. Copy your unique Project ID.
Go back to the “Configure Firebase” screen in Retool. Paste in your Project ID.
To fill in the rest of the fields, go to the left panel in the Firebase console and click on Build > Realtime Database > Data. Copy andpaste this URL into the Firebase Database URL field.
In Firebase, go back to the Project settings and click on the Service accounts tab. Hit the "Generate new private key" button. Copy it, then paste it into the "Configure" screen in Retool.
Now that you've entered the necessary information, hit the "Create resource" button on the bottom right. Give the app a name such as “Firebase CSV Loader” and choose the folder you want it to go into.
You'll be taken to the builder, and you'll see an initial table. Delete the initial table.
Grab the “File Button” component from the right-hand panel and drag it to the workspace to the left. In the right-hand panel, enable the “Parse Files” button, then click the new button and choose the CSV file you want to work with to upload it to the Retool frontend.
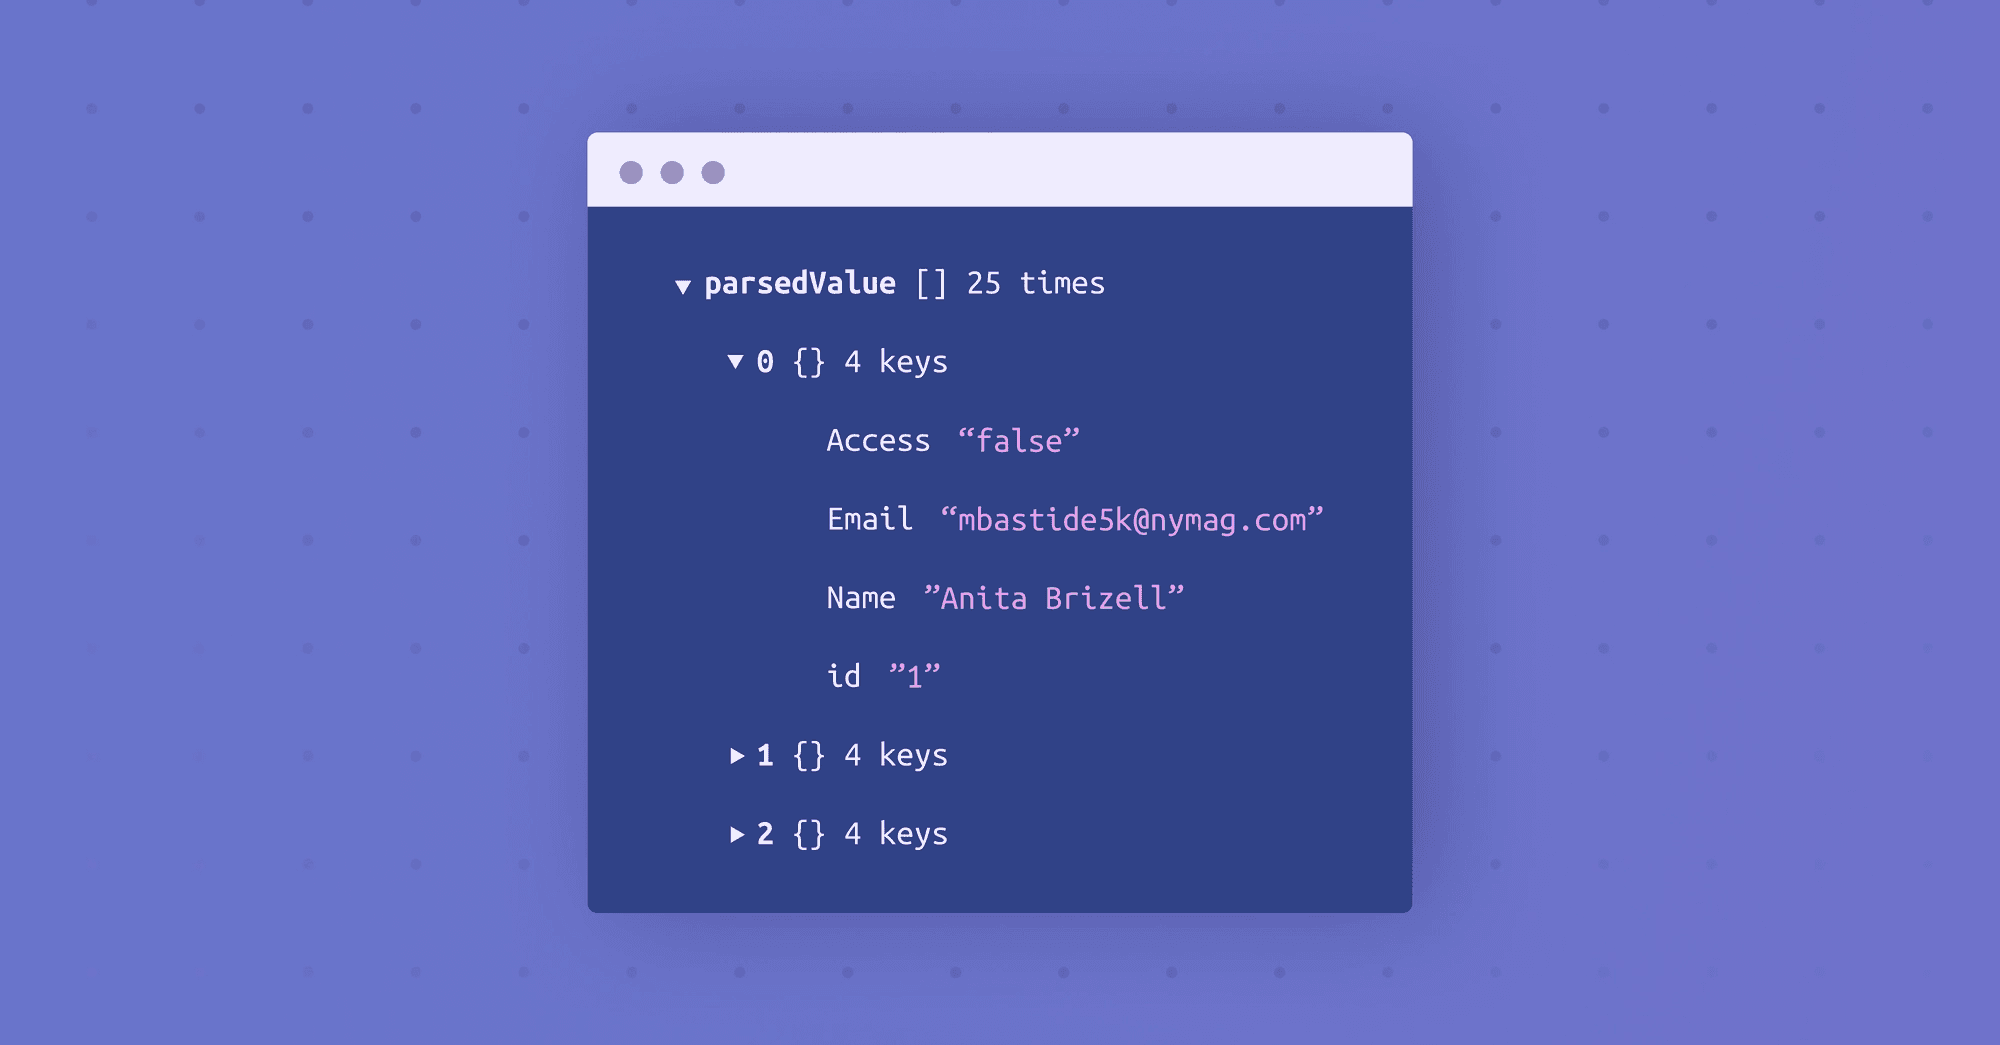
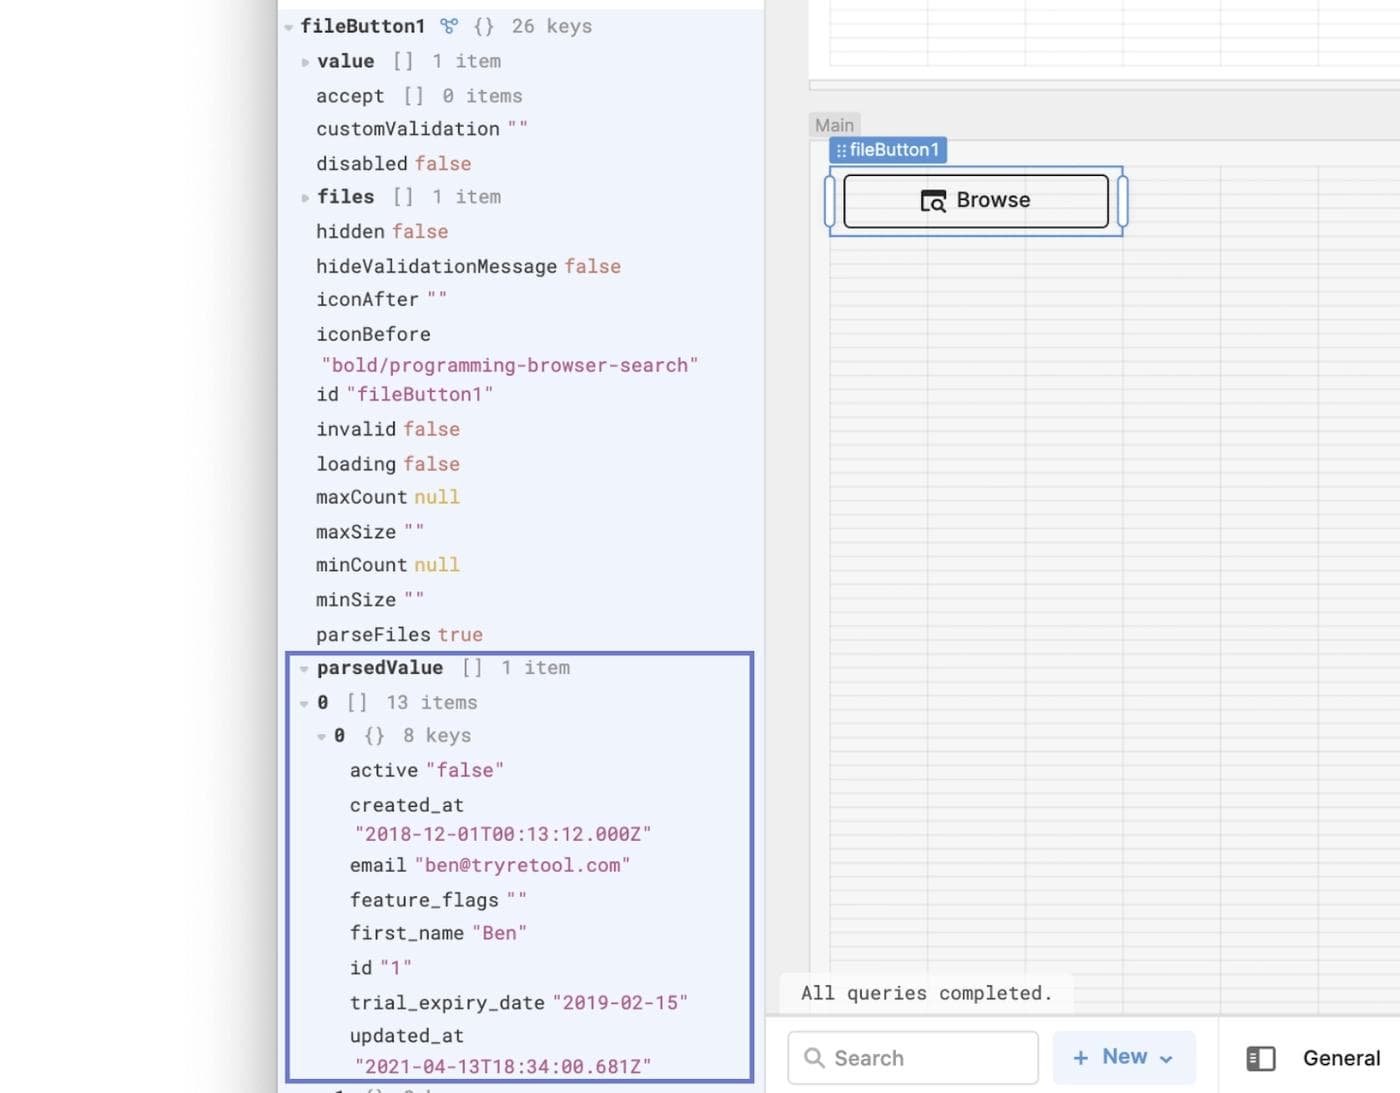
In the left-hand panel, you'll see your CSV's parsed data by selecting the `fileButton1` component and expanding the `parsedValue` property.
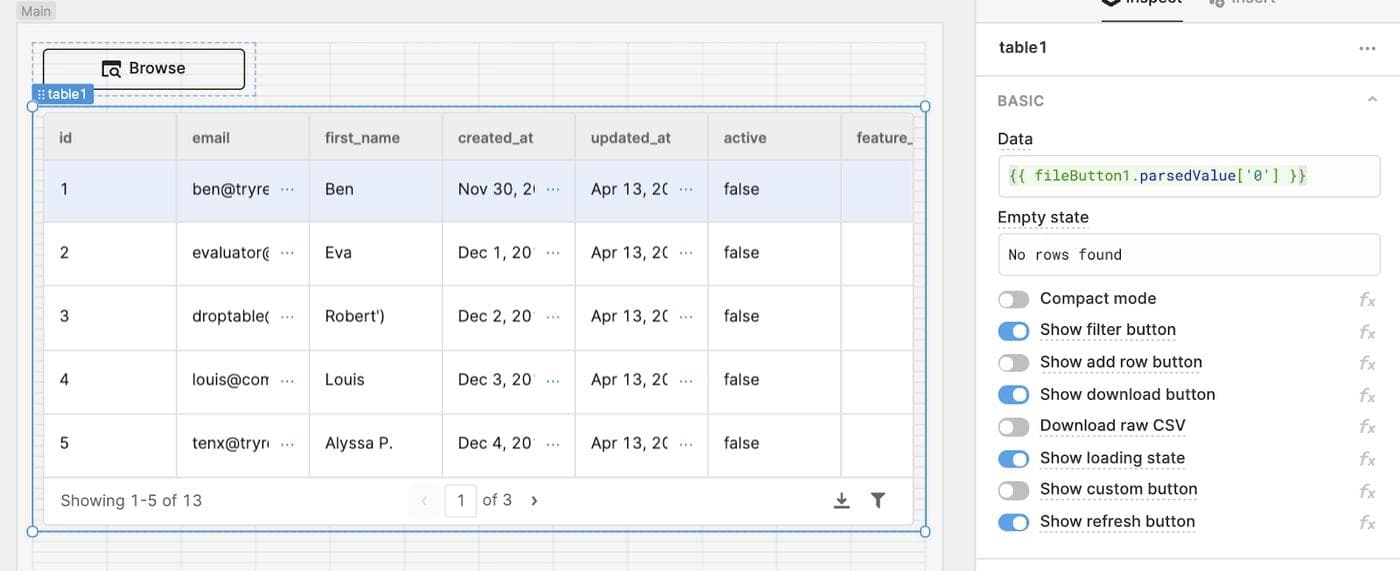
Similarly, grab the table component from the right-hand panel and drop it into the workspace so that you can visualize the CSV data.
Go to the Inspect tab on the right-hand panel. Change the data input to reference the fileButton1 parse value by typing `{{ fileButton1.parsedValue[‘0’] }}` . Voila! You'll see the data from your CSV file displayed in the table.
Add a text component from the right-hand panel so that you can name your table. Use Markdown to set the title size such as “## My CSV Loader”.
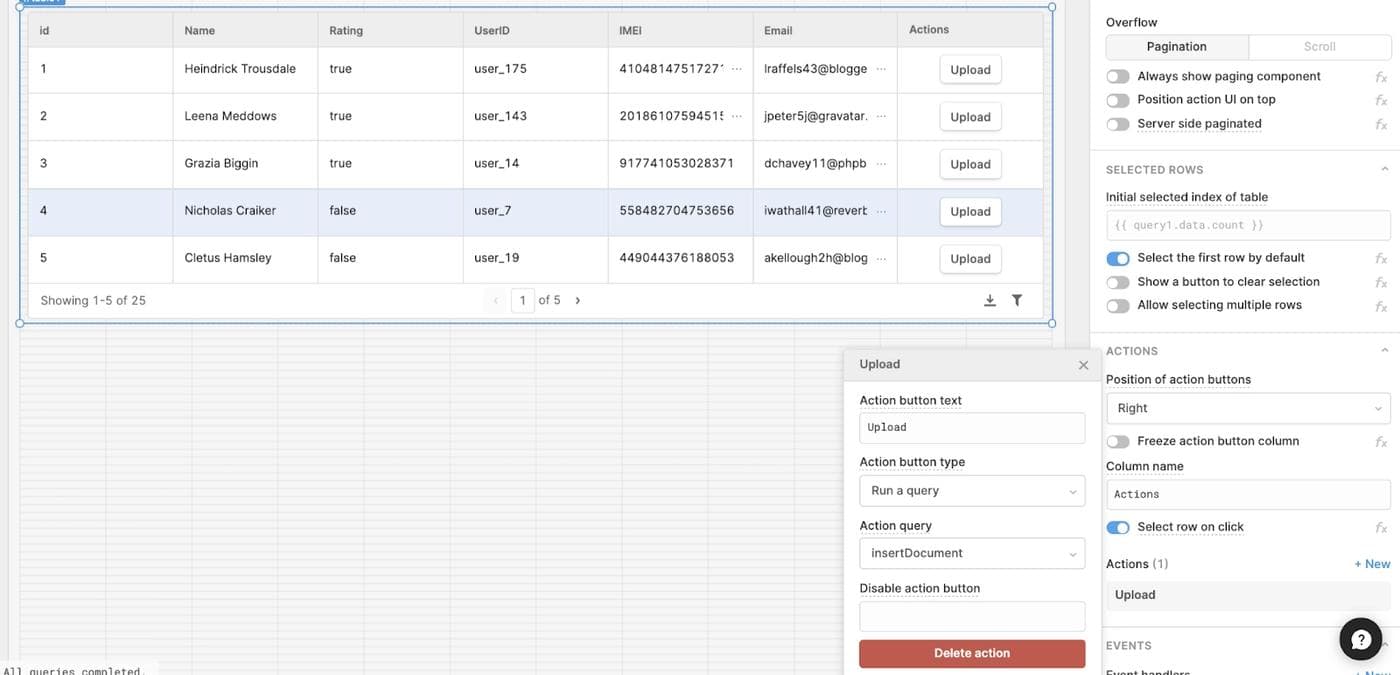
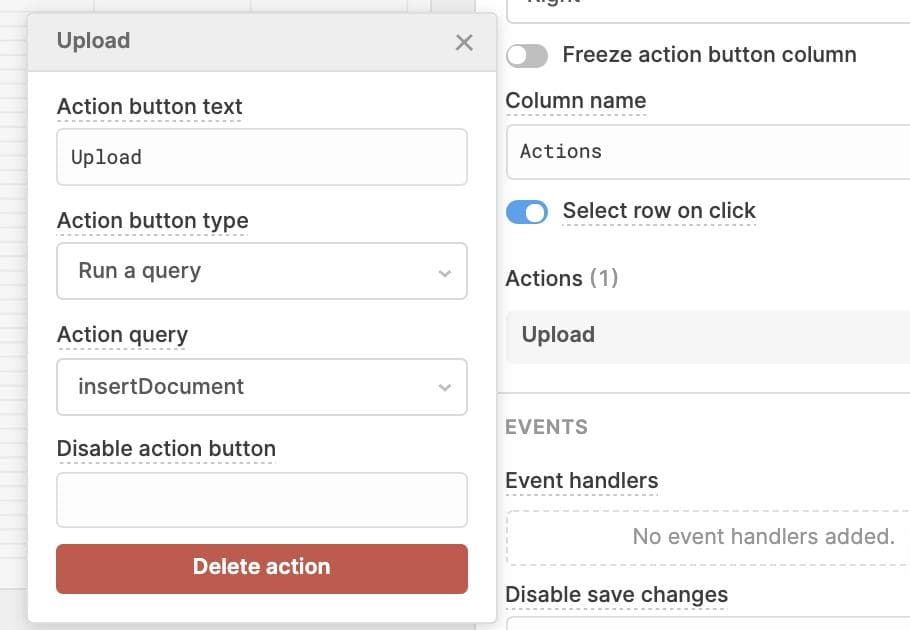
In order to give the user the ability to interact with each row in the table we need to select the table component; go to the right-hand panel and choose "+ New Action." Then change the name of the button. In this case, you can use "Upload" as the name for the button.
Next, we’ll create our query and link it with the button in the “Action query” dropdown.
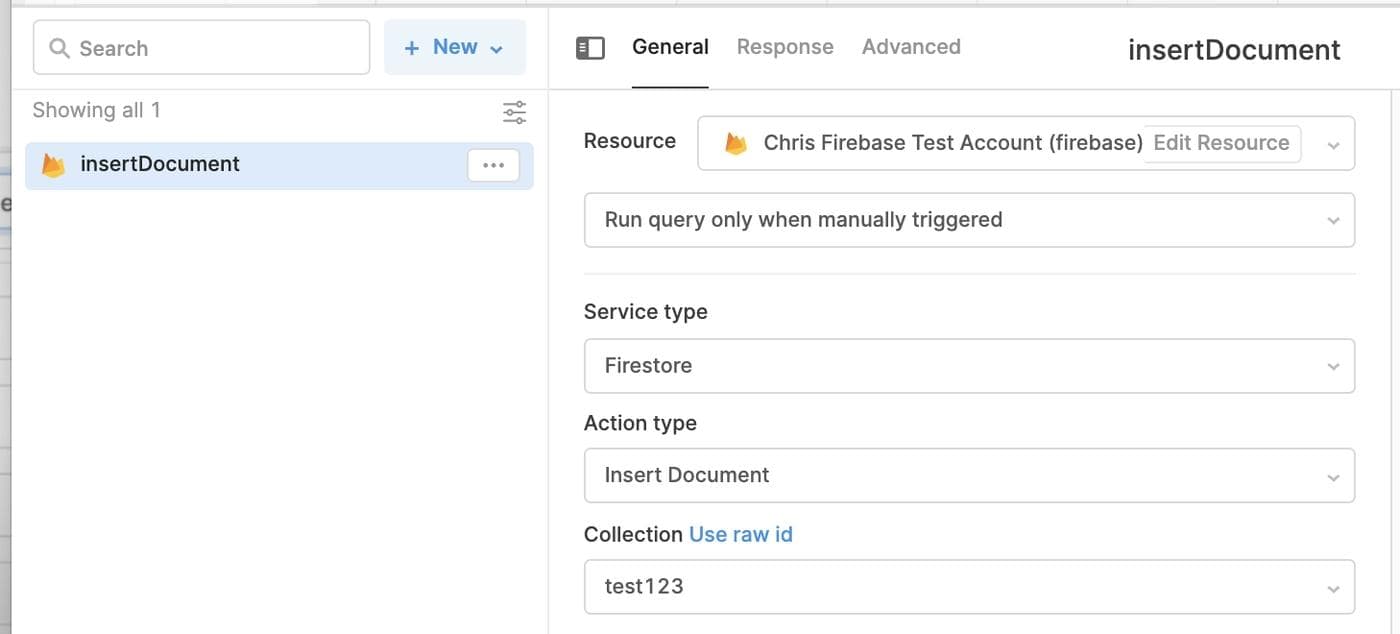
Go to the query panel below the UI canvas. Select the first query on the left side and change the Resource type to the Firebase resource which you created in the beginning of this tutorial. Next, change the service type to Firestore in the first dropdown menu below and change the Action type to Insert Document.
Now, select your Collection ID from the dropdown, and change the name of the query. As you can see in the image below, we’ve named the query “insertDocument” in this example.
Next, in the value input for the Insert Document query, create a JSON object and keys for each of the fields you want to pass through. For each key value pair, insert curly braces to reference the table data for the row that’s selected. In this example, we’ll reference the email key value, then copy, paste, and modify it for the other two keys.
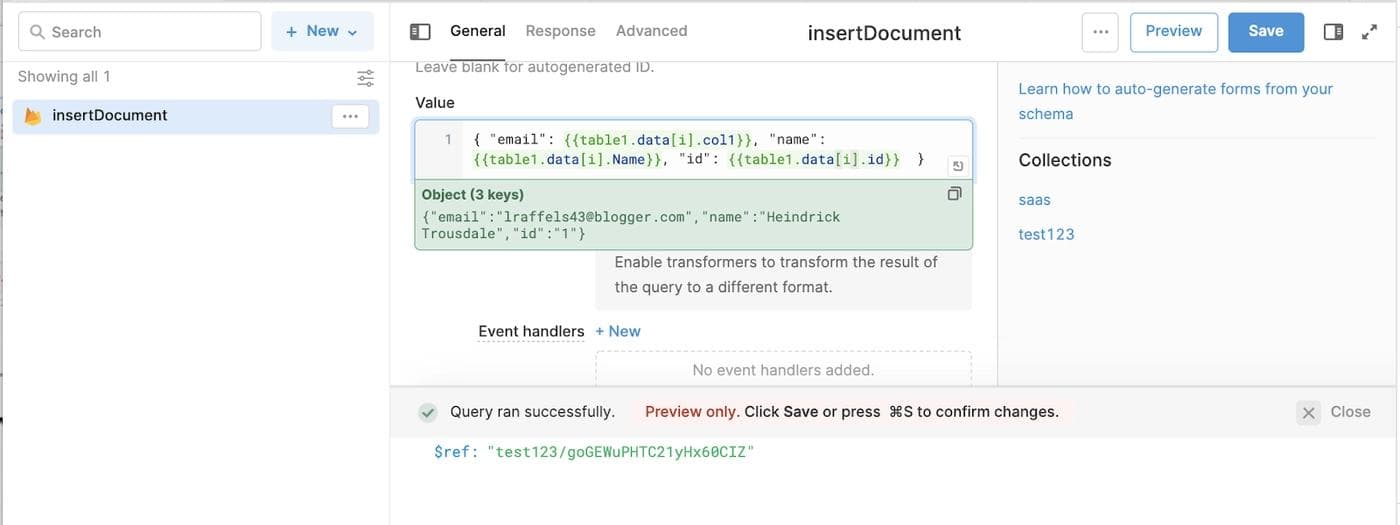
Note: You can reference the selected row in the table with `{{ table1.selectedRow.data.VALUE }}` or `{{ table1.data[i].VALUE }}`
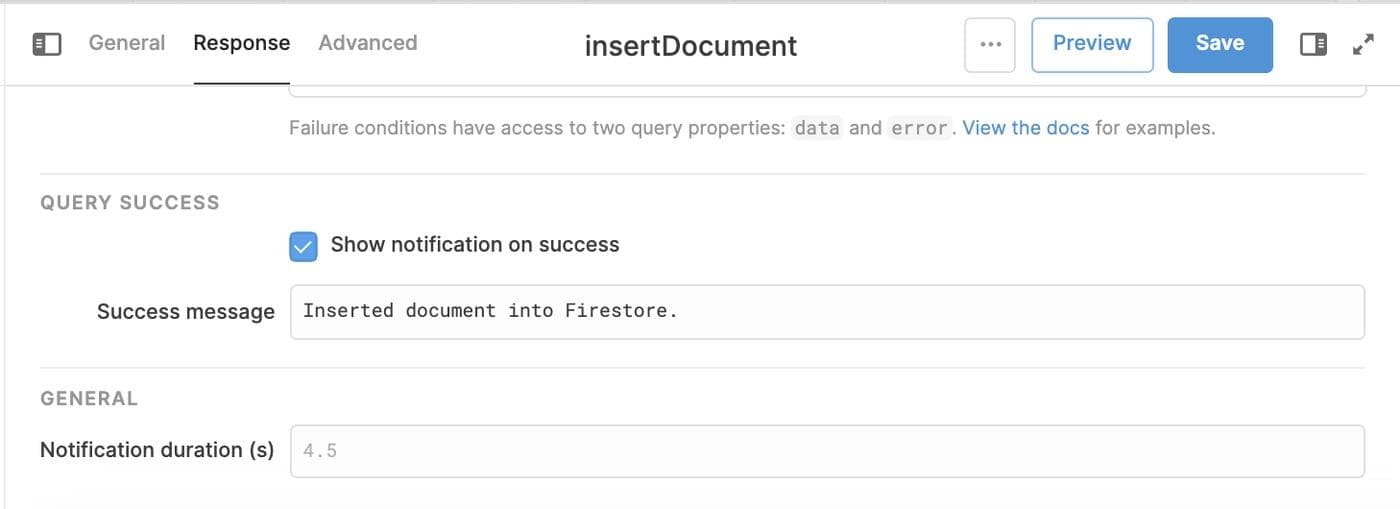
Click on the Response tab at the top of the query panel. Make sure there's a check next to "Show notification on success."
Now, write whatever success message you want to be shown to your user when a successful query runs. (In the example, we're using "Inserted document into Firestore." )
Finally, link the table’s upload button action to the “insertDocument” query, which will trigger the query to execute and upload row data to your resource.
We can test this response by clicking on individual rows on the table above, then clicking the "Upload" button to the right.
To make sure your data is making it into your Firestore, we’ll create another table to query the same Firestore instance and display the data.
To do this, create a second query in the bottom panel. Using the same Firebase resource and Collection ID, select "Query Firestore" as the Action type. Click the Preview button at the top right of the query panel to get an idea of the kind of data that will come back.
Assuming you get a successful response back, save the query and then rename it to “listDocuments”. Now, create another table component following the same steps as earlier and place it below your first table. In the new table settings Data input, reference your new query as `{{ listDocuments.data }}`.
In order to view the most up to date values from Firebase in our second table, we need to trigger the table to update each time we upload values from the first table.
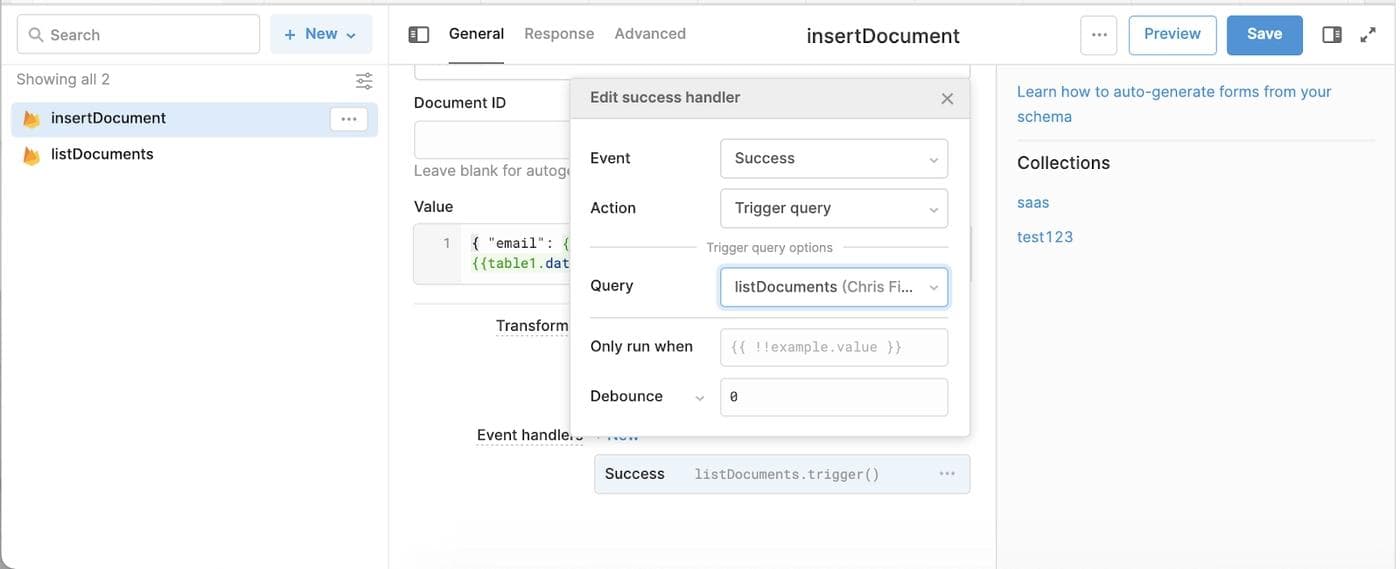
To do this, select your `insertDocument` query in the bottom panel and create an event handler for the “Success” event so that each time you successfully insert a document, the Firestore table will automatically be refreshed. From the event handler success trigger dropdown select the `listDocuments` query.
Now, the first stage of the project is done! You can upload any CSV file with these headers and quickly insert individual rows into your Firestore.
Rather than inserting individual rows, you may want to upload an entire file. This requires a slightly different query architecture than what we covered already so we’ll provide a short overview of how to do this below.
As an aside, I would not recommend this architecture for very large CSV files as it will take a long time to run all of the queries and be memory intensive for your computer.
There are two queries you'll need to upload an entire file: The first is a JavaScript query that will loop through each row in the CSV file and then call the second insertDocumentBulk query, passing in data for that row.
Take a look at the simple example in the screenshots below.
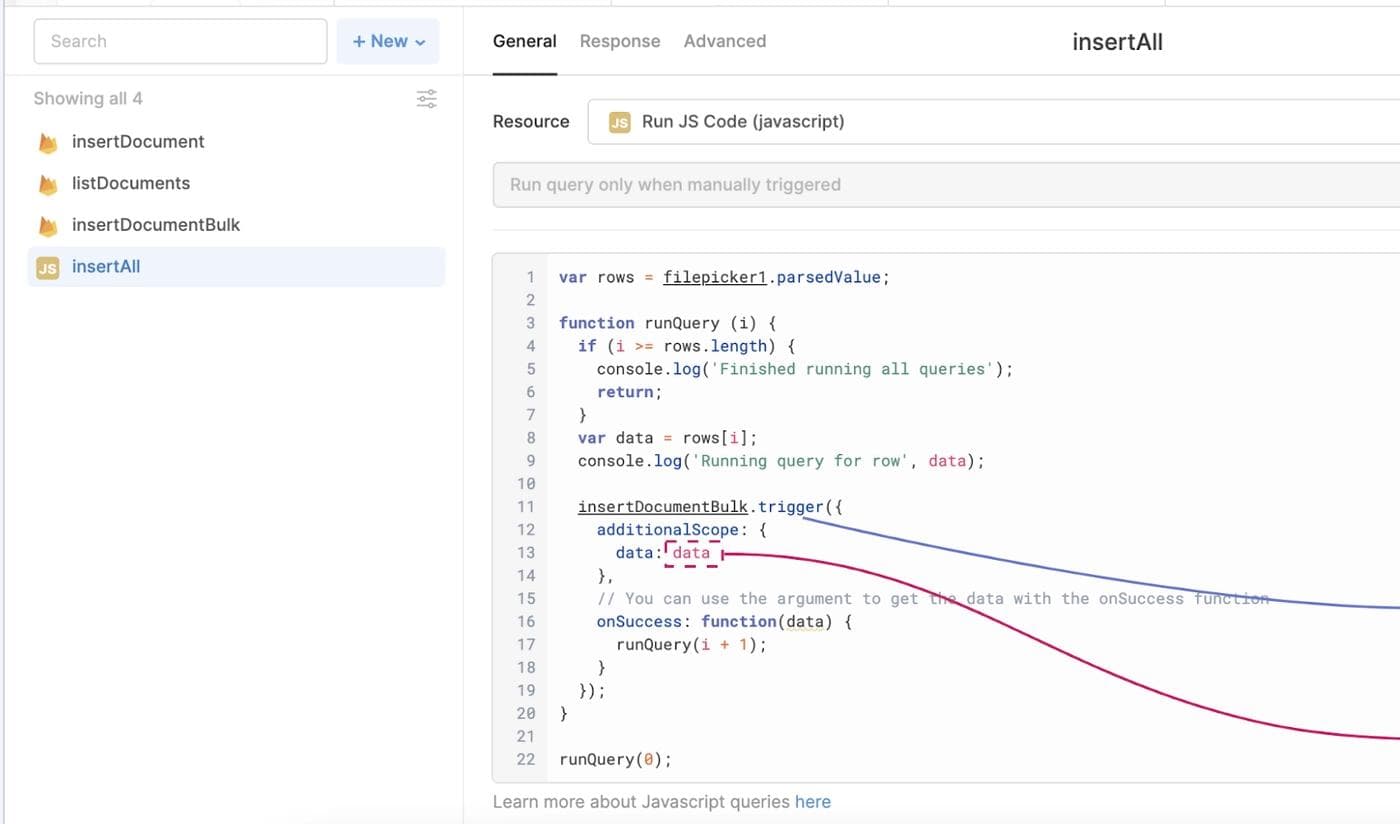
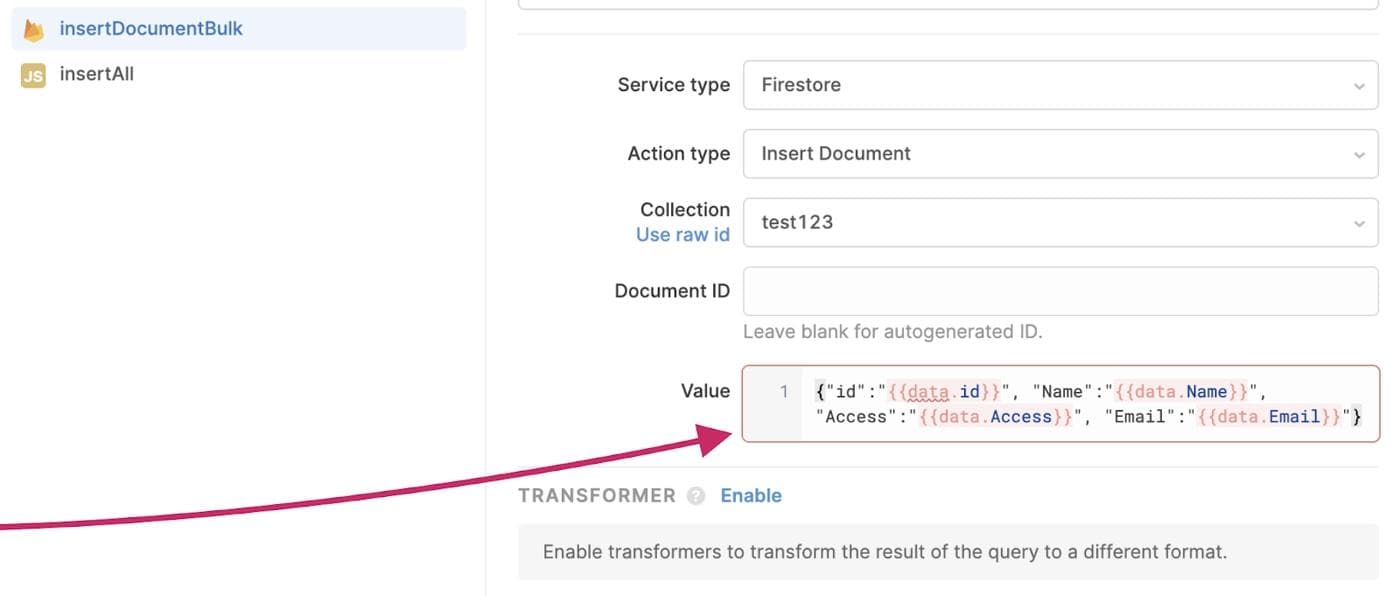
The `insertDocumentBulk` query will receive the data from that loop for each iteration and insert each individual row.
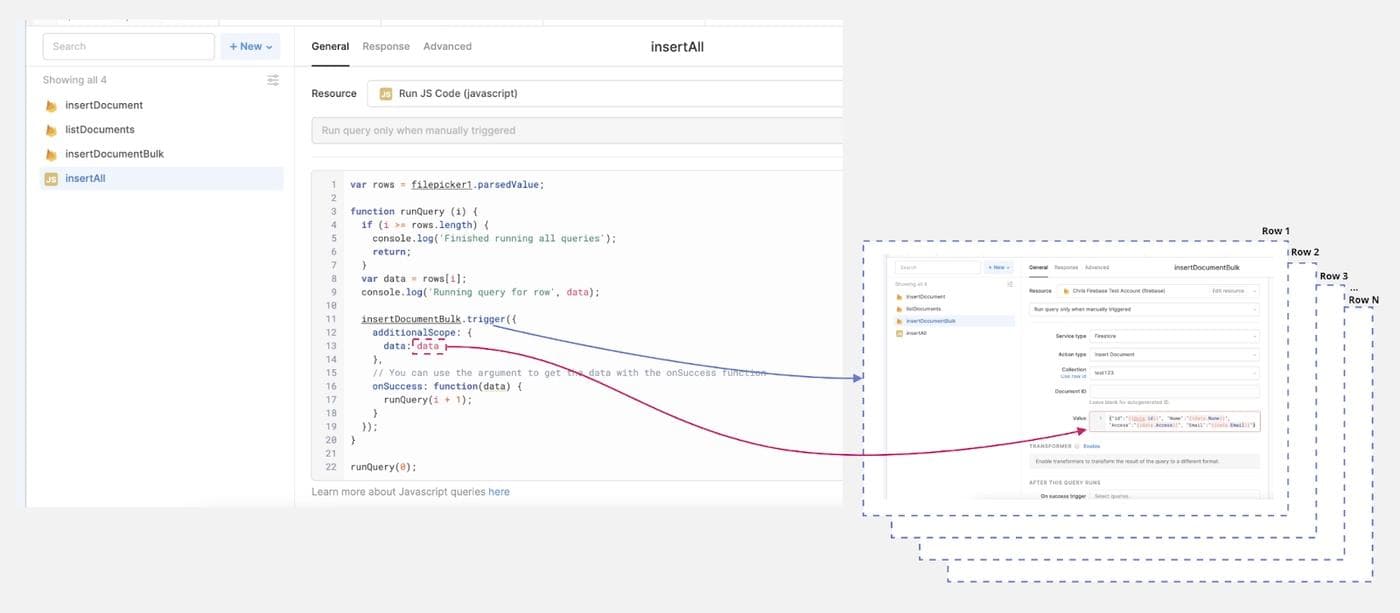
With these two queries together, you can link the first one to the button and upload the entire file to your Firestore. For more details of this method check out this documentation page.
Reader