

This post was written with help from Gaurav Thalpati.
Since the advent of products like Snowflake, more and more teams are leveraging data warehouses to store critical business data. Often, various teams—marketing, customer success, operations—need to access and alter that data but aren't equipped to write SQL queries. Retool makes it easy for your data team to build an administrative application by simplifying the frontend process with pre-built, draggable components.
To make implementing Snowflake in Retool easier, this article contains a tutorial on how to build a simple admin panel with it. These same concepts could be extended to other data warehouses, and if you're looking for a similar step-by-step guide, let us know!
Retool supports reading and writing Snowflake data directly. Specifically, this tutorial will cover building an admin panel that can:
- View the data from backend tables
- Search data based on specific filter criteria
- Insert new records to the backend table
- Update specific columns within a table
- Delete records from the table
To create this admin panel app, you will need the following:
You will need to create some sample data to query from. You can either create custom sample data or use Snowflake's default sample data. Both options are detailed below.
To create your own sample data, follow these steps:
- Create the database "demodb" in Snowflake.
- Create the table "customers" in the public schema in "demodb".
- Insert sample records in this table.
- Query the data to check if it's correctly inserted.
Alternatively, you can use Snowflake's default sample data.
Execute the following using the ACCOUNTADMIN role. Here's how to do it:
- Create a new "sampledb" database from the Snowflake share:
create database sampledb from share sfc_samples.sample_data;. - Give required permissions to the "sampledb" database:
grant imported privileges on database sampledb to role public;. - Create another database, "demodb", for creating tables with sample data:
create database demodb;. - Create a "customers" table in the public schema in "demodb" by selecting records from the "demodb" database as below:
1 2 3 4 5 6 7 8 9 10create table demodb.public.customers as select C_NAME as name, C_address as address, C_phone as phone, C_MKTSEGMENT as category from SAMPLEDB.TPCH_SF1.CUSTOMER limit 10;
Pro tip: Select a limited set of attributes and records while creating a sample table; this can help simplify your first app and its testing.
- Before you execute this query, create a virtual warehouse in Snowflake. Create a warehouse with the X-Small size and name it "demowh".
- Execute the above query using "demowh". This will create the "customers" table in the public schema within the "demodb" database.
For this tutorial, the second method—the Snowflake sample data—was used.
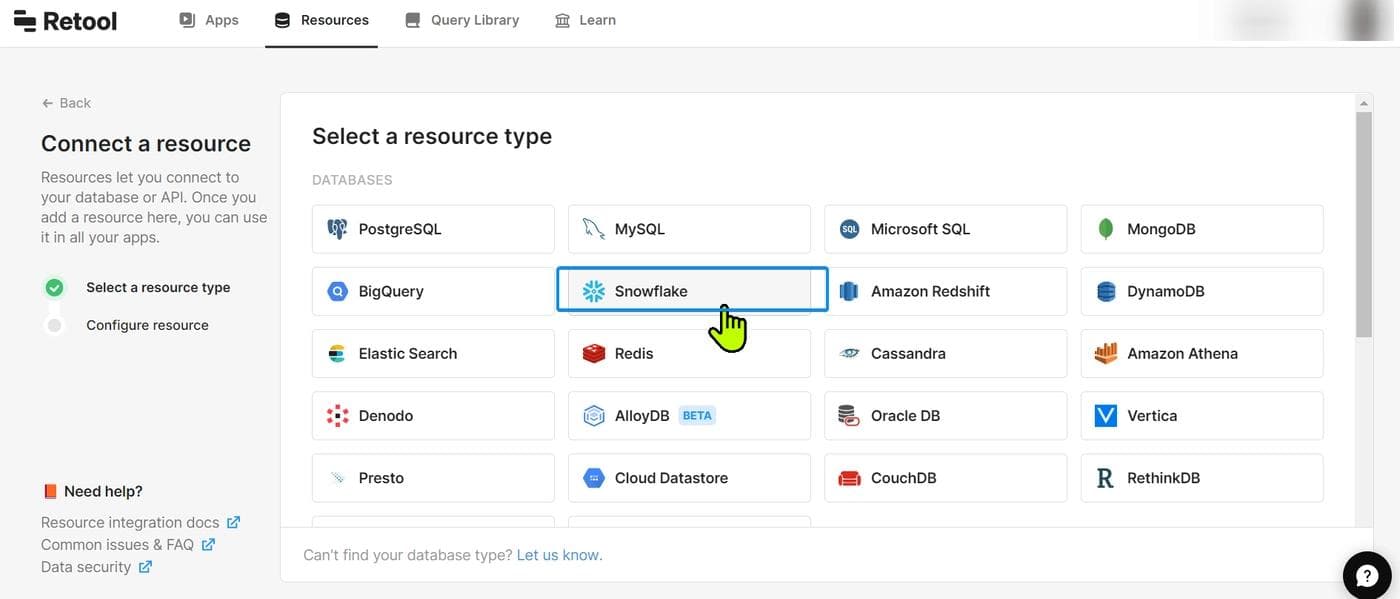
Retool has a native Snowflake connector. To establish this connection, you must first create a resource in Retool. To do this, log into your Retool account, and in the top menu bar, click on the Resources tab, then Create New, and then Resource.

Select Snowflake from the list of resource types.
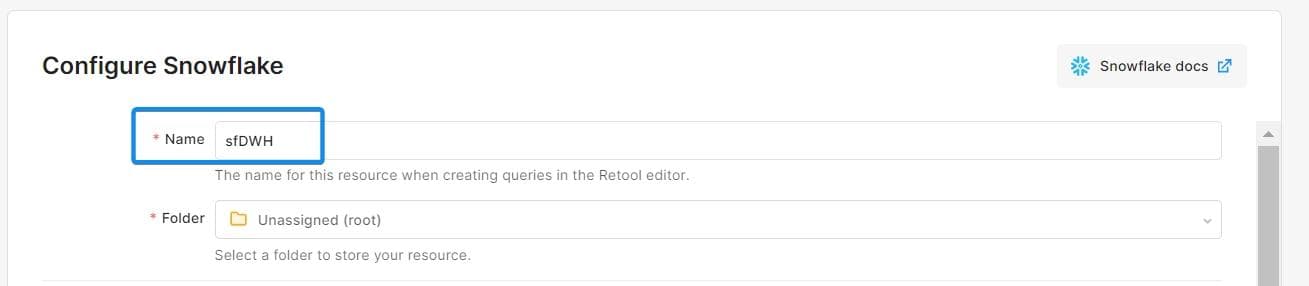
Name the connection "sfDWH".
Enter the below Snowflake details to establish the connection:
- Account identifier
- Database name
- Database schema
- Database warehouse
- User role
- Login credentials
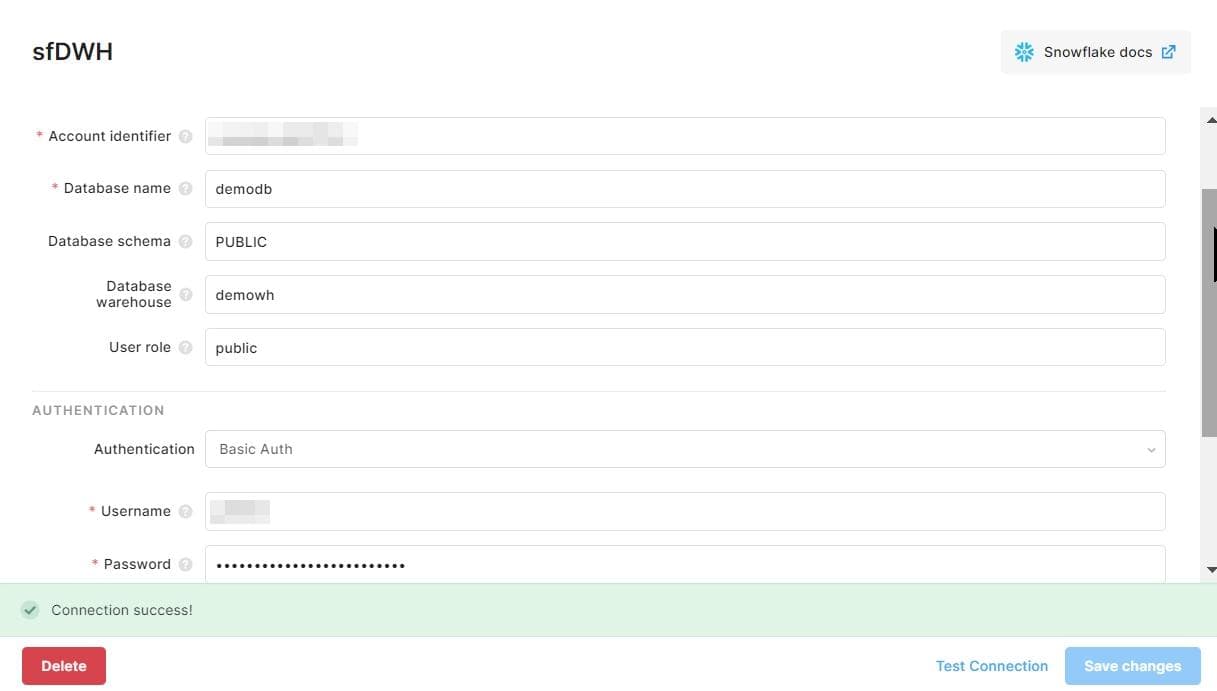
You can test the connection after creating the resource. If all the inputs are correct, you'll get a success message.
A failed connection could be attributed to these common issues:
- The Snowflake account name is incorrect. The Snowflake name is in the account URL, the part that precedes ".snowflakecomputing.com".
- There are trailing spaces in the account/login details.
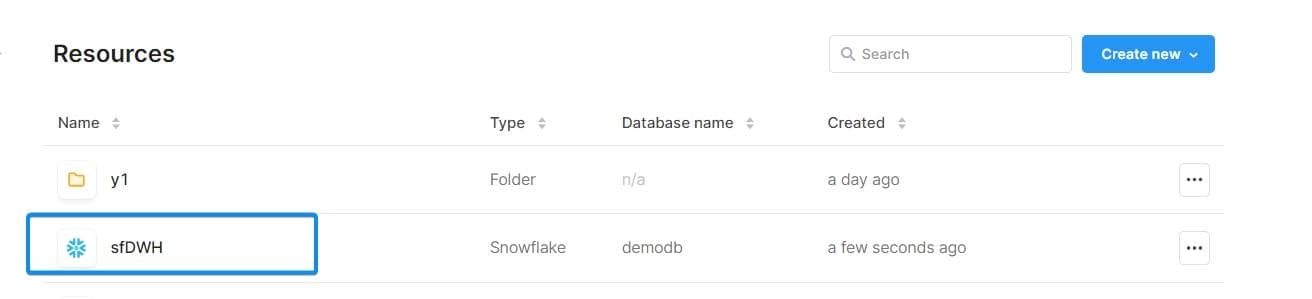
Next, navigate to Resources to locate your connection.
With Snowflake successfully connected to Retool, you can now create an admin panel app for accessing Snowflake data.
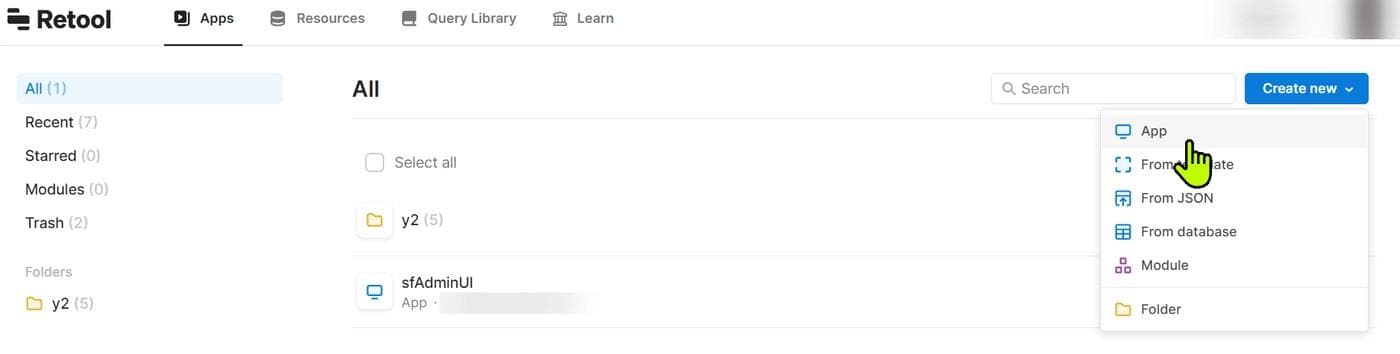
On the Retool Apps tab, click Create new and select App.
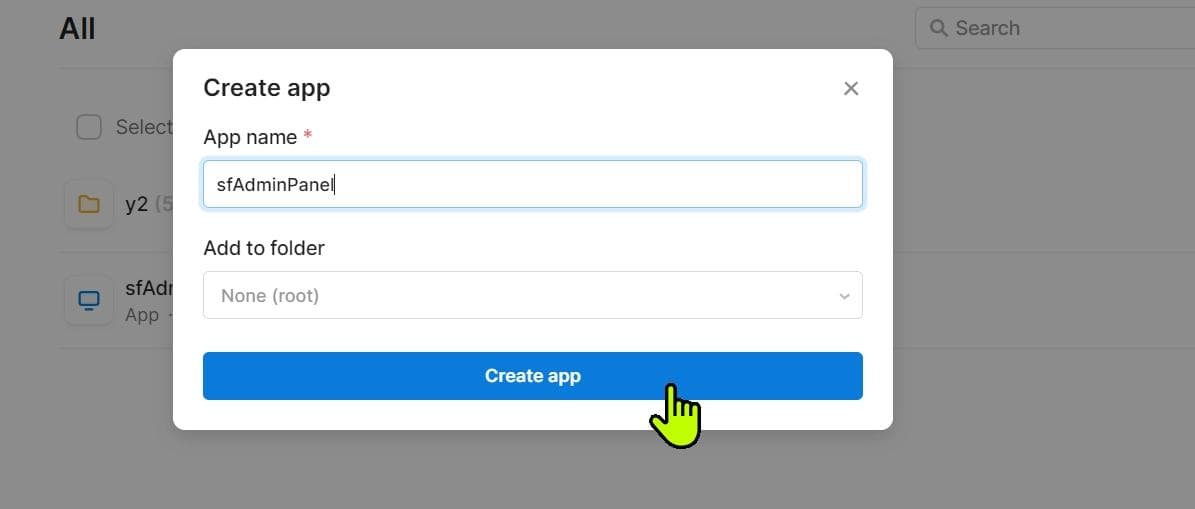
Provide a meaningful name like "sfAdminPanel" and create the app.
This opens the app editor, which can be used to add various features like viewing, searching, and manipulating data, respectively using the left, bottom, and right panels on the canvas.
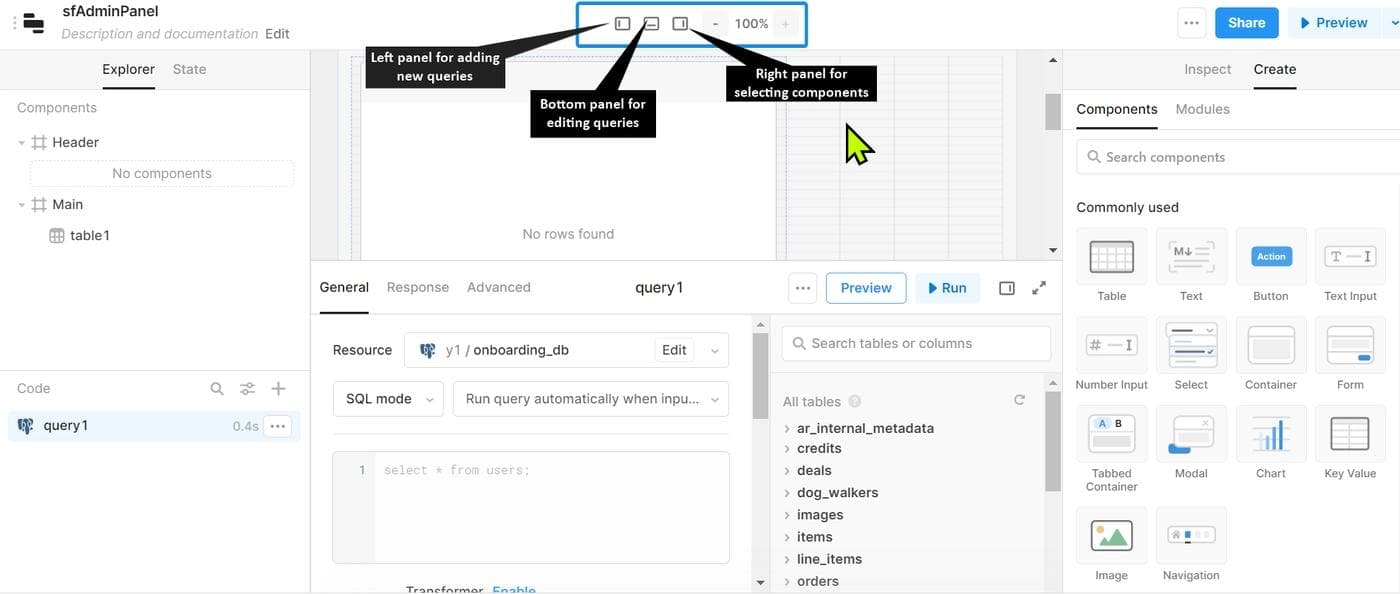
To make this app functional, you can add components like tables, containers, forms, and input fields, as well as write queries to access or update data.
Retool uses SQL for querying data. You can use a simple select query to fetch the data from the Snowflake table.
Follow the below steps to create your first query.
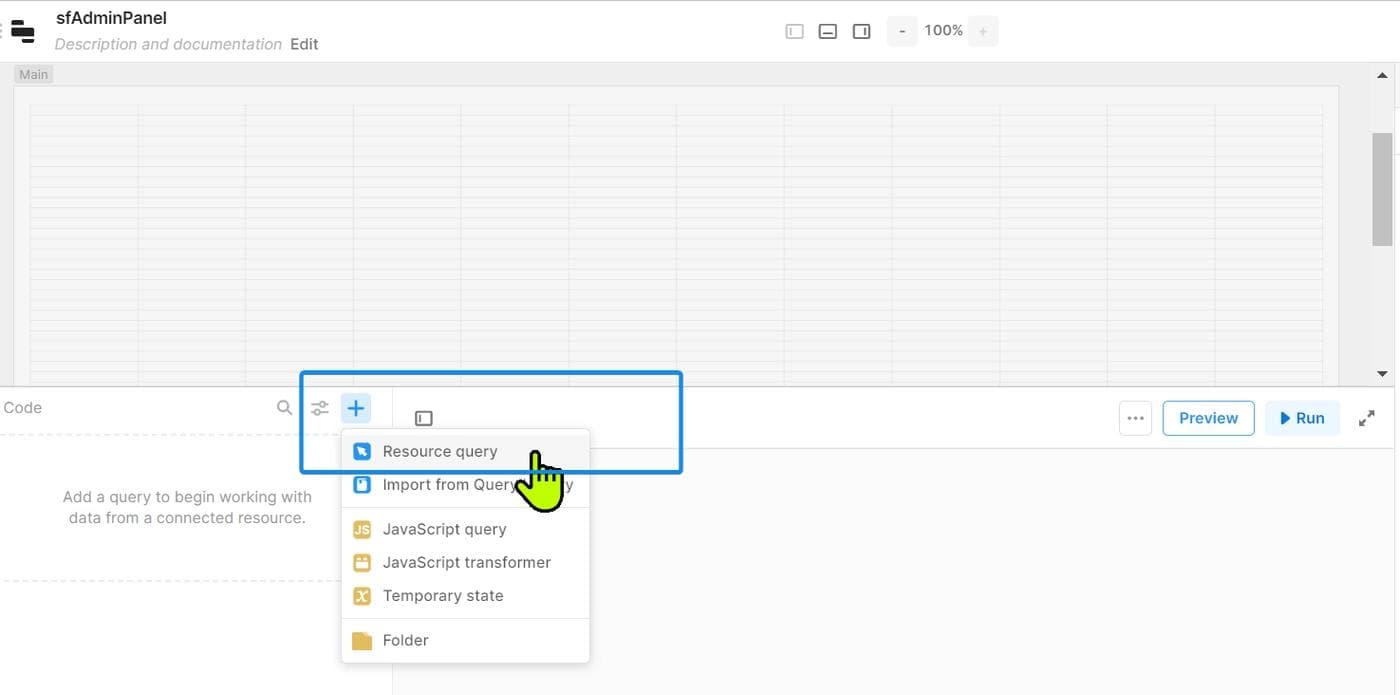
- In the app editor, open the bottom panel and click + to add a new query.
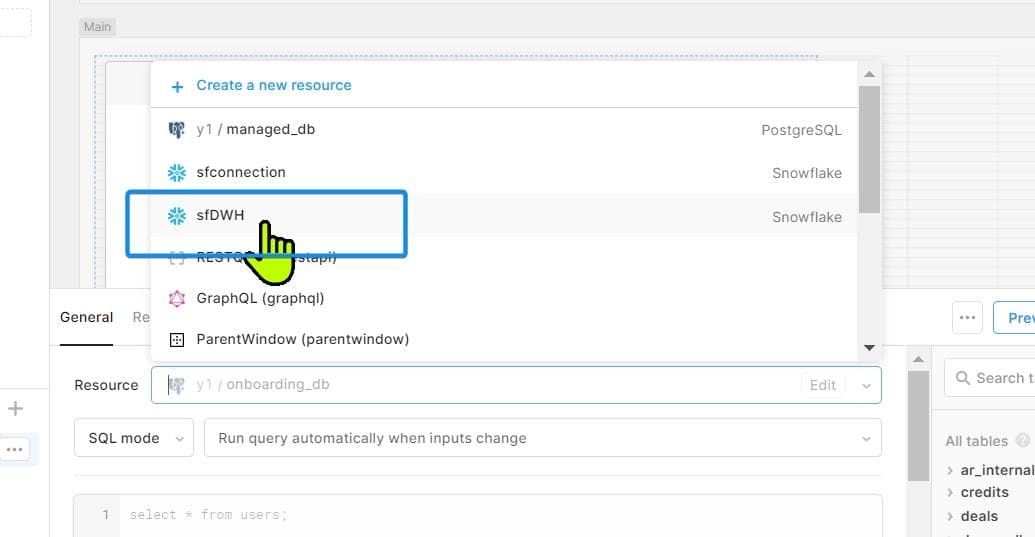
- Select the correct source connection you had previously created for connecting to Snowflake. To do this, click on the default connection visible under Resource.
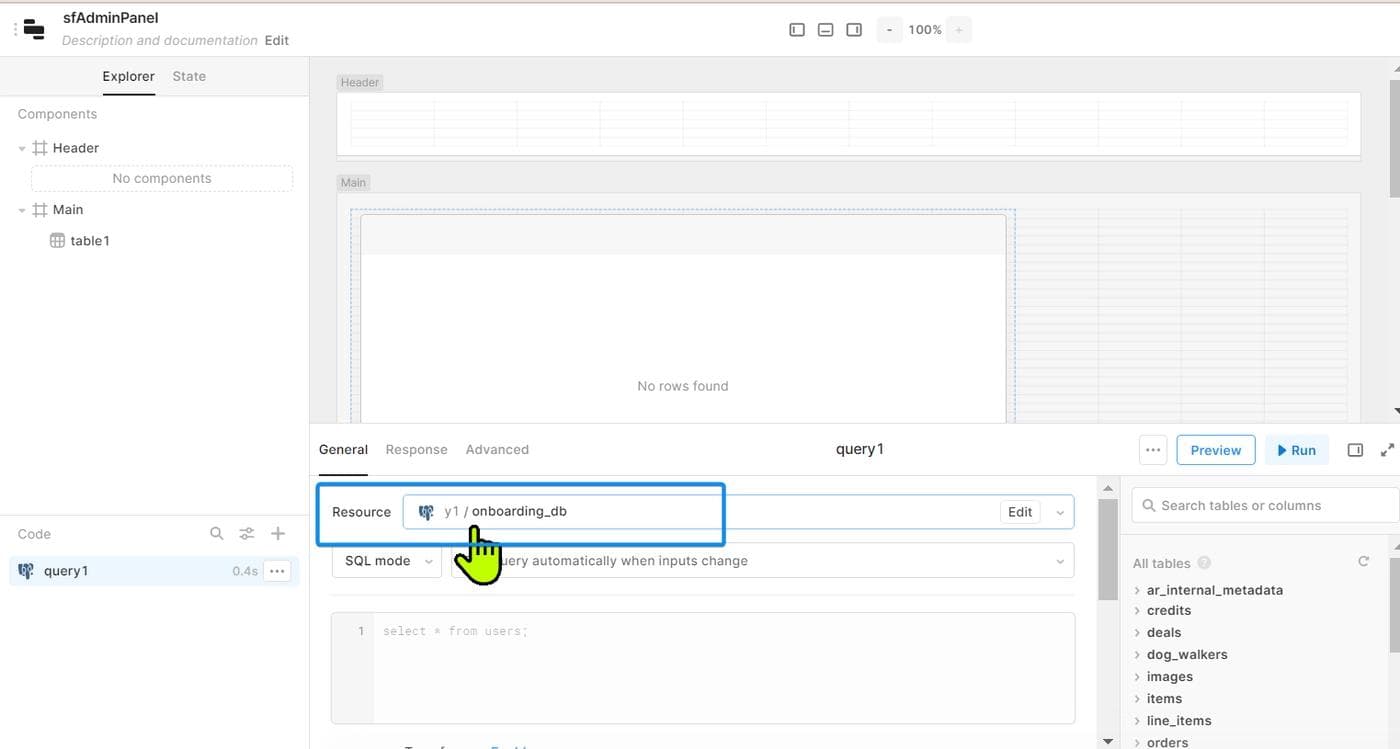
- Select the sfDWH connection created earlier.
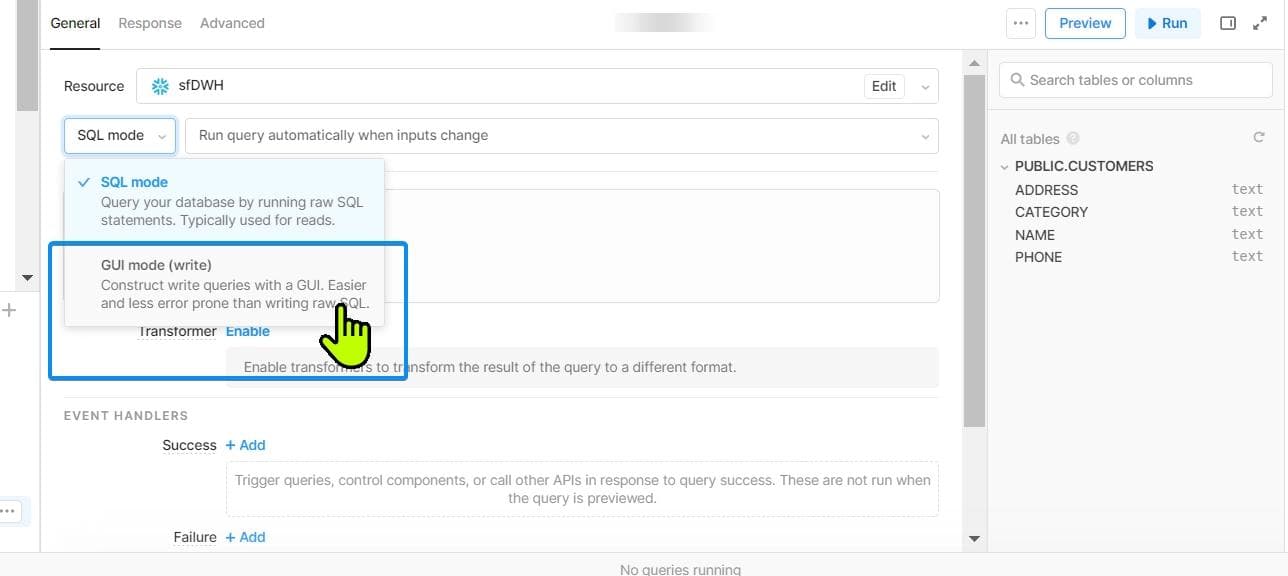
You're now ready to write your first query and see the data. To do this, select SQL mode for writing a select query.
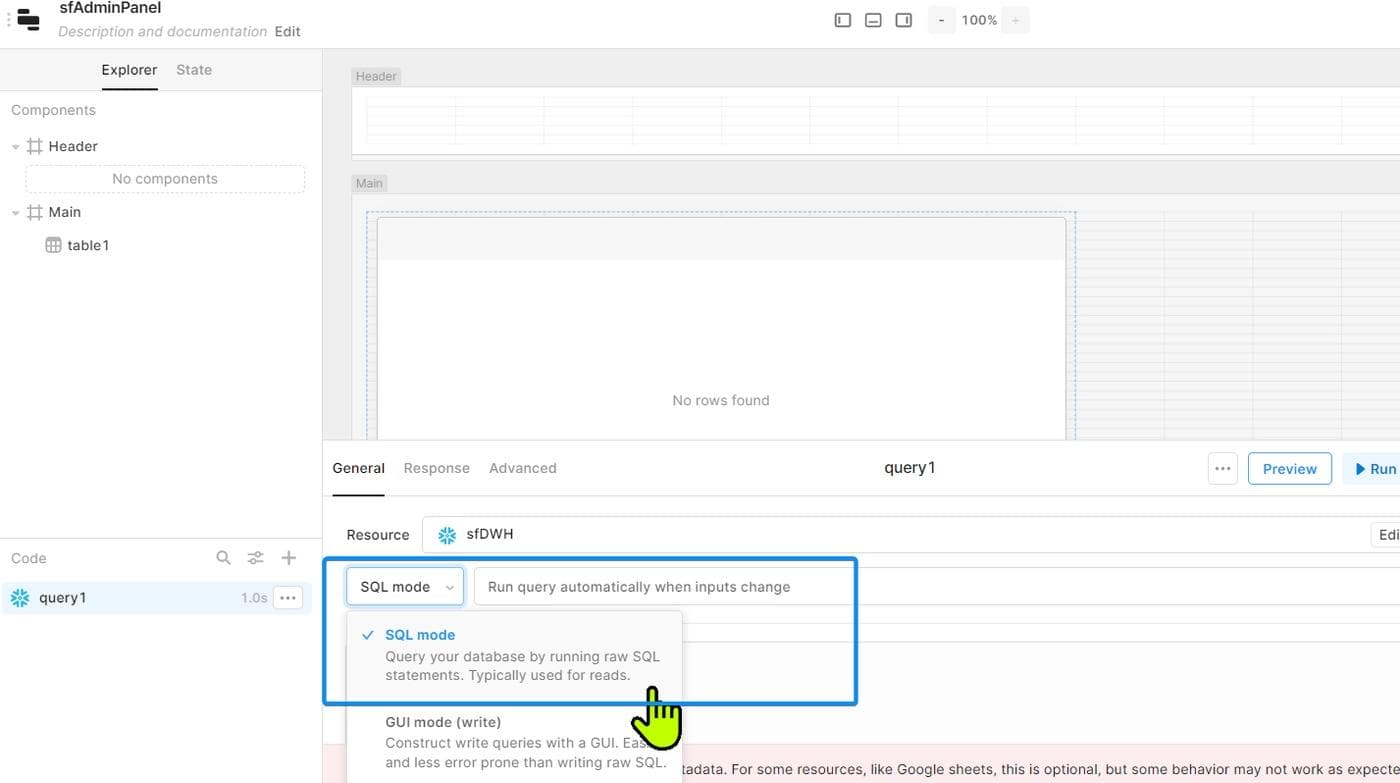
Note: Use SQL mode for writing select queries and GUI mode for DML operations like insert, update, or delete.
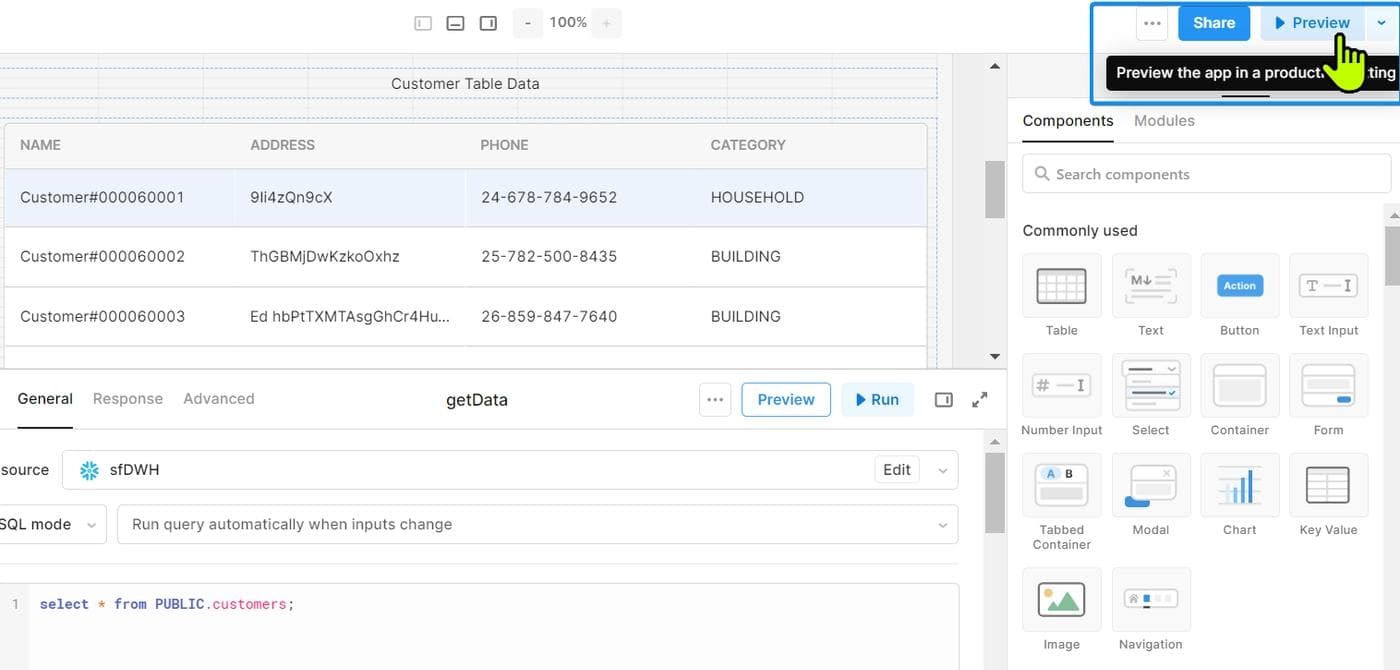
You can write your select query in the SQL editor with the following command: select * from PUBLIC.customers;.
Before running your query, do a quick preview by clicking Preview.
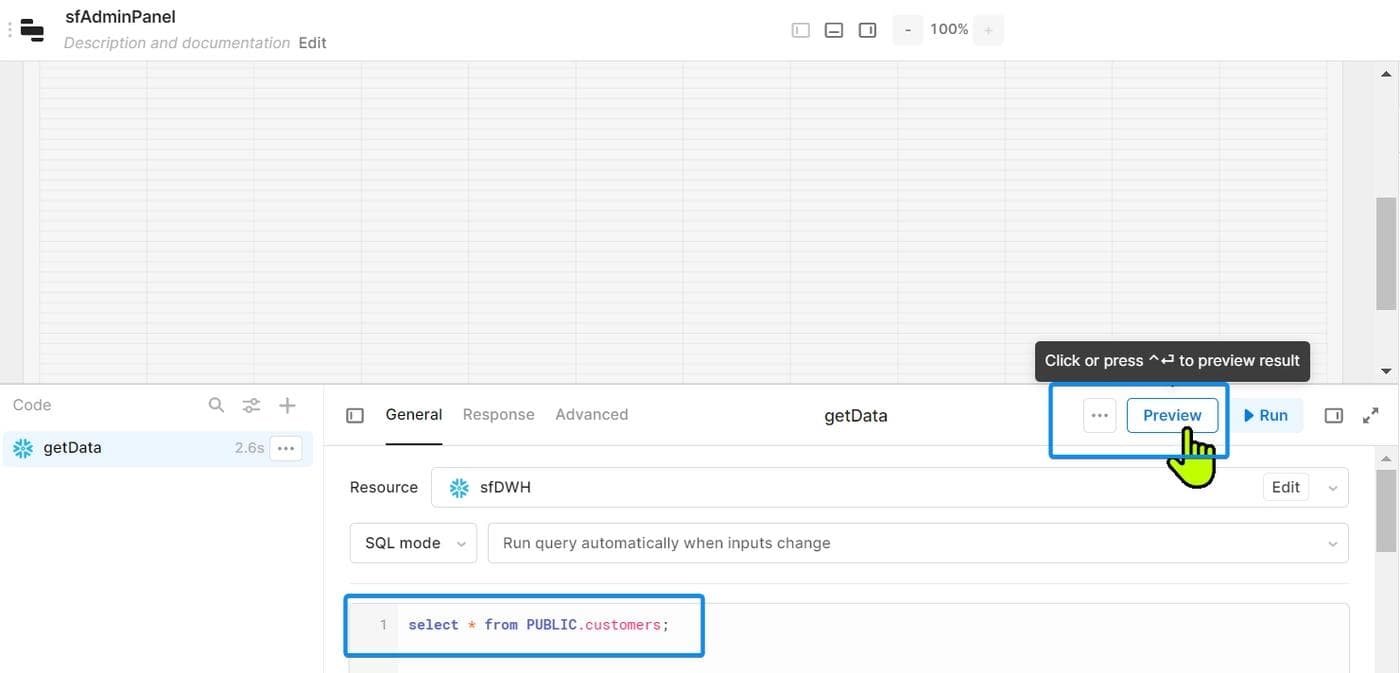
Save this query and rename it "getData" so it can be easily identified.
Pro tip: As a general best practice, easy naming standards like these can help you and other developers understand query functionalities by looking at the query names.
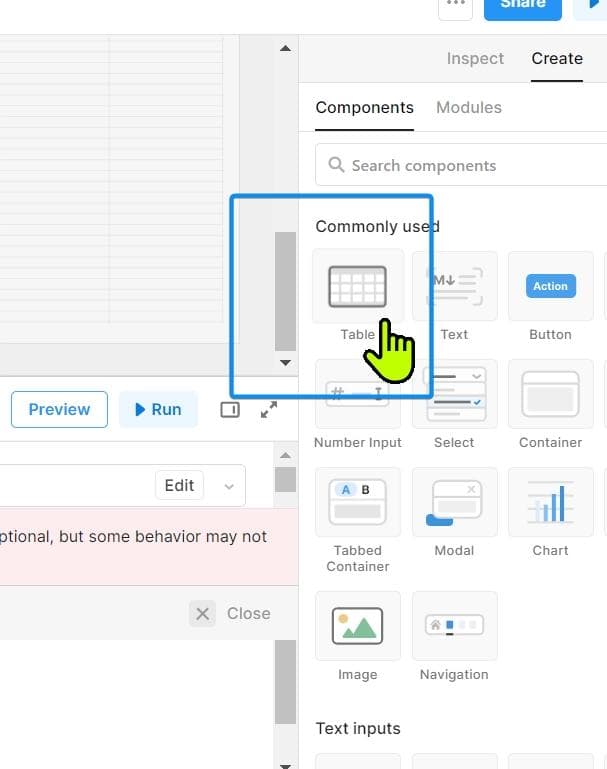
For the next step, add a table to the UI canvas to view the query result in tabular form. Select a new Table component from the panel on the right side of the app editor and drag it to the main section of the canvas.
You can now run your select query and see the table populated with the Snowflake data.
If you face any issues viewing data in the Table component, revisit its properties in the same panel. Ensure that the value in the Data attribute is set as {{ getData.data }}. This indicates the Table component is getting its value from the getData query that you had created in Resource Query.
Now add a simple text box at the top of the UI Table component. Modify the text in it as "Customer Data View".
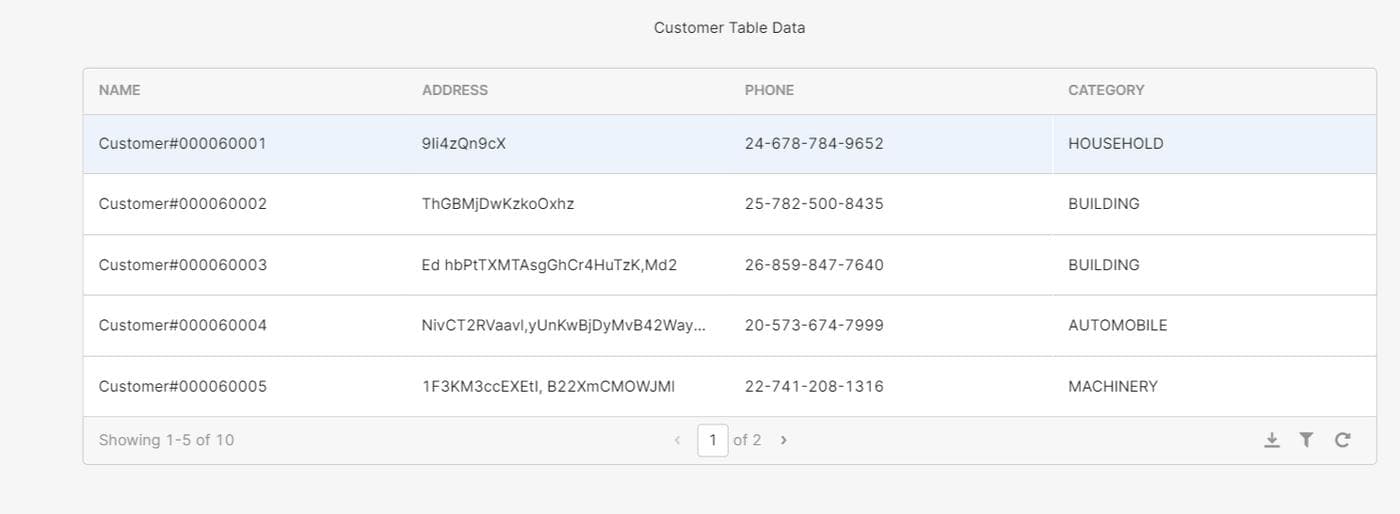
That's it! Your basic app is now ready. Preview the app using Preview in the top-right corner.
You will be able to see your first app.
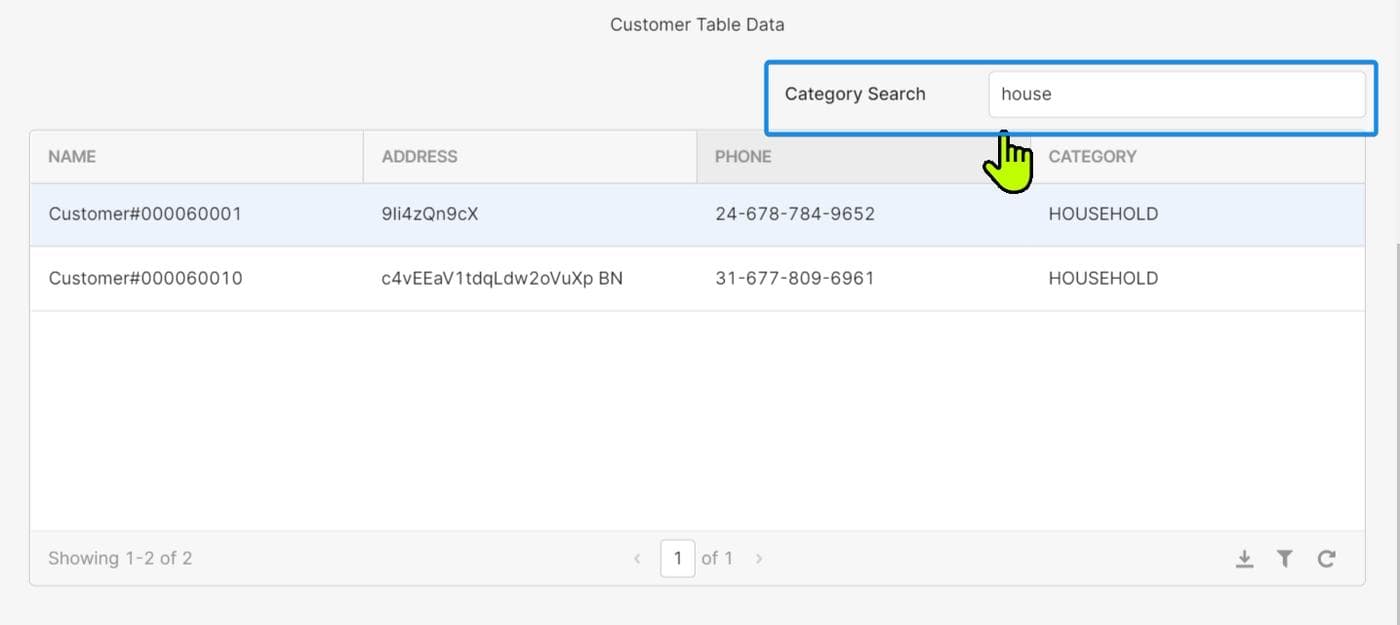
Now that your basic app is ready, you can add additional features. One of the most common and popular features required in any admin panel is search. You can add a search feature to your app in just a few clicks.
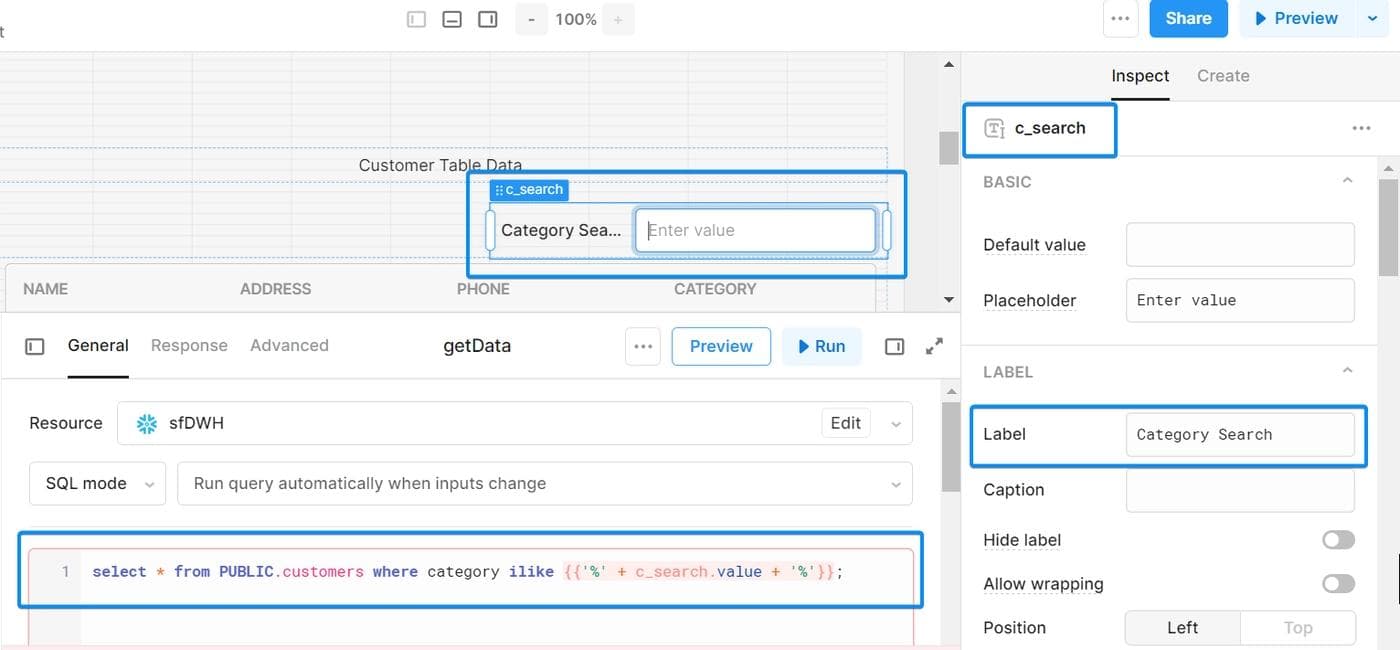
Open the panel on the right side, select the Text Input component, and drag it to the canvas. You can place it either at the top of your table view or below it.
Edit the Text Input component as below:
- Component Name: Give some meaningful name—e.g., "c_search".
- Label Value: This will help the users understand the attribute used in the search—e.g., Category Search.
Change the existing query to take input from this search component by adding a where clause for the Category attribute:
select * from PUBLIC.customers where category ilike {{'%' + c_search.value + '%'}};
Now save the query and preview the app. Go to search and type any valid value for the category attribute. You'll see the records getting filtered as you type the value.
You can also add the capability to perform DML operations like insert, update, or delete from the admin panel.
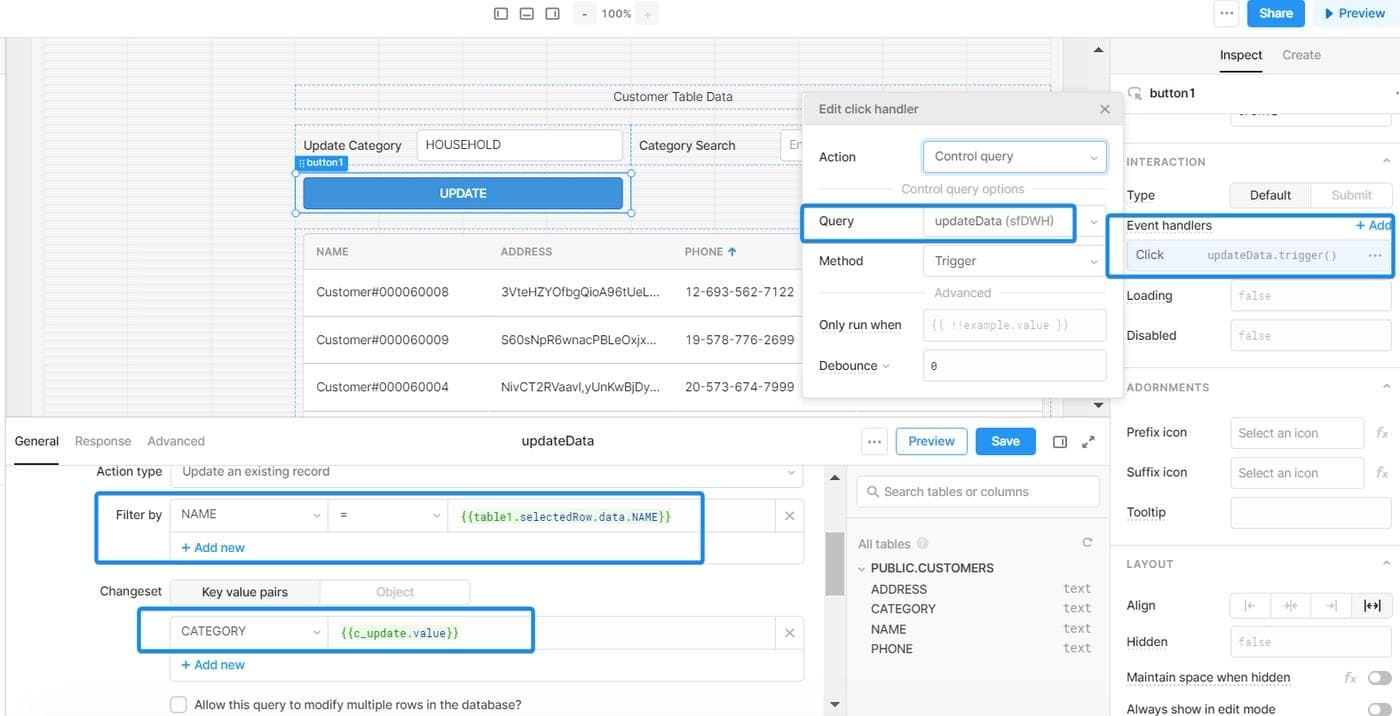
Let's use the update capability as an example. You will first create the "Update" module in the UI; then, you will create and attach the update query to this component.
The update module in the app consists of the following two components:
- Input Text: For the user to input the new value for the update
- Update Button: A clickable button to trigger the update action
To create the update query, create a new "Resource Query" similar to the "getData" query created earlier. However, use the GUI mode for any DML operations like insert/update/delete.
Configure the settings for an update operation:
- Mode: Select GUI mode for insert/update/delete queries.
- Table: Select the backend table from the dropdown list—in this case, the PUBLIC.CUSTOMERS table.
- Action Type: Select Update an existing record.
- Filter by: This represents the key column for the update query. Select this from the attribute list of the table—e.g., select the Name column for updating records based on the Name attribute as key.
- Changeset: This represents the attribute that needs to be updated. The new value will be taken from the Input Text component of the update module—e.g., select the Category column for updating the value in the Category attribute.
As a final step, edit the Update button to add an event handler as updateData.trigger() to trigger the update query when the user clicks this button.
Your app is now ready with an update feature, which can be easily tested using these simple steps:
- Click Preview and select the first record in the table by clicking on it from the table view. You'll see the value of the Category attribute (of the first record) in the Update Category text.
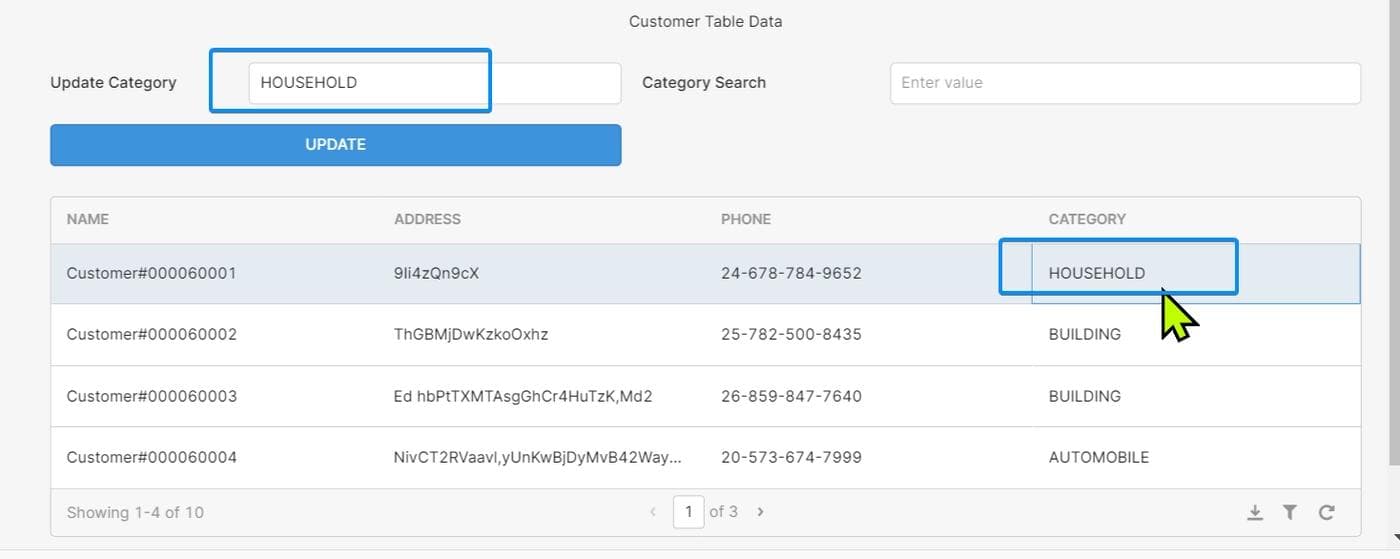
- You can now provide a new value in the text field—e.g., "HOUSE"—and click Update.
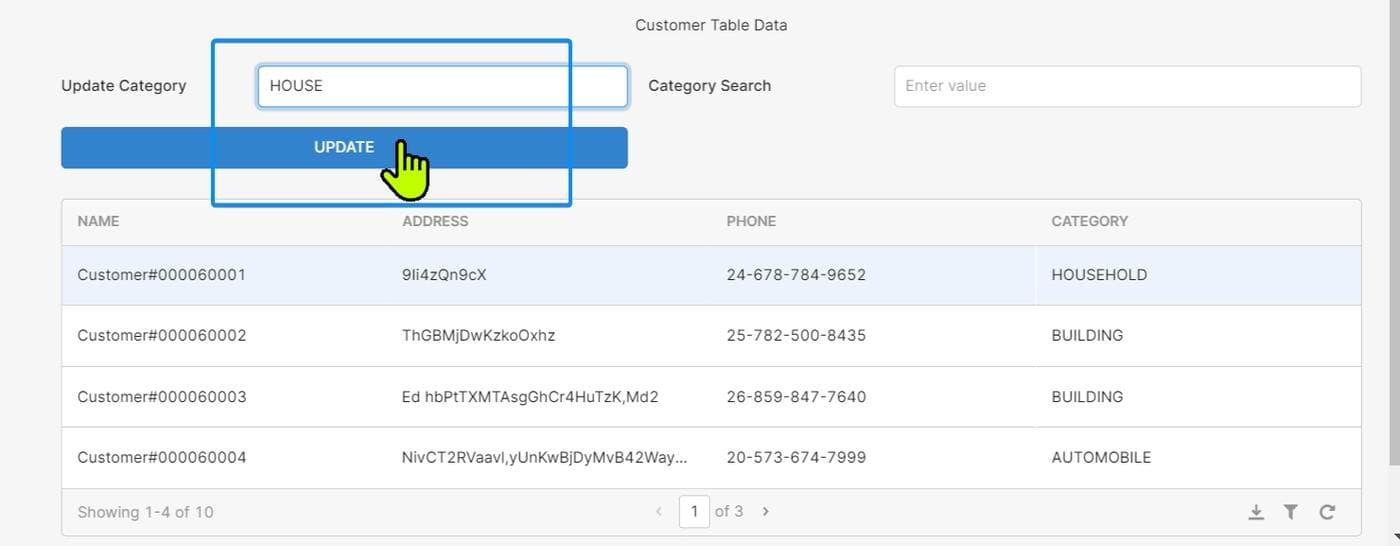
- This will execute the "updateData" query in the app, and you'll get a success message.
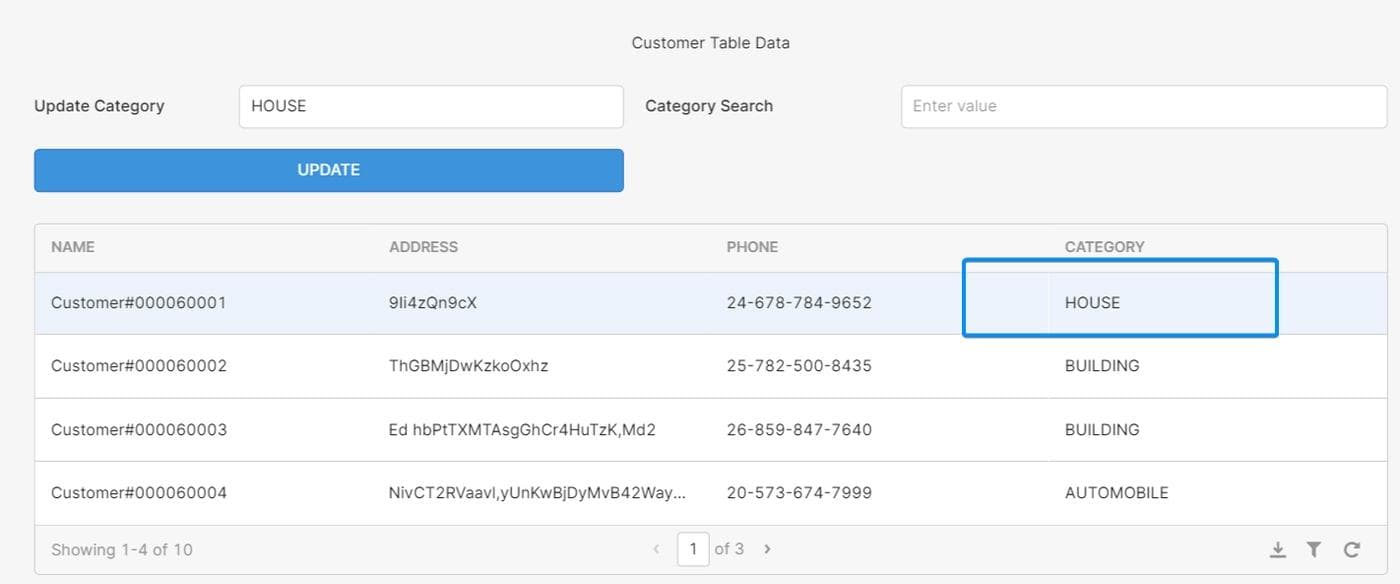
- To see the changes in the table view, you'll have to refresh the table using the refresh button in the bottom-right corner. After refreshing, you should be able to see the updated value "HOUSE" in the Category attribute of the first record.
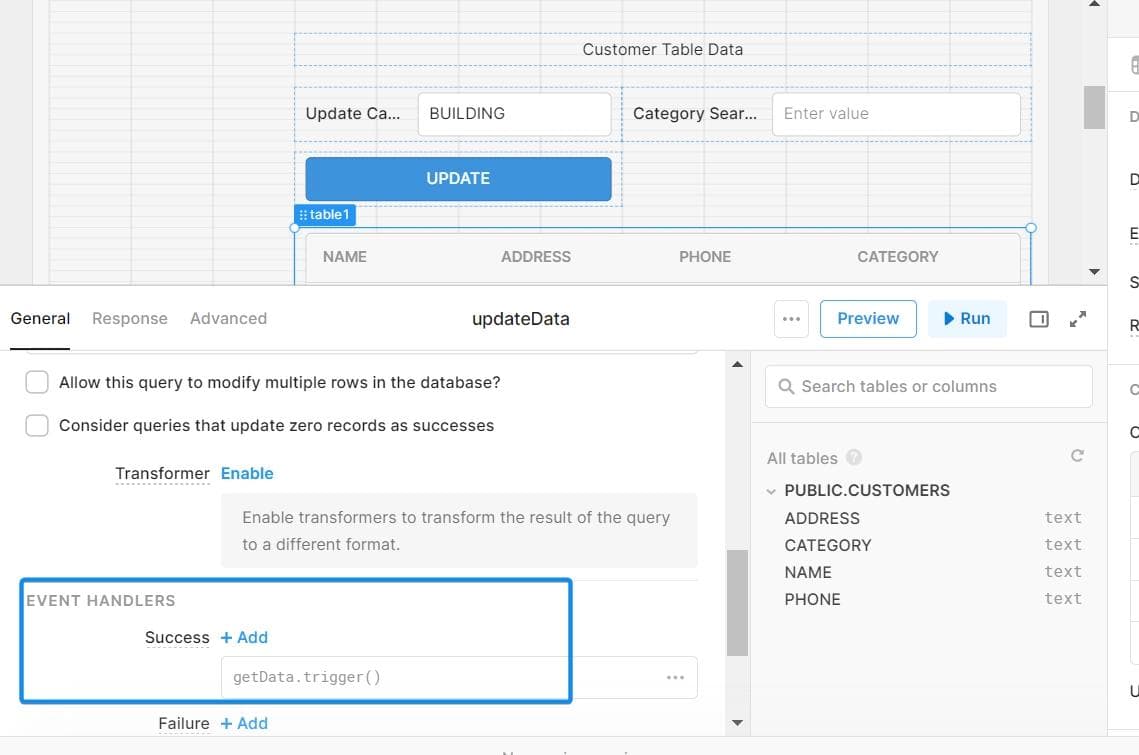
If you want to add an auto-refresh feature after the update operation, you can add an Event Handler for Success in the "updateData" resource query. In Event Handler, add Control Query as an action to trigger the already created "getData" query. This will fetch the records from table after the update action and show the updated records in table view.
For adding insert and delete functionalities into your admin panel, follow the same process for the update module described above.
Here's a sample admin panel app with features like search, insert, update, and delete.

You will have to create individual queries to perform these operations and attach them to their respective UI components.
If you face any difficulties while listing tables in GUI mode or when running queries, you should revisit the permissions in Snowflake. The below commands can help you set the correct permissions for the PUBLIC role and can be executed using the ACCOUNTADMIN role. These are just for POC purposes, and it's always a good practice to provide the least required privileges as per users' needs:
1 2 3 4grant all privileges on database demodb to role public; grant all privileges on schema demodb. public to role public; grant all privileges on all tables in schema demodb.public to role public; grant usage on warehouse demowh to role public;
This tutorial showcases how the admin panel for your Snowflake warehouse can be quickly built using Retool in four simple steps: loading the data in Snowflake tables, connecting Retool and Snowflake, creating an admin panel app in Retool, and adding some common queries and components.
Admin panels are helpful tools for users to access and manipulate data easily. Panels like those covered in this article are also possible for databases like MongoDB or Postgres or warehouses like BigQuery or Redshift.
You can explore more advanced features like ready-made templates for creating common apps like S3 File Explorer, Slack Notifier, or Customer Success Panel.
Reader