
Creating an interactive admin panel based on your Firebase database can be time consuming because it requires writing a lot of code. But what if you could set up this admin panel that'll help you perform CRUD operations with much less time and effort? That's very possible with Retool, and we'll walk you through it step by step.
To help you understand the workflow, we'll break it into four steps:
- Authenticate your Firebase instance
- Build out the UI
- Create the CRUD queries
- Link the queries to the UI
Start by creating a new app on Retool, and give this app a name. We’ll call it “Firebase Admin.” Next, create a Firebase resource by clicking "create a new resource" from the Resource field at the bottom panel. Select Firebase from the options to create a Firebase resource.
Next, we need to fill in the following details to configure our Firebase resource:
Give this configuration a name: for example, My Firebase. To fill in the rest of the fields, you’ll need to log into our Firebase console. To get the Firebase Database URL, go to the left panel in the Firebase console and click on Build > Realtime Database > Data. Copy andpaste this URL into the Firebase Database URL field.
Next, we get the Firebase project ID from the settings panel and paste it into the required field.
We also generate the private key within the service account section of the Firebase settings panel and paste it into our field.
You can confirm your connection is set up correctly by clicking the test connection button. If you see "Connection success!", complete this step by clicking the create resource button. We're then ready to proceed to the next steps.
Quick tip: Should you run into any issues with the Firebase resource and connection, check out our Firebase authentication docs.
Now that we've successfully authenticated our Firebase instance, we'll go ahead and build out the user interface. Retool provides you with pre-built components that let you create functional user interfaces very fast.
For this project, we'll be using the table component. Go to the right-hand panel to see the list of components and drag the table component onto the canvas. Then, toggle “compact mode” to make the table resize to display more data.
Quick tip: To hide the bottom panel from the screen, click the bottom panel icon at the top of your screen. You can also hide the right and left panels using their icons to give you more canvas space to work with.
Next, let's name our table. To do this, go to the right-hand panel and grab the Text field. We'll call the table "Firebase Admin Panel." If you need to change the title size, you can use Markdown.
We're almost finished building the user interface for our Firebase admin panel. The last step is to delete the default data referenced by the table in the value field on the right hand panel.
In the next couple of steps, we'll populate our table with data from our resource query.
We need to create queries to help us retrieve and manipulate data from our database. To do this, go to New > Resource query at the bottom panel and select the Firebase resource we created earlier (in our first step.) Next, we set the service type to "Firestore" and the Action Type to "Get Collections." This will help us run a test and communicate with the Firestore service.
To test if this setup works correctly, click on preview—if it returns "Query ran successfully", it shows we're on the right track, and we can continue with the steps below.
Now, we need to make a slight modification. Let's change the he Action Type we set to "Get Collections" earlier to "Query Firestore," and then put in our collection ID. Doing this returns the set of data we'll be using from Firestore. Save this query as "listDocuments."
Next, we will duplicate "listDocuments" a couple of times to create queries for updating, deleting, and creating documents.
Last, we set the Action type to match the correct action for each of these queries.
To link our queries to our user interface, we need to adjust some settings. Follow along!
Select the table in the inspection panel and type two opening curly braces in the data input field followed by the name of the query we’ve just created like so: {{ listDocuments.data }}. This will tell the table to display the data from our query.
Quick tip: When you start typing in the curly braces, you'll see a list of all the options available.
It is important to make sure all our columns are editable to support our intended update document functionality. To do this, go to the column selector on the right-hand side and toggle "Make editable" for each column (id column, email, name, access, etc.).
Next, we need to link the edit functionality to the table. To do this, we create an "Event Handler" and select the "Save Changes" event which will fire when the save changes button is pressed on the table. Select the "updateDocument" query from the Action dropdown so that when the button is pressed this query will run. Similarly, for the "Save New" event, we'll link that to the "createDocument" query so that when you create a row, it'll trigger that query.
Last, let's add an action column, which is a button which we can use to delete rows by calling a query. We'll call the button "Delete" and set the Action query to "deleteDocument."
Now, we need to link the "updateDocument" query to the changes in the table. To do this, we'll reference the table component’s "recordUpdates" property, which will be a set of the changed rows in object format. One helpful way to work with components is to open the left-hand panel and inspect the various properties for that component.
Quick tip: To make the changes visible in the table component after saving, you need to always set the On success trigger to the "listDocuments" query. This will run the "listDocuments" query again and update the table with the most recent data from the database.
We connect the delete button to the table by passing the ID of that record back to the delete action in the Firestore database. To do this, in the “deleteDocument” query we'll reference the row on which the delete button was pressed using the "i" variable (which will be the row id of the last button press) in the query as so: `{{ table1.data[i]._id }}`.
Note: Make sure the On success trigger is set to call the “listDocuments” query again to update the table with the most recent data from your database.
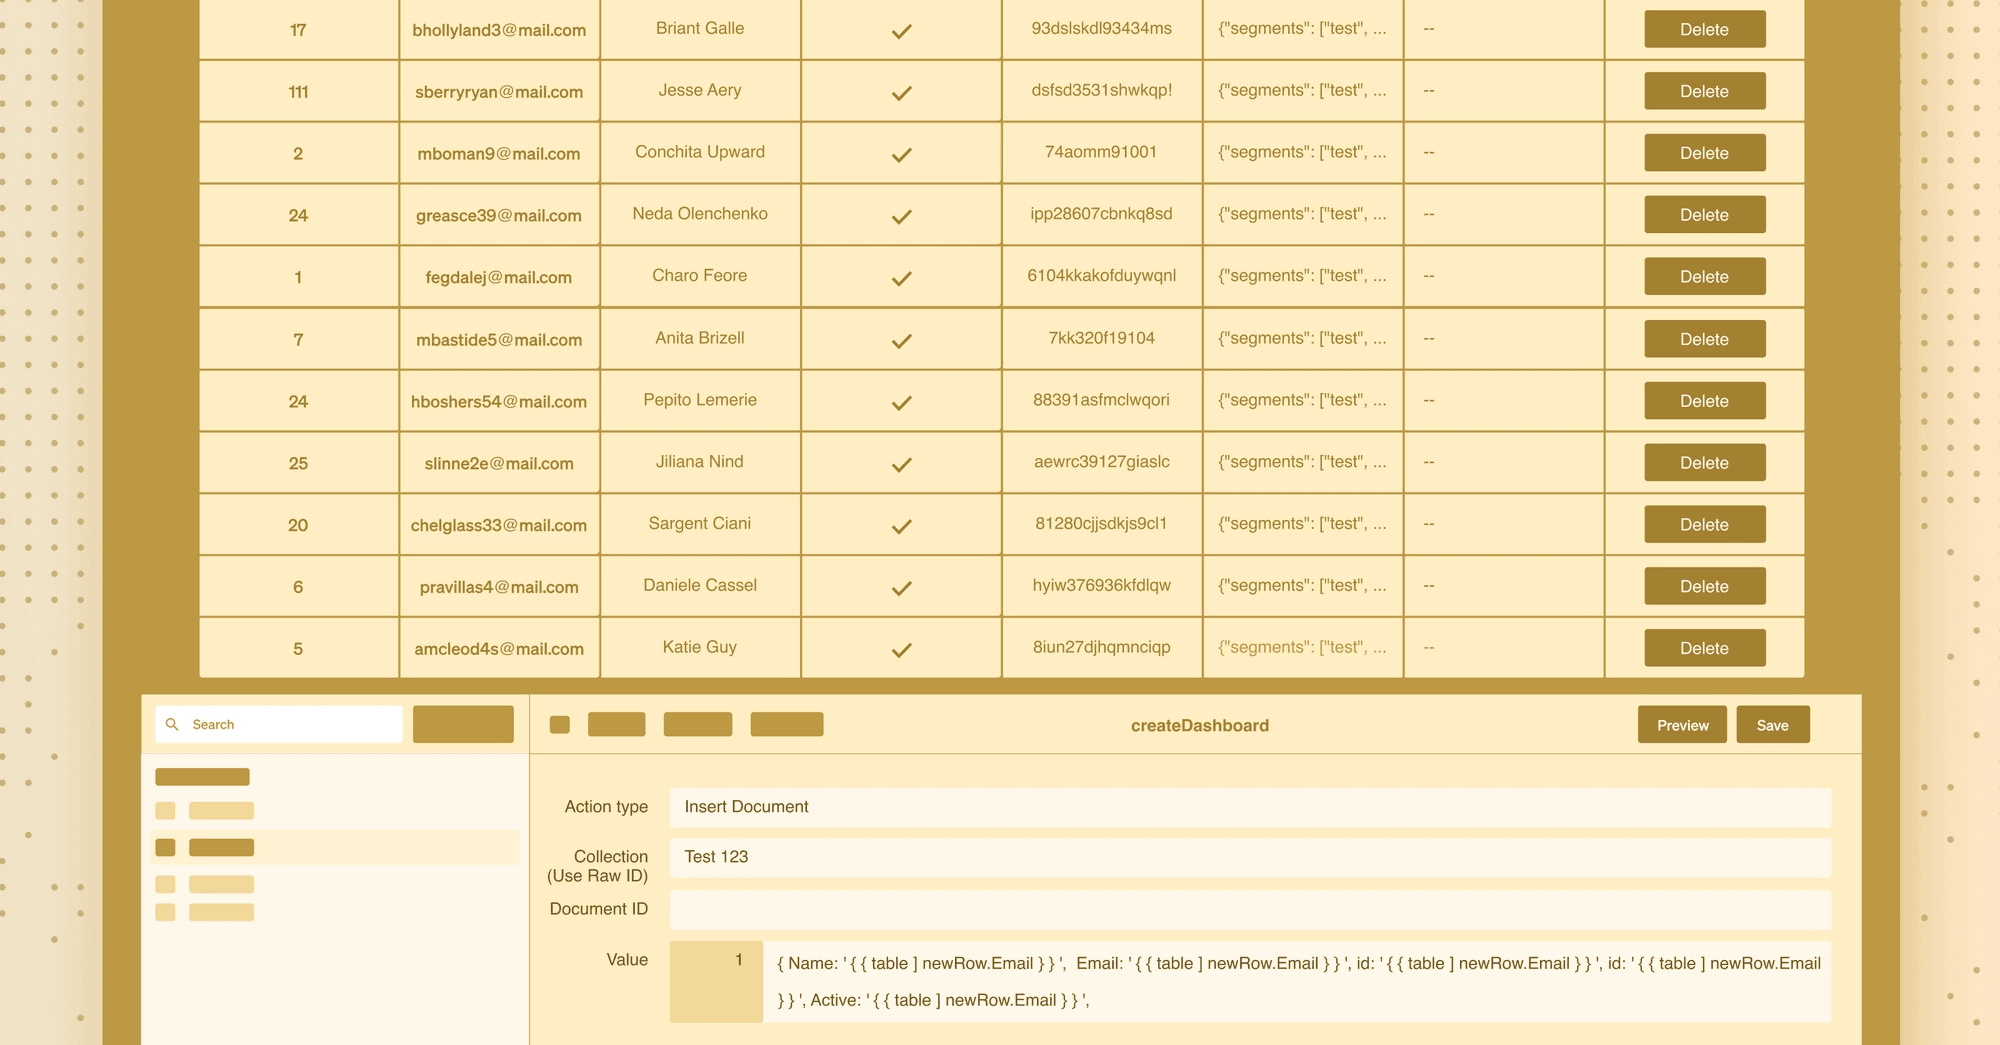
Last, we want to link our new row data from the table into our insert document action in the create document query. We reference a property of the table called "newRow" to do this. Now, we can create the appropriate JSON object in the Value field and save the query.
Note: As usual, don't forget to set the On success trigger to call the "listDocuments" query.
Great job! Now that you've completed building this admin panel, you can go ahead and test it out by adding, updating and deleting rows.
In this tutorial, we went through the steps for building a simple Firebase admin panel using Retool. If you'd love a more visual walkthrough, check out our tutorial video:
Retool provides you with pre-built components as well as a Firebase Admin Panel template right out of the box—and you can get started for free.
Reader