
I’m going to make a wild guess here – if you’ve ever had to build an admin panel at work, you probably weren’t incredibly excited about it. Every business needs an admin UI to manage the day to day – looking up a user’s address, marking an order as refunded, resetting a password – but they can be a bit of a pain to build and maintain. If you’re using React though, react-admin might just make things a bit easier.
This tutorial is going to walk through how to build a fully functional admin panel in react-admin with auth. To get the most out of this tutorial, you'll want to be comfortable with React and basic frontend/backend interaction.
React-admin is a framework that uses React, Material UI, React Router, Redux, and React-final-form to give you a unified admin framework that you can customize to fit your dashboard building needs. It’s developed and maintained by a dev shop called Marme Lab (I’m guessing they got tired of building the same admin UIs for their clients over and over again).
React-admin is a frontend framework, so it’s built to use your existing REST / GraphQL APIs. It allows you to easily create frontend admin applications that interact with your backend in a standardized way through data providers.
What are data providers, you say?
React-admin is unique in the way that it processes the interactions between your frontend and backend:

It uses something called an adapter approach (data providers): the data provider acts as the interface between the framework and your backend → it takes care of the querying and response handling between the frontend & your respective backend API(s) to allow you to focus on your dashboard building in modular steps.
To start, react-admin gives us data providers that can be used to backwards engineer our API’s if they haven’t already been built, or in the more likely scenario that they already exist, you can write your own data providers to interface with your existing APIs**.**
At a high level, react-admin offers some pretty interesting features (we’ll dive into one of them later):
- Relationship support
- Conditional formatting
- Full-featured datagrids
- Optimistic rendering
Long story short: it’s a powerful framework.
Prerequisites:
- Install
npx(nodeversion should be > 8) - Install
create-react-app
Let’s start out by creating a new folder to store our codebase for our new admin app. I’m going to call mine react-admin-tutorial (very creative, I know). After dropping into your new directory, let’s create a new react application with create-react-app:
1npx  create-react-app awesome-admin
2This will create a new empty React app that we can use to jumpstart our development through Facebook's create-react-app tool. Now we can move into the directory holding our new app:
1cd awesome-admin
2npm install react-admin ra-data-json-server
3// ra-data-json is the package containing the data provider we’ll use
4npm start
5That will install the react-admin package and the data provider we need to connect to our fake API. Our app will be running at localhost:3000. Now it’s time to work on building out the app.
Subscribe to the Retool monthly newsletter
Once a month, we send out top stories (like this one) along with Retool tutorials, templates, and product releases.
For this tutorial, we are going to use JSONPlaceholder - this is a fake REST API that we can use to develop our frontend with fake data. This way, we’ll be able to focus on the core of react-admin without worrying too much about writing custom data providers yet.
First off, replace src/app.js with the following to get us off the ground:
1import React from 'react';
2import { Admin } from 'react-admin';
3import jsonServerProvider from 'ra-data-json-server';
4
5//connect the data provider to the REST endpoint
6const dataProvider = jsonServerProvider('https://jsonplaceholder.typicode.com');
7
8function App() {
9 return (
10     <Admin dataProvider={dataProvider} />
11 );
12}
13
14export default App;
15Now you should see something like the screenshot below; this is the default page you get when you supply react-admin with the data provider it expects.

Now we’ll bring in our first resource:
1import React from 'react';
2import { Admin, Resource,ListGuesser } from 'react-admin';
3import jsonServerProvider from 'ra-data-json-server';
4
5//connect the data provider to the REST endpoint
6const dataProvider = jsonServerProvider('https://jsonplaceholder.typicode.com');
7
8function App() {
9   return (
10       <Admin dataProvider={dataProvider}>
11           <Resource name="users" list={ListGuesser}/>
12
13       </Admin>
14   );
15}
16
17export default App;
18The Resource component allows us to tell react-admin that we’d like to fetch and display a resource with the name “users.” The dataprovider processes this and makes a request according to its interface – in this case to https://jsonplaceholder.typicode.com/users – and then displays that to the user using the ListGuesser component. This “list” prop tells react-admin to use ListGuesser to take whatever data the resource receives and make it’s best guest to format the initial data grid.
We’ll use this initial with all of our resources to generate some initial list code - it spits out its best guess to the console for us to use. Here’s what things should look like:
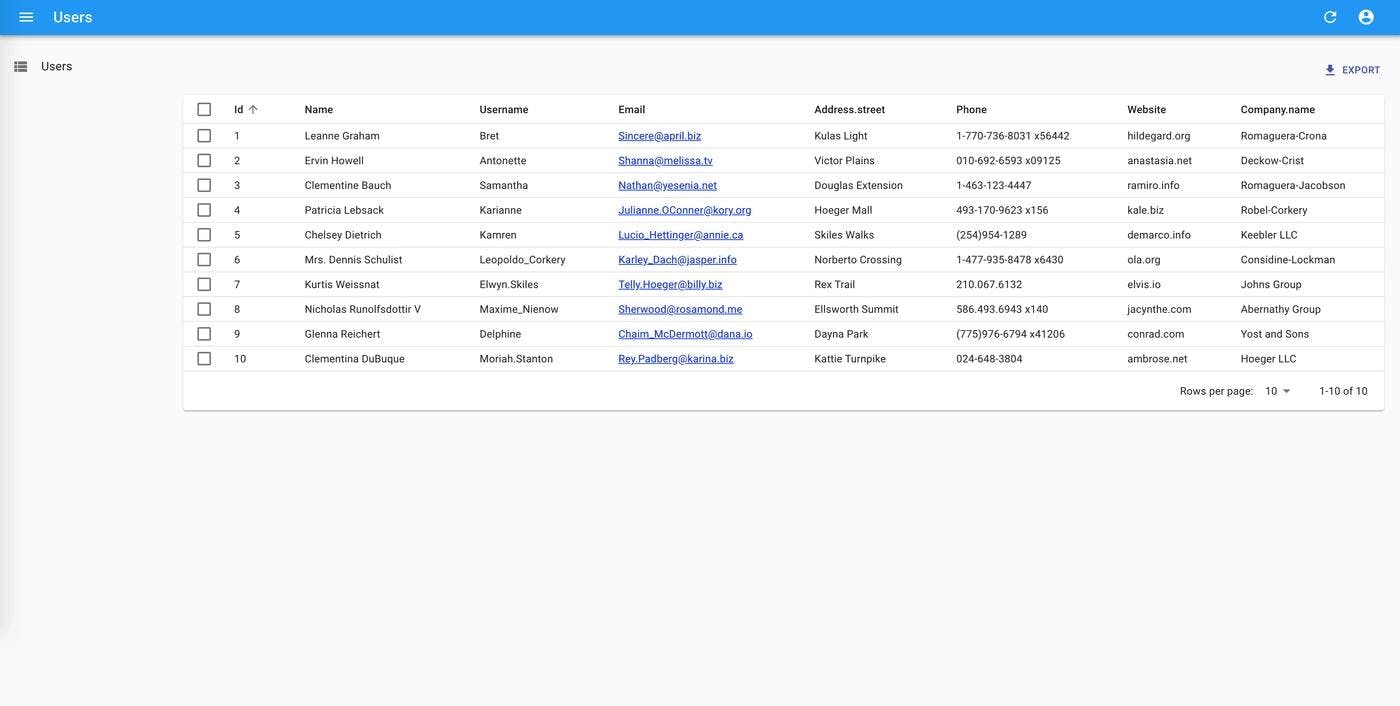
The guesser gets us 90% of the way there, but we want to customize the columns to have slightly more human-readable labels. Inspect the table element in your browser, and copy the Guessed List that you see in your console (inspect element → console). It should look something like this:
1export const UserList = props => (
2    <List {...props}>
3        <Datagrid rowClick="edit">
4            <TextField source="id" />
5            <TextField source="name" />
6            <TextField source="username" />
7            <EmailField source="email" />
8            <TextField source="address.street" />
9            <TextField source="phone" />
10            <TextField source="website" />
11            <TextField source="company.name" />
12        </Datagrid>
13    </List>
14);
15We’ll create a new component that overrides these suggestions. Create a folder called components in src and paste the copied code in a new file called users.js (src/components/users.js). It should look like this :
1import React from 'react';
2import { List, Datagrid, TextField, EmailField } from 'react-admin';
3
4export const UserList = props => (
5   <List {...props}>
6       <Datagrid rowClick="edit">
7           <TextField source="id" />
8           <TextField source="name" />
9           <TextField source="username" />
10           <EmailField source="email" />
11           <TextField source="address.street" />
12           <TextField source="phone" />
13           <TextField source="website" />
14           <TextField source="company.name" />
15       </Datagrid>
16   </List>
17);
18The list is the main component here, handling the majority of the work (pagination, etc.) but the actual rendering of the data is left to the DataGrid, which renders a table where each record has one of the child components / fields. These fields’ data is sourced based on the source name that you provide, which matches up with what is received by the dataprovider from the API.
While we’re here, let's refine this list a bit to show how you can customize it. Here’s what I am going to do:
- Get rid of the id and username field to save screen space
- Disable sorting in the phone field, as all fields default to being sortable
- Change the street address & company name field label with the label prop
The changed fields should look like this :
1<TextField source="address.street" label="Street Address"/>
2<TextField source="phone" sortable={false}/>
3<TextField source="company.name" label="Company Name"/>
4Now we’ll need to replace the ListGuesser with our new list in the Resource component. Head back to App.js, and add in a line up top to import our new UserList component:
1import {UserList} from "./components/users";
2Now replace ListGuesser in the List prop of our Resource with the UserList:
1<Resource name="users" list={UserList} />
2With those changes, we should have a more concise and usable view of the users resource:
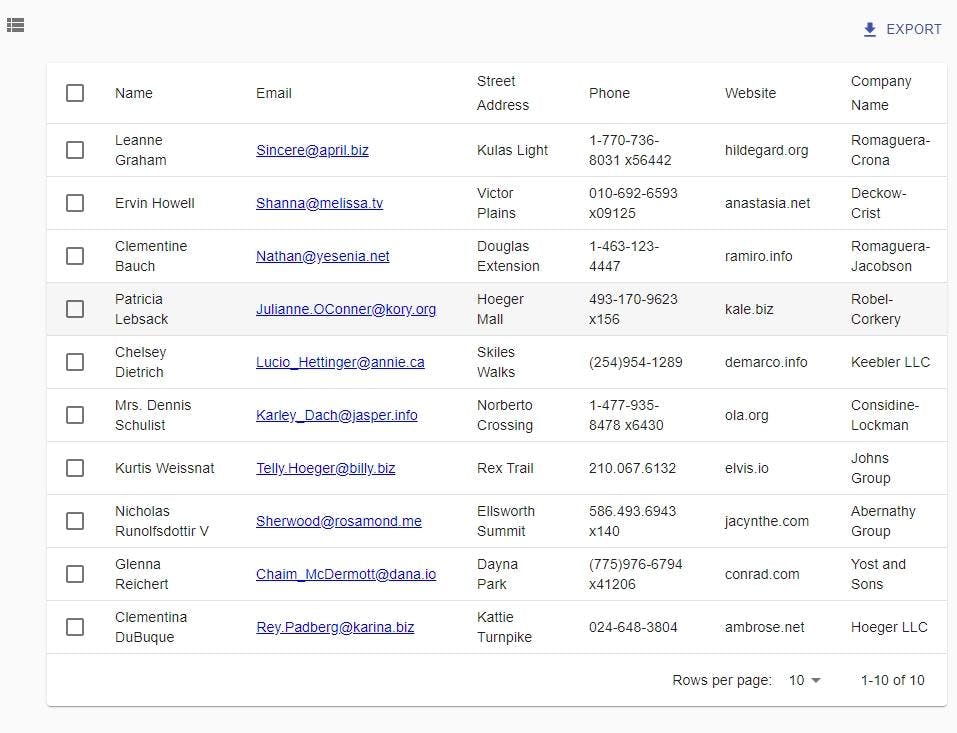
It’s worth mentioning that you can replace any of the components inside the datagrid with your own, so if you want to create your own fields to suit your needs, just drop them in and make sure to include the source prop.
To show you what this would look like:
1import React from 'react';
2import { makeStyles } from '@material-ui/core/styles';
3import MailOutlineIcon from '@material-ui/icons/MailOutline';
4
5const useStyles = makeStyles({
6   link: {
7       textDecoration: 'underline',
8   },
9   icon: {
10       width: '0.5em',
11       paddingLeft: 2,
12   },
13});
14
15const CustomEmailField = ({ record = {}, source }) => {
16   const classes = useStyles();
17   return (
18       <a href={"mailto:" + record[source]} className={classes.link}>
19           {record[source]}
20           <MailOutlineIcon className={classes.icon} />
21       </a>
22   );
23}
24
25export default CustomEmailField;
26Paste this in src/components/CustomEmailField.js and modify the email field in src/Users.js to reflect our new custom field.
By swapping out the email fields, we customize the component that’ll render the email data record. As you can see above, we modified the original functionality to have the link be a mailto so you can click on it and open an email to the person. We also added an email icon with custom styles using useStyles.
Note: You can do plenty more in customizing the fields to your heart's desire that won’t be covered here, but this gives you a solid template to build off and create your own custom fields.
Let’s repeat this process with posts. There’s something else we need to tackle here: relationship handling. In our sample API, querying the posts resource gives us this JSON:
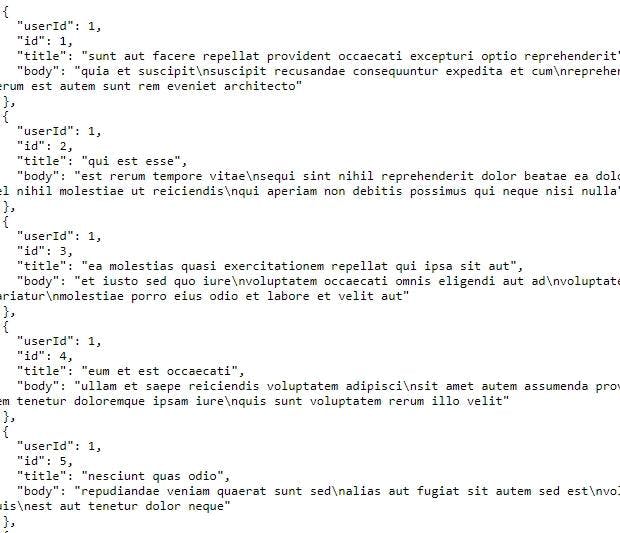
Notice how in each document there’s a userId attached. This userId allows us to create a reference between the user and the post within the admin panel, and thankfully react-admin automatically detects this for us.
To show the posts resource in our panel, let’s add another resource component:
1import React from 'react';
2import { Admin, Resource,ListGuesser } from 'react-admin';
3import jsonServerProvider from 'ra-data-json-server';
4import {UserList} from "./components/users";
5
6//connect the data provider to the REST endpoint
7const dataProvider = jsonServerProvider('https://jsonplaceholder.typicode.com');
8D
9function App() {
10   return (
11       <Admin dataProvider={dataProvider}>
12           <Resource name="users" list={UserList}/>
13           <Resource name="posts" list={ListsGuesser}/>
14
15       </Admin>
16   );
17}
18
19export default App;
20Again, we’ll use the ListGuesser to generate the guessed fields. If you can see something like this (click on the “posts” tab), you should be in good shape.
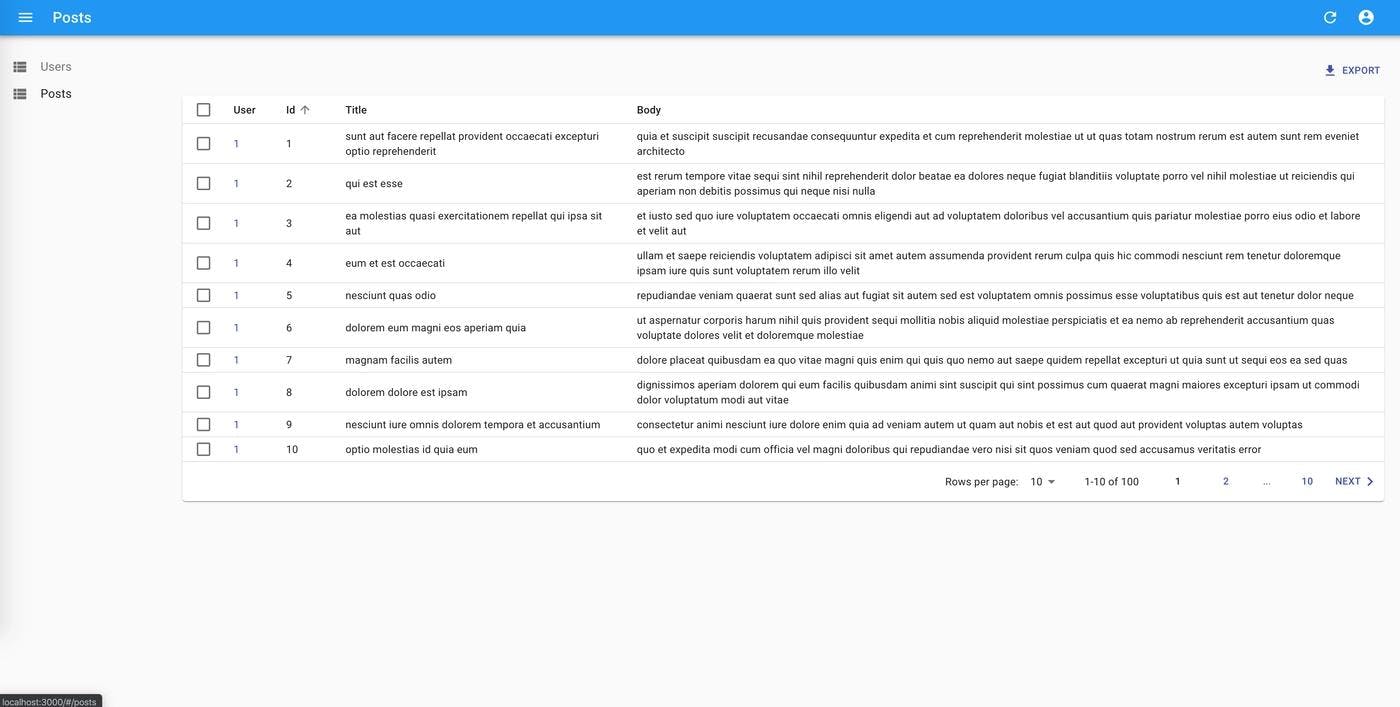
We’re going to want to update these column names, so we’ll go through the same workflow as above. Go ahead and copy the code from the guessed list in the console and paste into a new file: src/components/posts.js.
It should look like this:
1import React from 'react';
2import { List, Datagrid,ReferenceField, TextField, EmailField } from 'react-admin';
3
4export const PostList = props => (
5   <List {...props}>
6       <Datagrid rowClick="edit">
7           <ReferenceField source="userId" reference="users"><TextField source="name" /></ReferenceField>
8           <TextField source="id" />
9           <TextField source="title" />
10           <TextField source="body" />
11       </Datagrid>
12   </List>
13);
14The ReferenceField component above allows us to create a relationship with the user resource. We identify the foreign key with the prop source=”userId” and create the relationship with the reference prop.
Also, make sure to change the list prop for the new posts resource to reference our custom PostList in App.js – import the PostList and then replace ListGuesser in the post resource’s list prop.
Note: I went ahead and changed the TextField, what is actually displayed for the reference inside the table, to display the name. You can display anything contained within a user object by passing the source name for the user resource. Logically speaking, any child of a reference field will be working with the record of the referenced resource. In this case, the user resource is referenced so the child textfield’s source will be derived from the user resource.
Next, we’re going to add an edit button to set us up to be able to modify content. We’ll start by adding a new component into our Datagrid: an EditButton at the bottom (and adding it into the import from react-admin up top).
1import React from 'react';
2import { List, Datagrid,ReferenceField, TextField, EmailField,EditButton } from 'react-admin';
3
4export const PostList = props => (
5   <List {...props}>
6       <Datagrid rowClick="edit">
7           <ReferenceField source="userId" reference="users"><TextField source="name" /></ReferenceField>
8           <TextField source="id" />
9           <TextField source="title" />
10           <TextField source="body" />
11           <EditButton/>
12       </Datagrid>
13   </List>
14);
15Much like the list prop, we need to pass an edit prop to our resource in order to be able to have react-admin generate edit capabilities. We’ll use a component called EditGuesser and pass that to the posts resource in src/App.js (make sure to add it into the import up top):
1import React from 'react';
2import { Admin, Resource,ListGuesser,EditGuesser } from 'react-admin';
3import jsonServerProvider from 'ra-data-json-server';
4import {UserList} from "./components/users";
5import {PostList} from "./components/posts";
6
7//connect the data provider to the REST endpoint
8const dataProvider = jsonServerProvider('https://jsonplaceholder.typicode.com');
9
10function App() {
11   return (
12       <Admin dataProvider={dataProvider}>
13           <Resource name="users" list={UserList}/>
14           <Resource name="posts" list={PostList} edit={EditGuesser}/>
15
16       </Admin>
17   );
18}
19
20export default App;
21This guesser will generate the initial edit code for the posts that we can then customize.
Once you have the edit guesser wired in, check that the edit functionality works by clicking edit on one of the post records. It should bring you to a screen where you can make edits to the fields of the object being modified – since we’re using a test api, changes made will not persist beyond the local frontend state. In a real application though, the edit functionality would interface with the backend to make the necessary changes as you make them to the objects on the frontend.
Once you verify this is working, take the guessed code from the console, and put it in src/components/posts.js. It should look something like this:
1   <export const
2   PostEdit = props => (
3       <Edit {...props}>
4           <SimpleForm>
5               <ReferenceInput source="userId" reference="users">
6               <SelectInput optionText="id"/>
7               </ReferenceInput>
8               <TextInput source="id"/>
9               <TextInput source="title"/>
10               <TextInput source="body"/>
11           </SimpleForm>
12       </Edit>
13Note: you’ll have to import previously unused components – SimpleForm, TextInput, ReferenceInput, SelectInput, and Edit.
Let’s copy and paste the edit code now and create a CreatePost component. It takes almost the same structure of the edit component. Your posts.js file should like this:
1import React from 'react';
2import {
3   List,
4   TextInput,
5   SimpleForm,
6   Edit,
7   Create,
8   ReferenceInput,
9   SelectInput,
10   Datagrid,
11   ReferenceField,
12   TextField,
13   EmailField,
14   EditButton,
15   EditGuesser
16} from 'react-admin';
17
18export const PostList = props => (
19   <List {...props}>
20       <Datagrid rowClick="edit">
21           <ReferenceField source="userId" reference="users"><TextField source="name"/></ReferenceField>
22           <TextField source="id"/>
23           <TextField source="title"/>
24           <TextField source="body"/>
25           <EditButton/>
26       </Datagrid>
27   </List>
28);
29
30export const PostEdit = props => (
31   <Edit {...props}>
32       <SimpleForm>
33           <ReferenceInput source="userId" reference="users"><SelectInput optionText="id"/></ReferenceInput>
34           <TextInput source="id"/>
35           <TextInput source="title"/>
36           <TextInput source="body"/>
37       </SimpleForm>
38   </Edit>
39);
40
41export const PostCreate = props => (
42   <Create {...props}>
43       <SimpleForm>
44           <ReferenceInput source="userId" reference="users"><SelectInput optionText="id"/></ReferenceInput>
45           <TextInput source="id"/>
46           <TextInput source="title"/>
47           <TextInput source="body"/>
48       </SimpleForm>
49   </Create>
50);
51The only difference between the edit and create components is that we’re using two different wrapper components – <Edit> and <Create> – which each handle the data processing & interfacing with the backend uniquely. Make sure to add the Create component into your import statement up top.
As you might expect, we need to supply the create prop in our resource too. Start by adding our two new components from posts.js into the import on top of App.js (PostEdit and PostCreate), and then add them into the posts resource:
1<Resource name="posts" list={PostList} edit={PostEdit} create={PostCreate}/>
2While it’s not apparent in our code, react-admin bakes in a feature into our admin dashboard that enables deletion for every resource that has an edit component. If you check your edit screen on the Posts resource, you’ll see the delete button in the bottom right.
(Note that after clicking delete, the frontend will show that it was deleted due to optimistic rendering, but since our fake api disallows PUT/DELETE requests, this should error out after a few seconds. Not to worry though, once you’re hooked up to your live API, you’ll be fine.)
Although we only covered the basics with edit/create components, you can customize them even further with these props:
Also, if we want to create a rich input experience, we can customize the input fields with props like:
- source
- label
- validate
- helperText
- className: A class name (usually generated by JSS) to customize the look and feel of the input element itself
- formClassName: Class name to be applied to the container of the input (e.g. the <div> forming each row in <SimpleForm>)
- fullWidth: If true, the input will expand to fill the form width. Defaults to false.
Let’s talk a bit about why react-admin is so fast. Optimistic rendering means that react-admin renders changes to the client side state before the server has returned with a response for a particular action. For example, if you deleted a user, react-admin will render the user as deleted before the request actually goes through and responds. In reality, react-admin puts an approximately 5 second delay on requests to resources initiated by the user. This allows for this kind of fast rendering and also the ability to undo actions.
Say you accidentally hit delete: you can undo your actions quickly with an undo button and react-admin will cancel the request to delete the user before even sending it to the server. Overall, optimistic rendering let’s the user experience a more seamless UX when compared to a more traditional model that waits for the server to return in order to render. That being said, there are obviously tradeoffs inherent in each model.
If you’ve been following along, you’ve seen that the List component is integral to building out an admin app with react-admin, so it’s worth understanding what’s going on behind the scenes. The lists acts as the data facilitator / processor / interface for the application’s data List components – i.e. the components that render resource data for, say, users in a list. All the children of that list can be thought of as dumb, as they are mainly presentational in nature, whereas the List itself handles the connection to the data and all the associated processes. For example, if you want to control a filter, pagination, or sorting, you need to deal with the <List> components of a parent component.
As your application grows (and maybe scope creep starts happening), being able to leverage these customizable capabilities becomes important to fit your needs.
Nobody wants their internal APIs to be publicly accessible, so let’s quickly run through how we’d add some authentication into our admin console. By default, react-admin has a login page ready and setup, but it’s authentication provider agnostic, meaning you can use whatever identity service you want with react-admin, assuming you write an authentication provider.
React-admin expects five methods from our authentication provider: login, logout, checkError, checkAuth, and getPermissions . We’ll add our own basic ones in. Let’s put them in a new directory and file, src/providers/authProvider.js:
1export default {
2   login: ({ username }) => {
3       localStorage.setItem('username', username);
4       return Promise.resolve();
5   },
6  logout: () => {
7       localStorage.removeItem('username');
8       return Promise.resolve();
9   },
10   checkError: ({ status }) => {
11       if (status === 401 || status === 403) {
12           localStorage.removeItem('username');
13           return Promise.reject();
14       }
15       return Promise.resolve();
16   },
17   checkAuth: () => {
18       return localStorage.getItem('username')
19           ? Promise.resolve()
20           : Promise.reject();
21   },
22   getPermissions: () => Promise.resolve(),
23};
24Then go to your admin component in src/app.js and add the prop authProvider={authProvider}. Make sure to remember to add a new import statement for the authProvider component as well:
1import authProvider from "./providers/authProvider";
2After that, you’ll have a functioning admin app with a login page. Granted, some of the services and backend still need to be wired up in a production app, but you’ve still accomplished a lot! The big thing to take away from this is that react-admin makes it insanely easy to interact with your existing data that sit behind existing APIs, as long as you can fulfill the data contracts between the data providers and the API services.
For now, let’s implement a real authentication service, firebase auth. First you’re going to need to install react-admin-firebase: this package is an authProvider built specifically for use with react-admin and firebase.
1npm i react-admin-firebase
2Next, you’ll need to go to firebase and create a new project, and then go to settings to retrieve your auth config. Once you have it, create an auth object in src/app.js like below below:
1import React from 'react';
2import {Admin, Resource, ListGuesser, EditGuesser} from 'react-admin';
3import jsonServerProvider from 'ra-data-json-server';
4import {UserList} from "./components/users";
5import {PostCreate, PostEdit, PostList} from "./components/posts";
6import authProvider from "./providers/authProvider";
7import {
8   FirebaseAuthProvider,
9} from 'react-admin-firebase';
10
11//connect the data provider to the REST endpoint
12
13const config = {
14   apiKey: "xxxxxxxxxxxxxxxxxxxxxxx",
15   authDomain: "xxxxxxxxxxxxxxxxxxxxxxx",
16   databaseURL: "xxxxxxxxxxxxxxxxxxxxxxx",
17   projectId: "xxxxxxxxxxxxxxxxxxxxxxx",
18   storageBucket: "xxxxxxxxxxxxxxxxxxxxxxx",
19   messagingSenderId: "xxxxxxxxxxxxxxxxxxxxxxx",
20};
21
22// const options = {
23//     // Use a different root document to set your resource collections, by default it uses the root collections of firestore
24//     rootRef: 'root-collection/some-doc',
25// // Your own, previously initialized firebase app instance
26//     app: firebaseAppInstance,
27// // Enable logging of react-admin-firebase
28//     logging: true,
29// // Resources to watch for realtime updates, will implicitly watch all resources by default, if not set.
30//     watch: ['posts'],
31// // Resources you explicitly dont want realtime updates for
32//     dontwatch: ['comments'],
33// }
34
35const dataProvider = jsonServerProvider('https://jsonplaceholder.typicode.com');
36const firebaseAuthProvider = FirebaseAuthProvider(config)
37
38function App() {
39   return (
40       <Admin dataProvider={dataProvider} authProvider={firebaseAuthProvider}>
41           <Resource name="users" list={UserList}/>
42           <Resource name="posts" list={PostList} edit={PostEdit} create={PostCreate}/>
43
44       </Admin>
45   );
46}
47
48export default App;
49You’ll notice that the main piece is the firebase config, and beyond that you can set options and pass them as an optional argument to FireBaseAuthProvider. These options would allow you to customize the authentication handling, but we’ll leave it to the defaults for now.
This should set us up with a fully functioning login page. If we create a user in the firebase console with a username(email) and password then try to login to our admin app, we should be able to successfully get through.
You see the code for the final functioning app on GitHub.
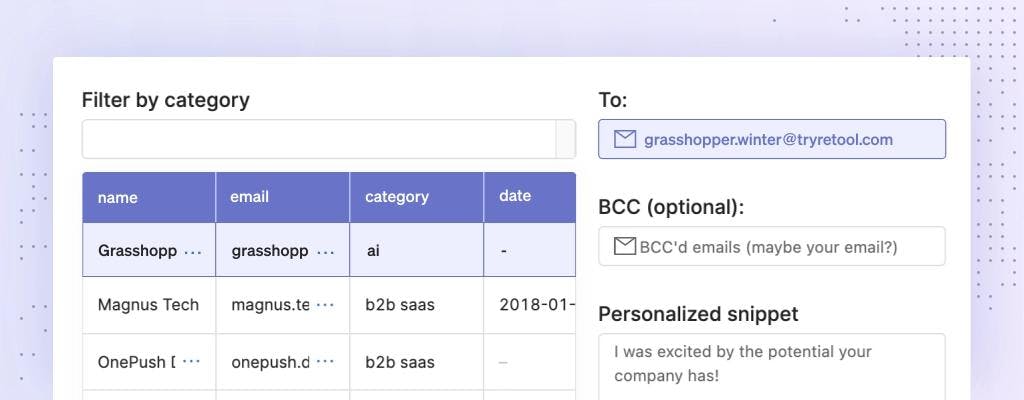
Retool gives you a complete set powerful building blocks for building internal tools: Assemble your app in 30 seconds by dragging and dropping from 50+ pre-built components. Connect to dozens of data integrations and anything with a REST or GraphQL API. Get started for free 👉
React-admin lets us get off the ground and build a super functional admin app in minutes, not months. It abstracts the nasty building and maintaining that us developers are usually tasked with. But where do you go from here if you want keep building?
If you want to use your own API, react-admin’s tutorial is a must read. At a high level, this is what the dataProvider interface needs to look like:
1const dataProvider = {
2    getList:    (resource, params) => Promise,
3    getOne:     (resource, params) => Promise,
4    getMany:    (resource, params) => Promise,
5    getManyReference: (resource, params) => Promise,
6    create:     (resource, params) => Promise,
7    update:     (resource, params) => Promise,
8    updateMany: (resource, params) => Promise,
9    delete:     (resource, params) => Promise,
10    deleteMany: (resource, params) => Promise,
11}
12The following is a list of existing data providers I got from marmelab.com (the developers and maintainers of react-admin):
- Django Rest Framework: synaptic-cl/ra-data-drf
- Express & Sequelize: express-sequelize-crud
- Feathersjs: josx/ra-data-feathers
- Firebase: aymendhaya/ra-data-firebase-client.
- Firestore: rafalzawadzki/ra-data-firestore-client.
- GraphCool: marmelab/ra-data-graphcool (uses Apollo)
- GraphQL: marmelab/ra-data-graphql (uses Apollo)
- HAL: b-social/ra-data-hal
- Hasura: hasura/ra-data-hasura
- Hydra / JSON-LD: api-platform/admin/hydra
- IndexedDB: tykoth/ra-data-dexie
- JSON API: henvo/ra-jsonapi-client
- JSON HAL: ra-data-json-hal
- JSON server: marmelab/ra-data-json-server.
- Loopback: darthwesker/react-admin-loopback
- Moleculer Microservices: RancaguaInnova/moleculer-data-provider
- NestJS CRUD: FusionWorks/react-admin-nestjsx-crud-dataprovider
- Parse: almahdi/ra-data-parse
- PostgREST: raphiniert-com/ra-data-postgrest
- Prisma: weakky/ra-data-prisma
- OpenCRUD: weakky/ra-data-opencrud
- REST-HAPI: ra-data-rest-hapi
- Sails.js: mpampin/ra-data-json-sails
- Spring Boot: vishpat/ra-data-springboot-rest
- Strapi: nazirov91/ra-strapi-rest
Check these out to see if any fit your stack before you try and write your own. Many of these will allow you to jumpstart your dataprovider development, if not eliminate you having to write one.
I will say that what you need to do to write your dataprovider is highly dependent on your api schema. If it’s standard, it will probably either fall under one of the prebuilt data providers listed above, or be fairly easy to implement. But if your api isn’t as standard, it might take more than a few minutes to get the data provider working.
If you’re building an admin app or custom dashboard or for your organization, check out Retool! Retool saves you a bunch of time and hassle by letting you drag and drop components like tables, search boxes, and buttons, and connecting them to SQL or Javascript on the backend. You can also build off of templates to customize your dashboard with custom components that interface with your backend.